Table of Contents
Advertisement
OWNER'S HANDBOOK
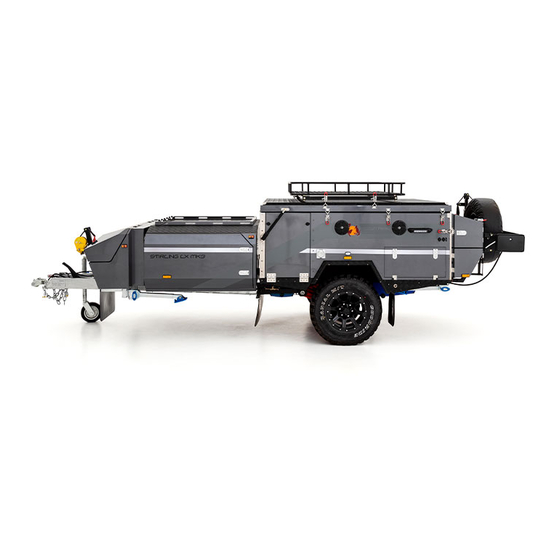
STIRLING MK3 RANGE
All the info you need to know when using your Ezytrail Stirling range Offroad Camper Trailer
www.ezytrail.com.au
Read owner's manual before using the equipment. Third party component manuals
should be read in conjunction with this manual. Maintenance guidelines must be met
or exceeded, failing to meet these guidelines may result in serious injury or death
and property damage.
Advertisement
Table of Contents

Related Manuals for Ezytrail STIRLING MK3 Series


Summary of Contents for Ezytrail STIRLING MK3 Series
- Page 1 OWNER’S HANDBOOK STIRLING MK3 RANGE All the info you need to know when using your Ezytrail Stirling range Offroad Camper Trailer www.ezytrail.com.au Read owner’s manual before using the equipment. Third party component manuals should be read in conjunction with this manual. Maintenance guidelines must be met or exceeded, failing to meet these guidelines may result in serious injury or death and property damage.
- Page 2 INDEX Introduction Hitch Terminology & Abbreviations Trailing Arm Pivot Bolts Store locations BRAKES AND HANDBRAKE ABOUT YOUR OFFROAD CAMPER Brake Controller Specifications Operation Bearings and Seals Trailer Plug Wiring HOW TO HITCH YOUR COUPLING Breakaway Switch Coupling Hand Brake Uncoupling Adjuster CANVAS CARE Correct use of your electric breaks...
- Page 3 This manual is supplied as a reference to required maintenance of your new Ezytrail offroad camper. Failure to use and maintain the product in accordance with what is outlined in this manual may affect your warranty.
- Page 4 BRANCH LOCATIONS VICTORIA Coffs Harbour WESTERN AUSTRALIA Branch Office Kilsyth Canning Vale 1 Keona Circuit Branch Office Branch Office Coffs Harbour NSW 2450 Lot 1, 97-107 Canterbury Unit 1, 196 Bannister Road P: 02 6651 2960 Road Canning Vale WA 6155 Kilsyth VIC 3137 P: 08 9455 1454 P: 03 9728 3147...
-
Page 5: Bearings And Seals
Customisable Colours Customisable Colours Ezytrail F5 Fully welded RHS tube with rated rear recovery Chassis/Drawbar Ezytrail F5 Fully welded RHS tube with rated rear recovery points points Suspension Adjustable Independent Trailing Arm Coil Suspension Adjustable Independent Trailing Arm Coil Suspension... -
Page 6: How To Hitch Your Coupling
HOW TO HITCH YOUR COUPLING COUPLING To Attach Coupling To Towball: Here is a short guide on how to safely attach and unattach your coupling from your towball 619350 (Fixed) & 619200 (Override) 1. Rotate latch handle upwards 2. At the same time pull latch assembly up to lift tongue. Rotate latch handle upward. -
Page 7: Canvas Care
STITCH HOLES Ezytrail ensure your tent is made using the finest water repellent fabric. However, canvas products are not permanent structures and in extreme conditions some water may penetrate. Seepage may occur in the seams through the needle holes created in the sewing process. - Page 8 CANVAS CARE ZIPS All zippers on your canvas product will give you years of service. However, care must be taken when using your zips. Never force a zipper - reduce tension so all zippers run smoothly without straining. • Have zips closed when pegging out the tent. •...
- Page 9 In soft floor campers these are best placed directly on top of the mattress and in canvas storage areas. In hard floor camp- ers they should be placed on the floor in the dining area and in the canvas storage areas. Using these packs is critical in high humidity weather and where your camper is not stored in an enclosed garage. www.ezytrail.com.au...
-
Page 10: Choosing A Spot To Set Up
SETTING UP YOUR CAMPER LOADING YOUR CAMPER It is important to load your camper correctly and distribute weight evenly to achieve a suitable ball load balance. Optimising ball weight between 9 and 11% will reduce sway. It is recommended to keep a ball weight scale with your camping accesso- ries as load balance will change with useage. - Page 11 Remove the locking pin on the other side of the trailer Push the rack up and away The rack can be locked horizontally Or it can be locked vertically (Replace the bolts to lock in the rack) (Replace the bolts to lock in the rack) www.ezytrail.com.au...
- Page 12 Next unwind both the forward and rear winches about 3.5-4m and attach to the anchor points Raise and sercure your winches Unwind your winches Attach hooks to the anchor points Then unlatch all your catches and lift the lid by about 500mm, this is so when you start winching the lid lifts rather than pulls straight against the hinges Using the front winch, wind until the trailer door goes just past 90 degrees, it will then start to fall before the rear winch catches it.
- Page 13 Window Cover type 1 (makes 2) 3 times. NO# F1 NO# F1 NO# A2 NO# A1 www.ezytrail.com.au Please note: Kids Room is not included in the standard package. It must be optioned in if required. Speak to your sales rep for pricing & availability.
- Page 14 INSIDE THE TENT FOR YOUR STIRLING GT MK3 Now it’s time to setup your tent, this stage can take as little as 10 minutes once you become well practiced, but be prepared for your first time to take a little longer Locate your door key, and use this to open the door of the trailer, this is always the first thing you do before going into the trailer and the last thing you do before folding trailer back up when you pack up.
- Page 15 This is the most basic setup for those quick overnight stays where you don’t need the extra undercover area that the annexe provides. If you are planning a longer stay however you’ll want to set up the annexe. OUTSIDE THE TENT FOR YOUR STIRLING GT MK3 www.ezytrail.com.au...
- Page 16 Once all the perimeter uprights and spreader bars are up, it’s time to put in the c clip uprights and spreader bars C-clip spreader bars stop water from pooling in bad weather All Ezytrail annexes are free standing, but we suggest that you always use guy ropes, especially if there is a chance of wind. STIRLING SERIES...
- Page 17 If you are putting the PVC floor in, this is the time to do it, once it is all pegged out, this simply velcros on and thanks to that PVC flap there is no chance of water getting in Getting a mate to put pressure on the outside while you fasten the Velcro will make the job much simpler www.ezytrail.com.au...
- Page 18 LOUNGE MODE Your Stirling range has a leather lounge and table included as standard and not only is it a comfortable place to sit, it can also convert into a bed for the kids. Let’s take a look at how to set it up. Setting this up is pretty simple, the base pieces all have a velour finish on the bottom, these go around the edges.
- Page 19 There you have a bed for the kids or their friends, making the Stirling rangea genuine 6 berth trailer! If you have any questions, feel free to give your local Ezytrail dealer a call. If you have a tip or hint that you would like to share with other Ezytrail owners jump onto the Ezytrail Facebook page and have your say! Don’t forget to check out the...
- Page 20 SET UP YOUR STIRLING LX MK3 2. Unlatch the boat loader rack and with the help of a mate push it up and away from the trailer, it can lock either horizon- tally or vertically depending what you have attached to it and how much space you have at camp. Unlock the locking pin Release the over-centre latches Remove the locking pin on the other...
- Page 21 Once it is supported by the rear winch, use that to lower the lid down onto the front of the trailer. Use the front winch to get the lid Then use the rear winch to safely The winch should lock into position past 90 degrees lower the lid into position like this www.ezytrail.com.au...
- Page 22 stirling LX mk3 tent setup POLE DIAGRAM STIRLING LX MainTent Annexe Ensuite Kids Room (Optional) Main Tent - Bow Poles not shown NO# 4 Tropical Roof pole NO# D3 NO# D1 NO# E1 Awning One NO# A2 NO# B4 NO# A3 NO# C1 NO# A4 NO# D2...
- Page 23 Work your way back extending all bows then spreader bars, but take care not to make it too tight it can open up seams and cause water to get in. Canvas shrinks as it weathers so your trailer may appear a little saggy when you first set it up but over time it will shrink and tighten up. www.ezytrail.com.au...
- Page 24 This is the most basic setup for those quick overnight stays where you don’t need the extra undercover area that the annexe provides. If you are planning a longer stay however you’ll want to set up the annexe. OUTSIDE THE TENT ON THE STIRLING LX Annexe: Your annexe will take approximately 20-30 minutes to setup completely and is best done with at least 2 people.
- Page 25 C-clip spreader bars stop water from pooling in bad weather All Ezytrail annexes are free standing, but we suggest that you always use guy ropes, especially if there is a chance of wind. ANNEXE WALLS: Now if you want a bit more privacy from other campers or the weather looks like turning and you want to batten down the hatches, you’ll want to attach your annexe walls.
-
Page 26: Site Power
Peg out all your walls using the d-rings that are positioned around the perimeter Lay out your walls to begin with This job is much easier with the help Pegging out the walls will help keep of a friend them quiet if it gets windy, as well as adding strength to the structure If you are putting the PVC floor in, this is the time to do it, once it is all pegged out, this simply velcros on and thanks to that PVC flap there is no chance of water getting in... - Page 27 The Stirling range has a hot and cold water tap pernmanently plumbed to both water tanks. To drain the sink, there is a flexible expandable hose under the sink. This can be placed into a bucket to collect waste water. Please allow to cool considerably before draining to prevent home damage. www.ezytrail.com.au...
-
Page 28: Preparing For Bad Weather
SETTING UP YOUR CAMPER PREPARING FOR BAD WEATHER Modern camper tents are designed with a roof height to accommodate taller people. The trade off with this kind of design is the pitch of the roof is not always steep enough for water to run off effectively during heavy rain. To better prepare for wet conditions it is advisable in most cases to increase the pitch of the awning/annex roof by lowering the corners furthest away from the main tent. -
Page 29: Storage & Care
SURFACES Laminates and internal wall surfaces should be cleaned with a damp soft cloth. For stubborn marks use a mild detergent based cleaner. **Do not use cleaners that contain ammonia or caustics** www.ezytrail.com.au... -
Page 30: Torque Settings
TORQUE SETTINGS WHEEL NUTS Wheel nuts should be tightened to correct torque using a torque wrench. Never trust a “rattle gun” as these may over or under tighten. A quality torque wrench will ensure nuts are tightened correctly. It’s important to remember to check your wheel nuts at 50km, 100km, and 500km and periodically thereafter. -
Page 31: Brakes And Handbrake
TRAILER PLUG WIRING The following diagrams outline the correct wiring for flat and round 7 pin plugs: 7 Pin Small Round 7 Pin Large Round www.ezytrail.com.au... -
Page 32: Breakaway Switch
BRAKES AND HANDBRAKE BREAKAWAY SWITCH By law*, all trailers with an ATM of 2000kg or greater must have a “Breakaway System” to halt the trailer in the event it becomes detached from the tow vehicle whilst traveling. Your camper is fitted with this system with the switch mounted on the drawbar with a steel wire lanyard to connect to your tow vehicle. - Page 33 To adjust the handbrake cable tension release locknuts. To tighten the handbrake cable, turn the adjuster wheel in a clockwise direction. Once adjusted retighten lock nuts and test. Always ensure that wheels turn freely when handbrake is off. Overtightened cables can cause brakes to drag and damage the brake linings. Adjuster Wheel www.ezytrail.com.au...
- Page 34 *IF AT ALL IN DOUBT PLEASE REFER ALL REPAIRS AND MAINTENANCE TO A SUITABLY QUALIFIED OR EXPERIENCED MECHANICAL REPAIRER. *EZYTRAIL CAMPERS ACCEPTS NO LIABILITY FOR PERSONAL INJURY, LOSS OR DAMAGE RESULTING FROM INCORRECT APPLICATIONS, METHODS AND FAILURE TO PERFORM MAINTENANCE SAFELY AND CORRECTLY.
-
Page 35: Shoes And Linings
If you are camping near or driving through these kinds of environments, we highly recommend that your trailer be thoroughly cleaned after use. Flushing the chassis and washing and rinsing your trailer is important. www.ezytrail.com.au... -
Page 36: Wheels And Tyres
JACKING YOUR CAMPER Your Ezytrail Camper has bottle jack points located on each of the trailing arms on the suspension. Never place any part of your body beneath the Camper when suspended by any kind of jack. Ensure the body of the camper is protected from damage by the jack. -
Page 37: Electrical Systems
ELECTRICAL DEVICES CAN BE DANGEROUS. UNDER NO CIRCUMSTANCES SHOULD REPAIRS AND MODIFICATIONS BE ATTEMPTED BY UNQUALIFIED OR UNTRAINED PERSONS. EZYTRAIL ACCEPTS NO LIABILITY FOR ANY PERSONAL INJURY, DAMAGES OR LOSS AS A RESULT OF UNQUALIFIED OR UNTRAINED PERSONS REPAIRING OR ALTERING THE ELECTRICAL SYSTEMS ON THIS PRODUCT. - Page 38 ELECTRICAL SYSTEMS CONTROL PANEL Front Water Tank gauge Rear Water Tank gauge Main Power (Master Switch) 4. Lights (Master Switch) Fridge Power (Master Switch) 12V Socket Power (Master Switch) TV/DVD (Master Switch) Water Pump 1 (Master Switch) Battery Voltage Meter * Voltmeter will indicate battery voltage when idle or charge voltage when charging...
-
Page 39: Gas & Water Systems
(C). To replace the battery of the stove, you simply lift the stove out of its frame. The battery box contains 1x Type D battery NOTE: It can take up to a minute or so for the gas to purge the line and flow through the burners. www.ezytrail.com.au... -
Page 40: Hot Water
GAS & WATER SYSTEMS HOT WATER The Stirling LX MK3 camper is fitted standard with a TRUMA Ultrarapid 14L gas/electric hot water system. The included manual will assist with operation, maintenance and trouble shooting. Do not attempt repairs, modifications or servicing unless qualified. Please be mindful of hot water around children STIRLING SERIES... -
Page 41: Trip Checklist
7 pin plug connected Trailer brakes engaging when brakes applied Safety breakaway switch lanyard connected Check trailer is at correct pitch before departing. Chains are crossed and at correct length Do a final walk around before driving off Handbrake lever released www.ezytrail.com.au... -
Page 42: Useful Accessories
USEFUL ACCESSORIES LEVELLING BLOCKS These are excellent for levelling your trailer on set up. Stabiliser legs are not meant for correcting the trailer angle, they are there to keep it stable when people are in it. Using levelling blocks will extend the service life of the stabiliser legs and make set up much safer and faster. -
Page 43: Troubleshooting
Check and repair as required Supply vehicle fault Inspect and rectify Overloading Check amperage draw from appliances, reset and check Circuit breaker tripping appliances individually during use Faulty appliance Check appliances individually and rectify Faulty circuit breaker Test and replace www.ezytrail.com.au... - Page 44 TROUBLE SHOOTING WATER PROBLEM POSSIBLE CAUSE SOLUTION Main Power Switch “OFF” Turn on Main Power Switch Battery isolator switch off Turn on Main circuit breaker tripped Reset main circuit breaker Low battery voltage Charge for 24hrs and retest Pump not working (no noise) Poor connection Tighten battery terminals and check power connections...
- Page 45 Insufficient wheel load (dual Axle) Correct trailer level to even load Faulty controller Test and Correct Intermittent brakes Broken Wires Repair or replace Poor connections Find and repair Diagnosis and repairs of Brakes should only be done by a professional www.ezytrail.com.au...
-
Page 46: Handy Tips
• Wheel Bearings • Seals • Wheel studs and nuts These spares are available from Ezytrail Campers CORRUGATIONS & ROUGH ROAD Corrugations are arguably the most taxing and damaging road conditions to vehicles. Constant vibration can loosen vehicle components and as a stress dynamic to vehicles and drivers well in excess of normal road driving. In these conditions take regular breaks to reduce driver fatigue and fatigue to vehicles. - Page 47 This smartphone app is an excellent resource for finding all kinds of camping across Australia. If you are looking for free camping you won’t find a better resource. There is an app add on that even assists in finding fuel stops with user updates on fuel prices. www.ezytrail.com.au...
-
Page 48: Warranty Statement
Ezytrail. Ezytrail shall not be liable, (in part or whole) for any warranties, either express or implied, made by agents or resellers on behalf of Ezytrail without the knowledge or express written permission of Ezytrail. Such unauthorised claims shall be the responsibility of the agent or reseller only. - Page 49 • Zips and mesh or screens are not covered. In addition to Ezytrail warranty, the consumer may also be covered by other rights and remedies of Consumer Law in relation to the goods and or services to which this warranty relates TENTS Tents are guaranteed to be in new merchantable condition at the time of purchase.
-
Page 50: Maintenance
MAINTENANCE Maintenance is essential to keep your camper in a safe and usable condition. Campers are no different to any other motor vehicle and require servicing at regular intervals which may vary according to use and the environment in which it is used. -
Page 51: Maintenance Schedule
PANEL AND PAINT LPG SYSTEM PLUMBING SYSTEM TRUMA WATER HEATER Refer to appliance manufacturers maintainence instructions for servicing and storage SEALS AND GROMMETS SIGNALLING LIGHTS STRUCTURAL FIXINGS SUSPENSION BUSHES SUSPENSION TORQUE TYRE PRESSURE VENT FILTERS WHEEL ALIGNMENT WHEEL BEARINGS WHEEL NUTS www.ezytrail.com.au... - Page 52 MAINTENANCE SCHEDULE A=Adjust C=Clean I=Inspect T=Test R=Replace RCL=Remove/Clean/Lubricate 6 Months/ 5,000KM ITEM/COMPONENT 2,500KM CHECKED CHECKED ONROAD OFFROAD BATTERY CONDITION HANDBRAKE CABLE I/C/A BRAKE LININGS BREAKAWAY SYSTEM CHASSIS LUBE ELECTRIC WINCHES 12V POWER SYSTEM HAND WINCHES I/L/A HITCH 240V POWER SYSTEM JOCKEY WHEEL LOCKS AND HINGES PANEL AND PAINT...
- Page 53 PANEL AND PAINT LPG SYSTEM PLUMBING SYSTEM TRUMA WATER HEATER Refer to appliance manufacturers maintainence instructions for servicing and storage SEALS AND GROMMETS SIGNALLING LIGHTS STRUCTURAL FIXINGS SUSPENSION BUSHES SUSPENSION TORQUE TYRE PRESSURE VENT FILTERS WHEEL ALIGNMENT WHEEL BEARINGS WHEEL NUTS www.ezytrail.com.au...
- Page 54 MAINTENANCE SCHEDULE A=Adjust C=Clean I=Inspect T=Test R=Replace RCL=Remove/Clean/Lubricate 18 Months/ 15,000KM ITEM/COMPONENT 12,500KM CHECKED CHECKED ONROAD OFFROAD BATTERY CONDITION HANDBRAKE CABLE I/C/A BRAKE LININGS BREAKAWAY SYSTEM CHASSIS LUBE ELECTRIC WINCHES 12V POWER SYSTEM HAND WINCHES I/L/A HITCH 240V POWER SYSTEM JOCKEY WHEEL LOCKS AND HINGES PANEL AND PAINT...
- Page 55 PANEL AND PAINT LPG SYSTEM PLUMBING SYSTEM TRUMA WATER HEATER Refer to appliance manufacturers maintainence instructions for servicing and storage SEALS AND GROMMETS SIGNALLING LIGHTS STRUCTURAL FIXINGS SUSPENSION BUSHES SUSPENSION TORQUE TYRE PRESSURE VENT FILTERS WHEEL ALIGNMENT WHEEL BEARINGS WHEEL NUTS www.ezytrail.com.au...
- Page 56 MAINTENANCE SCHEDULE A=Adjust C=Clean I=Inspect T=Test R=Replace RCL=Remove/Clean/Lubricate 30 Months/ 25,000KM ITEM/COMPONENT 22,500KM CHECKED CHECKED ONROAD OFFROAD BATTERY CONDITION HANDBRAKE CABLE I/C/A BRAKE LININGS BREAKAWAY SYSTEM CHASSIS LUBE ELECTRIC WINCHES 12V POWER SYSTEM HAND WINCHES I/L/A HITCH 240V POWER SYSTEM JOCKEY WHEEL LOCKS AND HINGES PANEL AND PAINT...
- Page 57 PANEL AND PAINT LPG SYSTEM PLUMBING SYSTEM TRUMA WATER HEATER Refer to appliance manufacturers maintainence instructions for servicing and storage SEALS AND GROMMETS SIGNALLING LIGHTS STRUCTURAL FIXINGS SUSPENSION BUSHES SUSPENSION TORQUE TYRE PRESSURE VENT FILTERS WHEEL ALIGNMENT WHEEL BEARINGS WHEEL NUTS www.ezytrail.com.au...
- Page 58 MAINTENANCE SCHEDULE A=Adjust C=Clean I=Inspect T=Test R=Replace RCL=Remove/Clean/Lubricate 42 Months/ 35,000KM ITEM/COMPONENT 32,500KM CHECKED CHECKED ONROAD OFFROAD BATTERY CONDITION HANDBRAKE CABLE I/C/A BRAKE LININGS BREAKAWAY SYSTEM CHASSIS LUBE ELECTRIC WINCHES 12V POWER SYSTEM HAND WINCHES I/L/A HITCH 240V POWER SYSTEM JOCKEY WHEEL LOCKS AND HINGES PANEL AND PAINT...
- Page 59 PANEL AND PAINT LPG SYSTEM PLUMBING SYSTEM TRUMA WATER HEATER Refer to appliance manufacturers maintainence instructions for servicing and storage SEALS AND GROMMETS SIGNALLING LIGHTS STRUCTURAL FIXINGS SUSPENSION BUSHES SUSPENSION TORQUE TYRE PRESSURE VENT FILTERS WHEEL ALIGNMENT WHEEL BEARINGS WHEEL NUTS www.ezytrail.com.au...
- Page 60 MAINTENANCE SCHEDULE A=Adjust C=Clean I=Inspect T=Test R=Replace RCL=Remove/Clean/Lubricate 54 Months/ 45,000KM ITEM/COMPONENT 42,500KM CHECKED CHECKED ONROAD OFFROAD BATTERY CONDITION HANDBRAKE CABLE I/C/A BRAKE LININGS BREAKAWAY SYSTEM CHASSIS LUBE ELECTRIC WINCHES 12V POWER SYSTEM HAND WINCHES I/L/A HITCH 240V POWER SYSTEM JOCKEY WHEEL LOCKS AND HINGES PANEL AND PAINT...
- Page 61 PANEL AND PAINT LPG SYSTEM PLUMBING SYSTEM TRUMA WATER HEATER Refer to appliance manufacturers maintainence instructions for servicing and storage SEALS AND GROMMETS SIGNALLING LIGHTS STRUCTURAL FIXINGS SUSPENSION BUSHES SUSPENSION TORQUE TYRE PRESSURE VENT FILTERS WHEEL ALIGNMENT WHEEL BEARINGS WHEEL NUTS www.ezytrail.com.au...
- Page 62 P: 07 5348 0240 Fyshwick NSW 2609 P:1300 010 513 Penrith Townsville Branch Office Branch Office 22 Lemko Place 62 Punari Street Penrith NSW 2750 Currajong QLD 4812 P: 02 4701 5782 P: 07 4725 3806 www.ezytrail.com.au @ ezytrail_campers /EzytrailCampers /EzytrailCampers...
Need help?
Do you have a question about the STIRLING MK3 Series and is the answer not in the manual?
Questions and answers