Lemeks Palmako FR28-2622 Assembly, Installation And Maintenance Manual
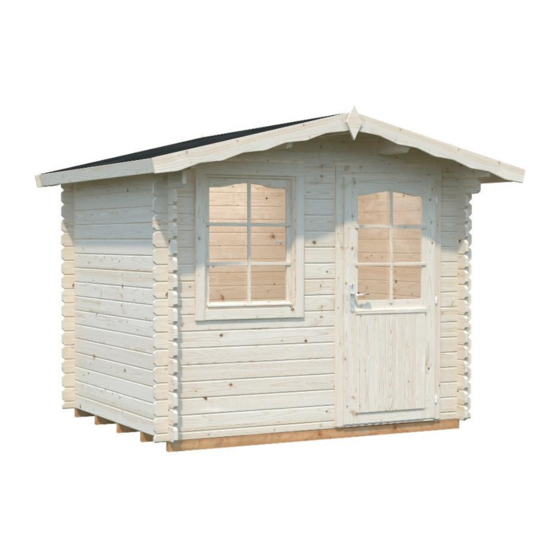
Square log cabin
Hide thumbs
Also See for Palmako FR28-2622:
- Assembly, installation and maintenance manual (151 pages)
Advertisement
Available languages
Available languages
Quick Links
Assembly, installation and maintenance manual
● Manual de montaje, instalación y mantenimiento ●
Square log cabin
● Caseta de madera de lamas rectangulares ●
Treatment options, Item code
● Opciones de tratamiento, código del artículo ●
Factory inspection by ● Inspector de fábrica ●
.........................................................................................
Manufacturer ● Fabricante:
Palmako AS | Näituse 25 | 50409 Tartu | Estonia | Ph: +372 7 355 530 | Fax: +372 7 355 544 | contact@palmako.ee | www.palmako.ee
FR28-2622
Date ● Fecha ●
Pack number ● Bulto N
o
NO 109625
●
Advertisement

Related Manuals for Lemeks Palmako FR28-2622


Summary of Contents for Lemeks Palmako FR28-2622
- Page 1 Assembly, installation and maintenance manual ● Manual de montaje, instalación y mantenimiento ● FR28-2622 Square log cabin ● Caseta de madera de lamas rectangulares ● Treatment options, Item code NO 109625 ● Opciones de tratamiento, código del artículo ● Factory inspection by ● Inspector de fábrica ● Date ●...
- Page 2 Inspection Certificate ● Certificado de control ● Art. Nr. FR28-2622 Please keep safely! ● ¡Por favor, conserve en un lugar seguro! ● English: The product you have purchased was manufactured in accordance with high quality norms. The product unit has been carefully inspected and packed.
-
Page 11: Assembly Manual
Installation manual – English 1 Assembly manual Dear client, We are glad that you have decided in favour of our wooden garden product! Please read the assembly manual carefully before proceeding with the Product assembly and installation! You will thus avoid problems and will not waste time. General storage, installation and maintenance requirements for Products Storage of Products and packaging prior to installation. - Page 12 Installation manual – English It is not allowed to cover the product with lacquer or paint on which surface the flame spread rate is higher than 20mm/s. Depending on the specificity of a Product (wooden house, glued laminated timber product or other finished wooden product), the Product should be maintained as follows for the warranty provided on the Product to remain in effect: ➢...
- Page 13 Installation manual – English Product-specific use and maintenance requirements. In addition to the provisions of this section, the Buyer is required to follow the requirements arising from the documentation and manuals that accompany the Product when storing, using and maintaining the Product. The Buyer is solely responsible for ensuring that the installation and further use of the Product complies with local laws and (construction) regulations and, if necessary, apply for the necessary permits.
- Page 14 Installation manual – English Preparation of components: Sort the components based on the wall plans (see Technical specifications) and place them at the four sides of the house in the installation sequence. ATTENTION: Never place the components directly on grass or a muddy surface because it will very difficult...
- Page 15 Installation manual – English 3 Garden house assembly ATTENTION: ➢ The house package also includes 2-3 marked hitting blocks (wall profile approximately 20–30 cm (8”–12”) long). Hitting blocks ARE NOT mentioned in the specification list. ➢ The drawings have the details marked with three-digit position numbers. The exact positions of those details that have the third digit “x”...
-
Page 16: Door And Window
Installation manual – English Walls When installing the walls, it is important to remember that: ➢ The logs are always assembled with their tongue upwards! ➢ Never directly hit the tongue with the hammer! If necessary, use the hitting block and hammer! Install the walls in accordance with the appended wall plans (see Technical specifications). - Page 17 Installation manual – English Door installation: The doorframe is placed at the formed aperture and pushed with force onto the lower log. If it is a double door, place the leaves on the hinges now. To open and close the door, fit the separately packaged lock and handle.
- Page 18 Installation manual – English Roof Before installing the roof boards, make sure that the house is completely level. Use the water-level to check all walls. ATTENTION: When placing the roof, use a stable ladder. Do not step on the roof as the structure is suitable to sustain only an even load (snow, wind, etc.), and not a point load! Begin the installation of the roof boards from the front or side edge of the roof.
- Page 19 Installation manual – English Floor Only when the house is built completely you can install the floor boards, thus avoiding unnecessary smudging on the floor. Place the floor boards on the base frame, tap them lightly against one another and then nail them with force to the foundation joists.
-
Page 20: General Advice
Installation manual – English General advice: Problem: Gaps appear between the wall logs Cause: Additional details are attached to the house that do not allow wood to swell/diminish. Solutions: If the door/window is attached to the wall logs with screws/nails, remove these screws/nails;... - Page 21 Installation manual – English 4 Palmako limited warranty Description of limited warranty 1.1. Warranty provider. This limited warranty (the “Warranty”) applies to products manufactured by the Palmako group of companies (the “Products”), and is provided by Palmako Corp., a Delaware corporation with offices at 228 East 45th Street, Suite 9E, New York, NY 10017 (“Palmako”), e- mail contact@palmako.com.
- Page 22 Installation manual – English 2.1.7. non-planed surfaces, shade variations, wane and pith knots on floor and roofing boards, provided that the boards can be installed in such a way that these defects are not visible after finishing (e.g. by turning the boards); 2.1.8.
- Page 23 Installation manual – English proof of purchase and original Product purchase invoice; clear photographs of the defective Product and specifically of the defective part, and an explanation of the experienced defect. 3.2. Instructions. In case of a defect Customer must stop using the Product immediately, if requested by reseller or Palmako.
- Page 24 Manual de montaje – español 1 Manual de montaje Estimado cliente, ¡Nos alegra que haya elegido uno de nuestros productos de madera! ¡Por favor, lea atentamente el manual de montaje antes de empezar con el montaje del producto! De esta forma, evitará problemas y ahorrará tiempo. Requisitos de almacenamiento, instalación y mantenimiento de los productos Almacenamiento de los productos y embalaje antes de la instalación El Comprador está...
- Page 25 Manual de montaje – español ¡Atención! El producto se entrega sin acabado. Use pintura o revestimiento a prueba de fuego para reducir el peligro de incendio. Use pinturas y revestimientos a base de agua, evite los productos a base de solventes. Consulte a un experto en relación a las pinturas para madera áspera de coníferas y siga las instrucciones del fabricante de la pintura.
-
Page 26: Instrucciones De Instalación
Manual de montaje – español ➢ El estado del material de base, la corrosión de los accesorios y las piezas de madera se deben revisar una vez al año. Las partes móviles deben ser engrasadas y las partes desgastadas y/o defectuosas se deben cambiar con repuestos provistos por el fabricante. - Page 27 Manual de montaje – español CONSEJO: Para evitar lesiones posibles por causa de astillas, recomendamos usar los guantes protectores correspondientes durante el ensamblado. Para proteger sus ojos del aserrín, recomendamos usar gafas protectoras durante el ensamblado. ¡Asegúrese de que el producto se monta entre dos personas como mínimo! ¡En función del producto, el montaje puede llevar más de un día! Haga perforaciones para los tornillos para evitar grietas en la madera.
- Page 28 Manual de montaje – español 3 Montaje de la cabaña ATENCIÓN: ➢ El paquete incluye 2 o 3 bloques para golpear etiquetados (una pieza con un perfil aproximado de 20-30 cm. de largo (8”–12”)). Estos elementos NO APARECEN en la lista de especificaciones. ➢...
- Page 29 Manual de montaje – español Paredes Durante el montaje de las paredes, recuerde que: ¡Todos los elementos se colocan con la lengüeta hacia arriba! ➢ ➢ ¡Nunca golpee directamente en la lengüeta! ¡Si es necesario, use los bloques para golpear en lugar de un martillo! Monte las paredes según los planos adjuntos (véase las especificaciones técnicas).
- Page 30 Manual de montaje – español Instalación de la puerta: El marco de la puerta se coloca en la abertura y se empuja con fuerza sobre el tronco inferior. Si se trata de una puerta doble, coloque ahora las hojas en las bisagras. Para abrir y cerrar la puerta, instale el cerrojo y las manillas que están empaquetados por separado.
- Page 31 Manual de montaje – español ATENCIÓN: Si las tablas de las paredes no están colocadas correctamente una sobre otra sin dejar huecos, el tronco superior podría no estar al mismo nivel que la estructura del tejado. En este caso, tendría que golpear con cuidado los troncos de pared hacia abajo tanto como sea necesario o cepillar el tejado o la tabla de pared lateral para reducirlo.
- Page 32 Manual de montaje – español Una vez que haya instalado el material de la cubierta del tejado fije los rastreles antiviento al tejado y las fajas del tablero a los listones y a la parte superior de los troncos. Suelo Las tablas del suelo se colocan cuando la casa ha sido totalmente montada para evitar manchas innecesarias.
-
Page 33: Recomendaciones Generales
Manual de montaje – español elementos pared puedan asentarse. Recomendaciones generales: Problema: Aparecen aberturas entre los elementos de pared Se han añadido elementos que no permiten la expansión o la contracción de la Causa: madera. Solución: Si se ha fijado una puerta o una ventana a los elementos de pared con tornillos o clavos, retírelos. - Page 34 Manual de montaje – español 4 Garantía limitada Palmako Descripción de la garantía 1.1. Proveedor de la garantía Esta garantía limitada (en adelante la «Garantía») se aplica a los productos fabricados por el grupo Palmako (en adelante los «Productos») y es proporcionada por Palmako Corp., una sociedad anónima con sede en Delaware y oficinas situadas en 228 East 45th Street, Suite 9E, New York, NY 10017 (“Palmako”), correo electrónico: contact@palmako.com.
- Page 35 Manual de montaje – español 2.1.4. las pequeñas fisuras o grietas en los elementos del Producto (como resultado del secado), si no son transversales y no ponen en peligro la estabilidad de la estructura del Producto; 2.1.5. la torsión o curvatura de los elementos del producto que no impiden la instalación; 2.1.6.
- Page 36 Manual de montaje – español de que el defecto se produjera o de que se descubriera por primera vez o de que, razonablemente, debería haberse descubierto. Todas las reclamaciones de Garantía relativas a los Productos tendrán que ser presentadas al distribuidor por escrito y llevarán adjuntos los siguientes datos y documentos: nombre o código y número de identificación del Producto (estos aparecen en la etiqueta del embalaje del Producto y en la hoja de revisión adjunta al manual de montaje, en la...
- Page 37 Manual de montaje – español EN NINGÚN CASO SE RESPONSABILIZARÁ A PALMAKO O A SUS AFILIADOS DE LOS DAÑOS INDIRECTOS, FORTUITOS, DERIVADOS, ESPECIALES O EJEMPLARES POR CUALQUIER CAUSA Y TENIENDO O NO BASE EN CONTRATO, GARANTÍA, AGRAVIO (INCLUIDA LA NEGLIGENCIA), RESPONSABILIDAD DEL PRODUCTO O CUALQUIER OTRA FORMA DE RESPONSABILIDAD.
Need help?
Do you have a question about the Palmako FR28-2622 and is the answer not in the manual?
Questions and answers