Table of Contents
Advertisement
Quick Links
Advertisement
Table of Contents

Related Manuals for Fairlight SX-48

Summary of Contents for Fairlight SX-48
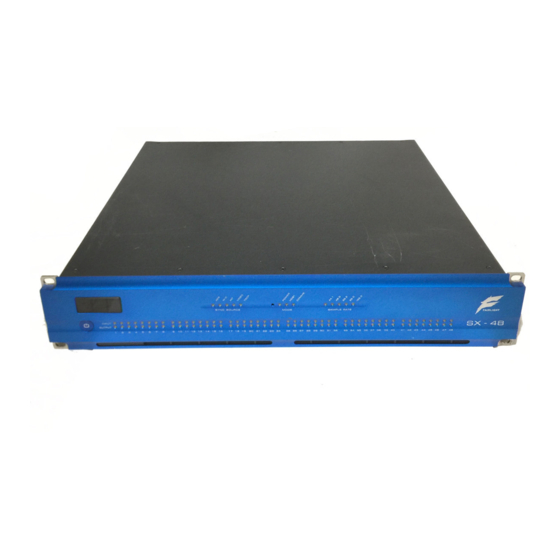
- Page 1 SX-48 Service Manual 24 July 2008 Version 1.0...
- Page 2 Important Notice COPYRIGHT The material in this document is copyright to Fairlight.AU Pty Ltd, and may not be quoted or reproduced in any form without written permission from the company. Fairlight is a trademark of FairlightAU Pty Ltd. All other trademarks are the property of their respective owners.
-
Page 3: Table Of Contents
CHAPTER 3 - PINOUTS....................15 Analog Inputs ..........................15 Analog Outputs ..........................16 AES Inputs and Outputs ........................17 RUNNING SX-48 IN A DREAM II SYSTEM ..............18 Sync..........................18 Audio Connection ....................... 18 Order of Channels ......................19 Naming Channels ..........................19 Control via Ethernet...................... - Page 4 Analog Inputs and Outputs ....................... 31 AES/EBU Inputs ..........................31 AES/EBU Outputs ..........................31 Synchronization..........................31 Dimensions, Weight and Power Requirements..................32 SX-48 Page 6...
-
Page 5: Chapter 1 - Introduction
LED’s provide a clear indication as to the reference currently in use. Central to the SX-48 design is the ability to flexibly configure units with any combination of up to six audio I/O cards plus one MADI I/O card in each 2U frame. These cards can provide 8 x channels of AES EBU I/O with Sample rate conversion, 8 channels of high quality analog inputs and 8 x channels of Analog outputs. -
Page 6: Adding A Board
All boards are fitted using connectors that press together. Excessive force is not required. I/O boards use white Teflon guides to locate easily. Ensure that the Teflon posts are correctly lined up to the holes in the board, and that the connectors are correctly lined up. Check orientation against the illustration above. SX-48 Page 8... -
Page 7: Chapter 2 - System Description
Internal (Crystal), AES digital audio, Word Clock , video (PAL or NTSC) and TSCP (Fairlight’s Total Studio Connectivity Protocol). I/O Boards There are four types of I/O boards that can currently be fitted into the SX-48, in a variety of combinations. AI1 – Analog Input The AI1 board provides 8 analog inputs at +4 dBu. - Page 8 Board Slots The SX-48 includes 6 slots for I/O boards. They can be filled with any combination of I/O boards desired by the owner. Using combinations of the I/O boards, it is possible to configure the SX-48 in many different ways. For example, it is possible to have 48 digital I/Os or 48 analog inputs or 48 analog outputs or 24 analog inputs and outputs etc.
-
Page 9: Chapter 3 - Installation Procedure
The SX-48 uses fans for ventilation. Make sure that the rack unit has access for cool air to flow through the opening on the front of the SX-48 and warm air to be expelled from the back. There is no need to leave vertical spaces between SX-48 units in the rack, as long as the flow of air to and from the fans is good. -
Page 10: Cabling
Slots are numbered from the RIGHT when viewing the unit from the rear. SX-48 uses DB-25 connectors for audio. Each type of I/O board uses a different layout of pins for its audio signals. Please see section Pinouts below for details. -
Page 11: Setup
Setup button for a few seconds, until one of the Sample Rate LEDs starts to flash. Check I/O Hardware Indication While the SX-48 is in Setup Mode, the Input and Output LEDs show the status of the I/O boards. They can be checked as follows. •... - Page 12 Service Manual 3 - I July 24, 2008 HAPTER NSTALLATION ROCEDURE The unit now exits Setup Mode, and is ready for use. SX-48 Page 14...
-
Page 13: Chapter 3 - Pinouts
Service Manual 4 - P July 24, 2008 HAPTER INOUTS C h a p t e r 4 - P i n o u ts Analog Inputs SX-48 Page 15... -
Page 14: Analog Outputs
Service Manual 4 - P July 24, 2008 HAPTER INOUTS Analog Outputs SX-48 Page 16... -
Page 15: Aes Inputs And Outputs
Service Manual 4 - P July 24, 2008 HAPTER INOUTS AES Inputs and Outputs SX-48 Page 17... -
Page 16: Running Sx-48 In A Dream Ii System
DREAM II → MADI → AES/EBU Output The MADI connectors on the rear of the SX-48 are used to transmit up to 48 channels between it and the DREAM II system. Use MADI cables to connect to the BNC connectors on the rear of the CC-1 card installed in the DREAM II host PC. -
Page 17: Order Of Channels
(before you connected the SX-48 or any other MADI device), so it reads IO_CONFIG,3,0,0. Step 2 Edit the line, changing the zeros to 56, if you have one SX-48, or multiples of 56 if you have more than one. - Page 18 YSTEM To do this, connect the SX-48 to your Ethernet hub using a standard networking cable. Your DREAM II system will automatically find the SX-48 and send commands to it, as long as the network is correctly set up. SX-48...
-
Page 19: Configurator
FMC Utils SX48 Configurator Please read this section completely before you attempt to use the SX-48 configurator. All files used by the SX-48 Configurator are installed by default with any new Dream II or Xynergi software release. Search for SX-48s By Clicking on this button, you will automatically see all SX-48s available on the network. -
Page 20: Room And Unit Id
July 24, 2008 HAPTER ONFIGURATOR Please note that once these SX-48 units are scanned and recognized, all of these units will now also be available for individual selection in the following drop-down window: Room and Unit ID You can set a fixed “Room” number and “Unit” identifier to each SX-48 unit by choosing a particular unit from the drop-down window. - Page 21 HAPTER ONFIGURATOR Please note that it is not a requirement to have a “sequential” IP address for the SX-48 units installed. You can even set up individual Subnet masks. This gives flexibility when integrating into larger networks. You must be able to communicate with any SX-48 using the proper network subnet.
-
Page 22: Upgrading Firmware
Dream II and Xynergi software version 1.50! Firmware Version Click on the Firmware Version button to read the current firmware versions for any particular SX-48 unit chosen in the “drop-down” window. You will see the following information displayed in the “info” window: •... - Page 23 July 24, 2008 HAPTER ONFIGURATOR This application will automatically select the correct firmware update for SX-48 (included in the Dream II or Xynergi installer). The firmware is stored here: C:\Program Files\Fairlight\FMC\Utils\Firmware\FLIOBOX.bin The application will automatically list all SX-48s found on the network. Simply highlight the desired unit that you wish to upgrade then click on the menu item Download in the upper right.
-
Page 24: Program Sync
Search/Ping response from: 192.168.3.222 port 2000: SX48:222 1.2.068 Program Sync The “Program Sync” Button should be used to reprogram the Sync Card in the SX-48. This must be done for compatibility with software version 1.50. This will update the SX-48’s Sync Card FPGA to Version: 7. -
Page 25: Front Panel Control
Flash Update Completed Please note that a Reboot is required in order for the upgrade to take effect. This can be accomplished at any time by simply clicking on the <Reboot SX-48> button. The Buttons Program MB, Program I/O, and Program All... -
Page 26: Diagnostics Section
Service Manual 6 - T SX-48 C July 24, 2008 HAPTER ONFIGURATOR You can set up the Sync source and Sample Rate, and also Pull Ratio setting. This can also display the reason for a lock failure such as "Sync Source not connected". -
Page 27: Configure Fmc - Required
HAPTER ONFIGURATOR Led Test – Start and End This runs through a LED test cycle for the front panel of the SX-48. This is mainly used here in Sydney for production. MADI Loop Patch and Reset Patching This is used by production for MADI testing. This is rarely used in the field. Please note that this test will switch the MADI ports of the SX-48 into 56 channel mode for CC-1 testing. -
Page 28: Using Aes2
FMC then polls the local network for SX-48s. If it finds an SX-48 with a matching MAC address that has a different IP address, it will update the registry with the new IP number. The updated IP addresses are now used to connect to the SX-48s. -
Page 29: Appendix A - Specifications
System sample rates 44.1, 48, 88.2, 96kHz Run-Up/Run-down sample rates 44.044, 44.056, 44.144, 47.952, 48.048, 95.904, 96.096kHz SRC range (with optional SRC I/O Input: module) 0.33 to 3.0 x system sample rate with range limits of 8kHz to 108kHz SX-48 Page 31... - Page 30 Net Weight Up to 8 kg, depending on card configuration Supply Voltage 90 – 250 VAC Power Consumption 50 Watts approx Fuse 3A at 250 V (same can be used with all supply voltages, as current is low). SX-48 Page 32...
Need help?
Do you have a question about the SX-48 and is the answer not in the manual?
Questions and answers