Table of Contents
Advertisement
Available languages
Available languages
Quick Links
EN
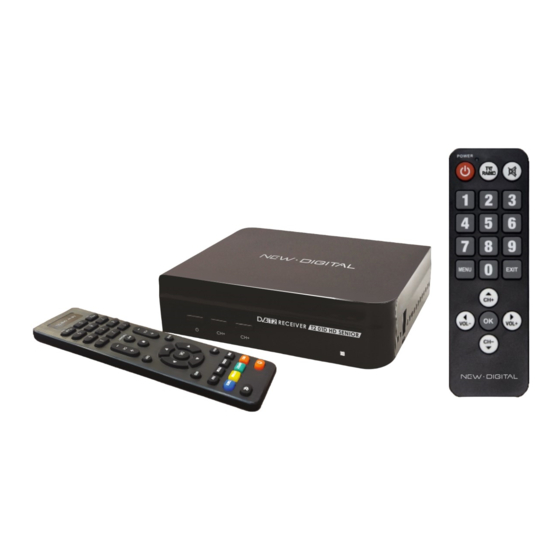
* NOTE: this Tuner is supporting the reception of Free To Air
programmes only
CONTENTS OF THE PACKAGE: Tuner Unit,
2 Remote Control Units, 4 pcs AAA type Batteries,
User Manual
Front panel and controls
1
2
3
Rear panel
and connection diagrams:
1
2
3
4
1. Read and follow these instructions.
2. Do not use this apparatus near water, heat sources, do not expose to direct sunlight and the
temperatures higher than in normal household. For Indoor use only!
3. Clean only with dry cloth, protect from moisture and dirt, do not cover the ventilation grid.
4. Operate this product only from the type of power source indicated on the label. Protect the
Device and the power cord from the moisture, physical damage.
5. Unplug this apparatus during lightning storms or when unused for the longer period.
6. Do not disassemble the unit or try to insert any extraneous items into it.
7. Refer all servicing to qualified service personnel only. Servicing is required when the apparatus
has been damaged in any way, including damage to the mains cord or plug, if the unit was
exposed to liquids or moisture, has been dropped or not operating correctly.
1 POWER – Switches between working and Standby mode
2 CH-
5
3 CH+ switches TV program down the list
4 IR (Infrared remote control) window
4
5 USB -- connector for external USB memory device (USB 2.0 support) located on the right
side
1 RF IN: This socket connects to your external Aerial.
2 HDMI: High definition audio and video output used to connect to TV HDMI socket
3 TV SCART – analog Audio / video output for connection to TV set
5
HIGH DEFINITION DIGITAL TERRESTRIAL
DVB-T2/T TUNER WITH H.264 SUPPORT
USER MANUAL
IMPORTANT SAFETY INSTRUCTIONS
CAUTION
Risk of electric shock!
DO NOT OPEN!
ATTENTION
Risque de choc electrique!
NE PAS OUVRIR!
This symbol indicates that dangerous voltages constituting a risk of electric shock are
present within this unit.
This symbol indicates that there are important operating and maintenance
instructions in the literature accompanying this unit.
This symbol indicates that this product incorporates double insulation between
hazardous mains voltage and user accessible parts. When servicing use only identical
replacement parts.
This symbol on the product or in the instructions means that your electrical and
electronic equipment should be disposed at the end of life separately from your
household waste. There are separate collection systems for recycling.
For more information, please contact the local authority or your retailer where you
purchased the product.
This symbol on the product means that your equipment is suitable only for Indoor use.
FRONT AND REAR PANELS AND CONNECTIONS DIAGRAM
switches TV program up the list
Advertisement
Table of Contents

Related Manuals for New Digital T2 01D HD SENIOR


Summary of Contents for New Digital T2 01D HD SENIOR
- Page 1 HIGH DEFINITION DIGITAL TERRESTRIAL DVB-T2/T TUNER WITH H.264 SUPPORT USER MANUAL IMPORTANT SAFETY INSTRUCTIONS 1. Read and follow these instructions. 2. Do not use this apparatus near water, heat sources, do not expose to direct sunlight and the temperatures higher than in normal household. For Indoor use only! 3.
- Page 2 DESCRIPTION OF THE REMOTE CONTROL UNIT (RCU) 1. POWER: Turns the receiver On/Standby. 2. REC: Record button. 3. ASPECT: Switch 4:3/16:9. 4. SUB: Shows list of available subtitle languages Temporary override of the subtitle setting in the main menu. 5. AUDIO: Shows list of available audio type or language. Temporary override of Main menu audio setting.
-
Page 3: First Time Installation
FIRST TIME INSTALLATION Please insert the batteries into the Remote control unit, arrange the necessary connections and plug in the unit to mains. The installed TV Antenna should guarantee the minimum signal strength not less than 60% and the signal quality not less than 80% according to the device indicator. - Page 4 Picture Setting Menu To access the Menu, press MENU then select [Picture] using the RIGHT/LEFT key. The Menu provides options to adjust the video settings. Press UP/DOWN to select an option and press RIGHT/LEFT to adjust that setting. Press EXIT to exit the menu.
- Page 5 Time Settings Menu (a) Time offset – allows to set time offset Automatically (recommended) and Manually (in case Automatic time setting does not match the local time). (b) Time Zone – allows to set time zone (used in Manual Time offset mode). (c) Sleep - allows to set the Tuner to energy saving mode with automatic turn off after certain viewing time (selectable from 1 to 12 Hours).
- Page 6 Other useful functions Program Information bar: Press INFO control button to display Information on the viewed program: Now/next event and signal quality information: Press INFO control button two times to display Now/next event description and Signal Quality Information of the viewed program: Audio language Menu (Accessible via Audio button).
-
Page 7: Troubleshooting
TROUBLESHOOTING Potential reasons What to do PROBLEM Power isn’t connected Connect the power. Audio/Video OUT No picture The power switch is not on Switch on the power DVB-T or DVB-T2 cable not connected Plug in the DVB-T or DVB-T2 cable Screen shows No Signal Aerial cable is faulty... -
Page 8: Instrucciones Importantes De Seguridad
SINTONIZADOR DIGITAL TERRESTRE DE ALTA DEFINICIÓN DVB-T2/T CON SOPORTE H.264 MANUAL DEL USUARIO INSTRUCCIONES IMPORTANTES DE SEGURIDAD 1. Lea y siga estas instrucciones. 2. No utilice este aparato cerca del agua o de fuentes de calor, no lo exponga a la luz solar directa ni a temperaturas superiores que las de un hogar normal. -
Page 9: Descripción Del Mando A Distancia
DESCRIPCIÓN DEL MANDO A DISTANCIA 1. POWER: Enciende el receptor/modo en espera. 2. REC: Botón de grabación. 3. ASPECT: Cambia a 4:3/16:9. 4. SUB: Muestra la lista de idiomas de subtítulos disponibles. Anulación temporal de la configuración de los subtítulos en el menú principal. 5. -
Page 10: Primera Instalación
PRIMERA INSTALACIÓN Introduzca las pilas en el mando a distancia y realice las conexiones necesarias y enchufe la unidad a la red eléctrica. La antena de televisión instalada debe garantizar la señal mínima de intensidad no inferior al 60% y la calidad de la señal no inferior al 80% según el indicador del dispositivo. - Page 11 Menú de configuración de la imagen Para acceder al menú, pulse MENÚ y seleccione [Imagen] con la tecla DERECHA/IZQUIERDA. El menú ofrece opciones para ajustar la configuración de vídeo. Pulse ARRIBA/ABAJO para seleccione una opción y pulse DERECHA/IZQUIERDA para ajustar esa configuración. Pulse EXIT para salir el menú.
- Page 12 Menú de configuración de la hora (a) Desfase horario: permite establecer el desfase horario automáticamente (recomendado) y manualmente (en caso de que la configuración automática de la hora no coincida con la hora local). (b) Zona horaria: permite establecer la zona horaria (se utiliza en el modo de compensación manual de la hora).
- Page 13 Otras funciones útiles Barra de información del programa: Pulse el botón de INFO para mostrar información sobre el programa visualizado: Información sobre el evento actual/próximo y la calidad de la señal: Pulse dos veces el botón INFO para mostrar la descripción del evento actual/siguiente e información sobre la calidad de la señal del programa: Menú...
-
Page 14: Resolución De Problemas
RESOLUCIÓN DE PROBLEMAS Posibles razones Qué hacer PROBLEMA Conectar la alimentación. La alimentación no está conectada Desconectar audio/vídeo No hay imagen El interruptor de alimentación no está Encienda el poder encendido Conectar el cable DVB-T o DVB-T2 Cable DVB-T o DVB-T2 no conectado La pantalla muestra “No hay señal”... -
Page 15: Consignes De Sécurité Importantes
MANUEL D'UTILISATION DU TUNER NUMÉRIQUE TERRESTRE HAUTE DÉFINITION DVB-T2/T AVEC SUPPORT H.264 CONSIGNES DE SÉCURITÉ IMPORTANTES 1. Lisez et suivez ces instructions. 2. N'utilisez pas cet appareil à proximité de sources d'eau, de sources de chaleur, ne l'exposez pas à la lumière directe du soleil et à des températures supérieures à celles d'un foyer normal. Pour un usage intérieur uniquement ! 3. - Page 16 DESCRIPTION DE LA TÉLÉCOMMANDE (RCU) 1. POWER: Met le récepteur sur On/en Veille. 2. REC: Bouton d'enregistrement. 3. ASPECT: Passer du 4:3 au 16:9. 4. SUB: Affiche la liste des langues disponibles pour les sous-titres. Annule temporairement le réglage des sous-titres dans le menu principal. 5.
-
Page 17: Première Installation
PREMIÈRE INSTALLATION Insérez les piles dans la télécommande, effectuez les connexions nécessaires et branchez l'appareil sur le secteur. L'antenne TV installée doit garantir une intensité minimale du signal d'au moins 60 % et une qualité de signal d'au moins 80 % selon l'indicateur de l'appareil. Si vous utilisez l'appareil pour la première fois ou après avoir restauré... - Page 18 Menu de réglage de l'image Pour accéder au menu, appuyez sur la touche MENU, puis sélectionnez [Image] à l'aide des touches DROITE/GAUCHE. Le menu propose des options permettant de régler les paramètres vidéo. Appuyez sur les touches HAUT/BAS pour sélectionner une option et appuyez sur les touches DROITE/GAUCHE pour régler ce paramètre.
- Page 19 Menu des paramètres de l'heure (a) Décalage horaire - Permet de régler le décalage horaire automatiquement (recommandé) et manuellement (au cas où le réglage automatique de l'heure ne correspond pas à l'heure locale). (b) Fuseau horaire - Permet de définir le fuseau horaire (utilisé...
- Page 20 Autres fonctions utiles Barre d'information sur les programmes: Appuyez sur la touche de commande INFO pour afficher des informations sur le programme visionné: L'événement actuel/suivant et les informations sur la qualité du signal: Appuyez deux fois sur la touche de commande INFO pour afficher la description de l'événement actuel/suivant et les informations sur la qualité...
-
Page 21: Dépannage
DÉPANNAGE Raisons potentielles Que faire? PROBLÈME L'alimentation n'est pas connectée Branchez l'alimentation. Sortie audio/vidéo Pas d'image L'interrupteur d'alimentation n'est pas allumé Mettez l'appareil sous tension Câble DVB-T ou DVB-T2 non connecté Branchez le câble DVB-T ou DVB-T2 L'écran affiche No Signal Le câble de l'antenne est défectueux Vérifiez le câble de l'antenne et les connexions Pas de connexion ou connexion incorrecte...
Need help?
Do you have a question about the T2 01D HD SENIOR and is the answer not in the manual?
Questions and answers