Advertisement
Advertisement

Related Manuals for dreo DR-HAC002


Summary of Contents for dreo DR-HAC002
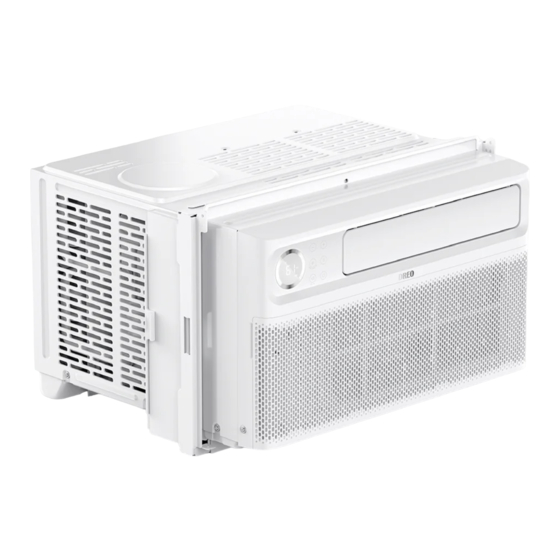
- Page 1 Inverter Window Air Conditioner USER MANUAL...
- Page 2 Thanks For Choosing DREO! Your support means the world to us. We hope you enjoy our product as much as we did creating it.
- Page 3 EXTEND YOUR WARRANTY FOR FREE Scan or visit dreo.com/warranty to extend your warranty for free by registering your product. If you have any product issues, we always stand ready to help. support@dreo.com www.dreo.com (888) 520-3736 Mon - Fri, 9:00 am-5:00 pm PST/PDT...
- Page 4 CONTENTS...
-
Page 5: Table Of Contents
IMPORTANT SAFETY INSTRUCTIONS ASSEMBLING YOUR AIR CONDITIONER USING YOUR AIR CONDITIONER CLEANING AND MAINTENANCE TROUBLESHOOTING DREO CUSTOMER CARE... -
Page 6: Important Safety Instructions
IMPORTANT SAFETY INSTRUCTIONS Read All Instructions and Cautionary Markings Before Operation and Installation to prevent death or injury to the user or other people and property damage, the following instructions must be followed. Incorrect operation due to ignoring of instructions may cause death, harm or damage. - Page 7 • Your appliance must be used in a properly grounded wall receptacle. If the wall receptacle you intend to use is not adequately grounded or protected by a time delay fuse or circuit breaker (the fuse or circuit breaker needed is determined by the maximum current of the appliance. The maximum current is indicated on the nameplate located on the appliance), have a qualified electrician install the proper receptacle.
- Page 8 • All wiring must be performed strictly in accordance with the wiring diagram located inside of the appliance. • The appliance's circuit board(PCB) is designed with a fuse to provide overcurrent protection. The specifications of the fuse are printed on the circuit board, such as: T 3.15A/250V, etc.
- Page 9 • Do not operate with a damaged cord, plug, power fuse or circuit breaker. Discard the appliance or return to an authorized service facility for examination and/or repair. • To reduce the risk of fire or electric shock, do not use this fan with any solid-state speed control device.
- Page 10 Operation of Current Device The power supply cord contains a current measuring device that detects damage to the power cord. Test your power supply cord as follows: 1. Plug in the air conditioner. 2. The power supply cord will have TWO buttons on the plug head. Press the TEST button.
- Page 11 WARNING FOR USING R32 REFRIGERANT For R32 refrigerant models: • Appliance shall be installed, operated and stored in a room with a floor area larger than 4 m². • Appliance shall not be installed in an unvertilated space, if that space is smaller than 4 m².
- Page 12 Caution: Risk of fire/flammable materials Warning: low burning velocity material (Required for R32 units only) (For R32 models apply to IEC60335-2-40:2018) Note about Fluorinated Gases 1. Fluorinated greenhouse gases are contained in hermetically sealed equipment. For specific information on the type, the amount and the CO2 equivalent in tonnes of the fluorinated greenhouse gas(on some models), please refer to the relevant label on the unit itself.
- Page 13 1.Transport of equipment containing flammable refrigerants See transport regulations. 2.Marking of equipment using signs See local regulations. 3.Disposal of equipment using flammable refrigerants See national regulations. 4.Storage of equipment/appliances The storage of equipment should be in accordance with the manufacturer's instructions.
- Page 14 associated parts, appropriate fire extinguishing equipment shall be avail- able to hand. Have a dry powder or CO2 fire extinguisher adjacent to the charging area. 6)No ignition sources No person carrying out work in relation to a refrigeration system which involves exposing any pipe work that contains or has contained flammable refrigerant shall use any sources of ignition in such a manner that it may lead to the risk of fire or explosion.
- Page 15 immediately but it is necessary to continue operation, an adequate tempo- rary solution shall be used. This shall be reported to the owner of the equipment so all parties are advised. Initial safety checks shall include: • That capacitors are discharged: this shall be done in a safe manner to avoid possibility of sparking;...
- Page 16 of the refrigerant shall be recovered from the system, or isolated (by means of shut off valves) in a part of the system remote from the leak. Oxygen free nitrogen (OFN) shall then be purged through the system both before and during the brazing process.
- Page 17 taken in case analysis is required prior to re-use of reclaimed refrigerant. It is essential that electrical power is available before the task is commenced. a)Become familiar with the equipment and its operation. b) Isolate system electrically. c) Before attempting the procedure ensure that: Mechanical handling equipment is available, if required, for handling refrigerant cylin- ders;All personal protective equipment is available and being used correct- ly;...
- Page 18 properly maintained and that any associated electrical components are sealed to prevent ignition in the event of a refrigerant release. Consult manufacturer if in doubt. The recovered refrigerant shall be returned to the refrigerant supplier in the correct recovery cylinder, and the relevant Waste Transfer Note arranged.
- Page 19 Specifications Model DR-HAC002 Refrigerant Cooling Capacity 8,000 Btu/h Rated Voltage 115V Rated Frequency 60Hz Rated Input 740W Rated Current 8.3A CEER 15 (Btu/h)/W Recommended Applicable Area ≤350 ft² 22.99 x 18.81 x 13.97 in / Dimensions 584 x 478 x 355 mm Weight 56.7 lb / 25.7 kg...
-
Page 20: Assembling Your Air Conditioner
ASSEMBLING YOUR AIR CONDITIONER Package Contents Part Name Quantity Window Air Conditioner Remote Control Long Foam Seal (Non-Adhesive) Long Foam Seal (Adhesive) Panel Seal (Adhesive) Security Bracket 3/4’’ Screw 1/2’’ Screw Remote Control Battery Plasticene Inverter Window Air Conditioner... - Page 21 Window Requirements 25-36 inch 645-915 mm 14.5 inch Exterior 368 mm Stool Offset Wall Sill Interior Wall 1. This air conditioner is designed to be installed in a standard single-hung or double-hung window with a window width between 25" and 36" (645mm - 915mm).
- Page 22 Getting Started SUGGESTED TOOLS FOR INSTALLATION (Not included) Phillips Scissors Pencil Level Ruler or screwdriver or knife tape measure CAUTION Heavy object. Team handling is required during the installation process. 1.Removing All the Packaging Carefully remove all the packaging straps and wraps from the air conditioner and accessories.
- Page 23 2.Applying the Adhesive Foam Seal Measure the length of the upper window frame, trim the adhesive foam seal to the appropriate length and apply as shown. Adhesive Foam Seal 3.Placing Inside an Open Window Carefully lift the air conditioner with a helper to the windowsill and pull down the sash, making sure the air conditioner is centered and its bottom rail is flush against the windowsill.
- Page 24 4.Securing the Side Brackets Extend the side brackets from both sides of the air conditioner onto the left and right window frames and secure by installing four 3/4’’ screws as shown. 3/4’’ Screws *4 NOTE Fix the upper screws first, then the lower screws. Inverter Window Air Conditioner...
- Page 25 5.Securing the Side Panels Pull the side panels inwards to align with the brackets, then secure onto the sides by snapping the jutting points onto the locking pins. Locking Pins Jutting Points 6.Sealing the Crevices with Plasticene (Optional) Fill the crevices between the side brackets and panels with the included plasticene.
- Page 26 7.Installing the Screw Into the Top Rail Install the 1/2’’ screw into the top rail of the air conditioner. Top Rail 1/2''Screw *1 8.Applying the Panel Seals Measure the length extended by the side panels, trim the panel seals to the appropriate length, peel off the backings and apply on the panels on both sides.
- Page 27 9.Installing the Security Bracket Attach the security bracket on top of the window sash and secure with two 1/2’’ screws. 1/2''Screw *2 10.Filling the Gap Between Sashes Trim the non-adhesive foam seal to the appropriate length and insert between the window sashes. Non-Adhesive Foam Seal CAUTION: When open the window, besure that the fixed screws are...
- Page 28 If AC Is Blocked By Storm Window SASH 1-1/2” min Storm window frame or other (38 mm) Board thickness as obstruction. required, for proper pitch to rear, along entire sill. Fasten with nails or screws. OUTSIDE INSIDE • Add wood as shown, or remove storm window before air conditioner is installed.
- Page 29 Introduction to Refrigerants R32 1.Site Safety Open Flames Prohibited Ventilation Necessary 2.Operation Safety Mind Static Electricity Must Wear Protective Clothing and Anti-Static Gloves Don't Use Mobile Phone 3.Installation Safety • Refrigerant Leak Detector • Appropriate Installation Location • The left picture is the schematic diagram of a refrigerant leak detector.
-
Page 30: Using Your Air Conditioner
Please note that: 1. The installation site should be in a well-ventilated condition. 2. The sites for installing and maintaining an air conditioner using Refrigerant R32 should be free from open fire or welding, smoking, drying oven or any other heat source higher than 548℃ which easily produces open fire. - Page 31 Power Turn on the air conditioner or switch to standby. Button • Adjust fan speed (Low, Med, High, Auto) Fan Speed • Long press 5 seconds to reset filter reminder Button NOTE: Fan speed setting is available in Auto, Cool, and Fan modes only. •...
- Page 32 LED Display Indicate Cool, Dry, Fan, and Auto mode respectively. IIndicates that the timer is active. Indicates that the filter needs to be cleaned. Indicates Sleep mode. Indicates WiFi connection. NOTE: Not available on this unit. Indicates Eco mode. Indicate Low, Medium, High, and Automatic fan speed respectively.
- Page 33 General Operations Power Press to turn on the air conditioner or switch Button it to standby mode. Increase Press to increase the air conditioning Button temperature by 1 °F/°C. Decrease Press to decrease the air conditioning Button temperature by 1 °F/°C. •...
- Page 34 Adjust Fan Speed Press repeatedly to adjust fan speed: Low, Med, High, and Auto. Fan Speed Button Reset Filter Reminder • Press and hold for 5 seconds to reset filter reminder. • To clean the filter, see page 34. NOTE •...
- Page 35 • When the air conditioner is on standby/ running, press the Timer button and its icon will flash on the remote display. During the Timer flashing process, press + or - to select a timer Button (On from 0.5 to 24 hours, then press the Timer Remote button again to confirm the setting.
- Page 36 Other Features Filter Reminder When the running time of the fan reaches 500 hours, the filter reminder will light up to remind you to clean the filter. To clean the filter, see page 34. Display Auto Off • Display will dim after 30 seconds (off after 15 seconds in sleep mode). •...
- Page 37 Remote Control POWER MODE Turn on/off the air conditioner. Cycle through Cool, Dry, Fan and Auto modes. DECREASE INCREASE Decrease temperature/timer. Increase temperature/timer. FAN SPEED SWING Adjust fan speed Starts and pauses the louver (Low, Med, High, Auto) movement. TIMER SLEEP MODE Set a timer to turn Save energy during sleeping...
- Page 38 Battery Replacement Your air conditioner may come with two batteries. Put the batteries in the remote control before use. 1. Slide the back cover from the remote control downward, exposing the battery compartment. 2. Insert the batteries, paying attention to match up the (+) and (-) ends of the batteries with the symbols inside the battery compartment.
-
Page 39: Cleaning And Maintenance
CLEANING AND MAINTENANCE Care and Cleaning Clean your air conditioner occasionally to keep it looking new. Be sure to unplug the unit before cleaning to prevent shock or fire hazards. Air Filter Cleaning The air filter should be checked at least once every month to see if it needs cleaning. - Page 40 Cabinet Cleaning To clean the air conditioner cabinet: • Unplug the air conditioner to prevent shock or a fire hazard. The cabinet and front panel of the air conditioner may be dusted with an oil free cloth or washed with a cloth dampened in a solution of warm water and mild liquid soap.
-
Page 41: Troubleshooting
TROUBLESHOOTING Problem Possible Cause Solution The air conditioner is Make sure the air unplugged conditioner plug is pushed completely into the outlet. The fuse is blown/circuit Check the house breaker is tripped fuse/circuit breaker box and replace the fuse or reset the breaker. - Page 42 Problem Possible Cause Solution Air flow is restricted Make sure there are no curtains, blinds or furniture blocking the front of the air conditioner. The temperature Lower the set control may not be thermostat temperature. set correctly. The air filter is dirty Clean the filter.
- Page 43 Ice blocks the air flow Switch to high fan and stops the air speed and set the The air conditioner conditioner from thermostat to a higher is freezing up cooling the room temperature. The batteries are Check the position inserted incorrectly of the batteries.
-
Page 44: Dreo Customer Care
DREO CUSTOMER CARE Default 12-Month Warranty This appliance is covered by Dreo warranty for 12 months from the date of its original purchase. Extend Your Warranty Extend your warranty by registering your new appliance on our website https://dreo.com/warranty The warranty will not apply in cases of: •... - Page 45 FCC Statement Changes or modifications not expressly approved by the party responsible for compliance could void the user's authority to operate the equipment. This device complies with Part 15 of the FCC Rules. Operation is subject to the following two conditions: (1)this device may not cause harmful interference, and (2)this device must accept any interference received, including interference that may cause undesired operation.
- Page 46 Inverter Window Air Conditioner...
- Page 47 We’re Here to Help! (888) 520-3736 www.dreo.com Mon - Fri, 9:00 am-5:00 pm PST/PDT Shenzhen Hesung Innovation www.dreo.com Technology Co., LTD 26F, Bldg A7, Creative City, support@dreo.com Shenzhen, China Rev_1.0_EN MADE IN CHINA Inverter Window Air Conditioner...
- Page 48 DR-HAC002 Looking for help? Contact us to get expert support. support@dreo.com (888) 520-3736 www.dreo.com Mon - Fri, 9:00 am-5:00 pm PST/PDT...
Need help?
Do you have a question about the DR-HAC002 and is the answer not in the manual?
Questions and answers
how do you switch from celsius to farenheit