Table of Contents
Advertisement
Quick Links
Advertisement
Table of Contents

Related Manuals for SST EcoSmart 25


Summary of Contents for SST EcoSmart 25
- Page 1 Thermostat EcoSmart 25 TECHNICAL CERTIFICATE...
-
Page 2: Table Of Contents
The EcoSmart 25 thermostat installation manual . . . . . . . . . . . . . . . . . -
Page 3: Introduction
INTRODUCTION The EcoSmart 25 thermostat is designed to control electrical heating systems of premises . The thermostat maintains a comfortable temper- ature of the heated surface and provides efficient energy consump- tion . The thermostat provides control using two temperature sensors: floor sensor and air sensor, both simultaneously and separately (in- cluded in the scope of delivery) . -
Page 4: Special Features
. You can also get a link to this program on the website teploluxe .ru or via QR code provided below: To learn more about the features of the SST Cloud App, visit sstcloud . r u . -
Page 5: Wi-Fi Connection Guidelines
WI-FI CONNECTION GUIDELINES — Wi-Fi standards supported by the thermostat: IEEE 802 .11 . b/g/n 2 .4 GHz . — Minimum Wi-Fi signal level at the place of the thermostat installation: -70 dBm . — Position the Wi-Fi router's antennas according to the manufacturer's recommendations in order to maximize the Wi-Fi signal level at the location where the thermostat is installed . - Page 6 Since the thermostat is flush mounted in the wall, the Wi-Fi signal level received by the device can be lower than that shown by the smartphone. To set up and operate the EcoSmart 25 thermostat, download its operating manual on your smartphone .
-
Page 7: Controls And Display
CONTROLS AND DISPLAY To display information and control operating modes, the thermostat uses an LCD touch display with functional control buttons applied to it . To set up and control the device, the control buttons are used 1. “<” — to decrease the temperature following value; 2. -
Page 8: The Main Indication Window Of The Thermostat
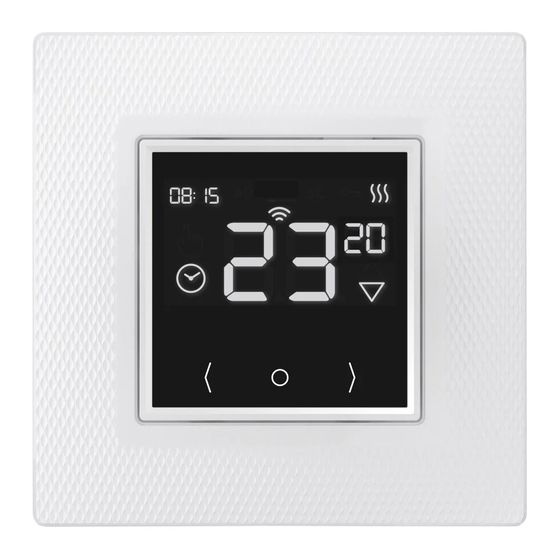
The main indication window of the thermostat There are two main display modes of the device: — current time indication (Figure 2a); — current floor and air temperature indication (Figure 2b) . Switching between the display modes occurs automatically every 3 seconds . -
Page 9: Control Buttons Locking/Unlocking
Figure 2. The main indication window of the device Control buttons locking/unlocking To unlock the buttons, hold the ON/OFF button for more than 3 sec- onds . When the buttons become unlocked, the device's backlight turns on . For the first three seconds, the touch buttons are calibrated, and then you can modify the device settings . -
Page 10: Factory Settings Reset
Factory settings reset The EcoSmart 25 thermostat can be reset to the factory settings if necessary . In this case, information about connected Wi-Fi networks will be erased from the device memory heating, schedules and temperature settings will be returned to the factory settings: 28 °C –... -
Page 11: Installation And Connection
Installation and connection Tools and materials required: 1. Corrugated plastic tube min 16 mm in diameter (the length depends on the thermostat mounting location) 2. Standard plastic mounting box 3. External terminal connector for the earthing line connection 4. Slot screwdriver 5. -
Page 12: Floor Temperature Sensor Installation
(Figure 3) . At that you can select the parameters of the operating temperature sensors from the list provided in the SST Cloud App . Place the tube in preliminarily prepared grove (chase) in the floor and lead its other end to the place chosen for the thermostat or junction box location . - Page 13 IMPORTANT! The floor temperature sensor is installed when you perform your heating element (mat, cable section or film) installation. The thermostat is installed at the end of the warm floor system installation. Figure 3...
-
Page 14: Thermostat Installation
Thermostat installation Preparation of electrical connections Install the mounting box or the intermediate junction box (if you plan to use it) . Lead power supply cable, installation wires of the warm floor heating elements, temperature sensor installation wire to the box . Energize the supply cable and find the phase wire and the neutral wire using the mains phase indicator;... - Page 15 Protective Protective earthing line (PE) earthing line (PE) External External terminal terminal Temperature connector Temperature connector sensor 230 VAC sensor 230 VAC Single-core heating cable/mat Single-core heating cable/mat Figure4 Connection diagram of the thermostatic head to the thermostat to control water heating systems . Temperature 230 VAC sensor...
-
Page 16: Mounting The Thermostat
Mounting the thermostat Disassemble the device . 1. Remove the front cover . For that, carefully press in turn, by thin slot screwdriver, the latches located on the lower side of the front cover, pulling it slightly out (Figure 6a) . 2. -
Page 17: Assembling The Device
Assembling the device Install the front cover carefully on the upper latches of the rear part of the device and press the cover at an angle up to the click of all latches . Make sure that the front cover tightly adjoins the rear part of A(2:1) A(2:1) the thermostat installed in the mounting box . -
Page 18: Technical Data
TECHNICAL DATA Supply voltage 230 VAC Maximum load current 16 A (3 .5 kW) Power consumption 450 mW Weight 120 gr Dimensions 80×80×44 mm Ingress protection rating IP31 Protection class Floor temperature sensor, included in the scope NTC 6 .8 kOhm of delivery (TST02) Sensor installation wire length 2 m ±... - Page 19 Clock time settings retention time synchronized when accessing cloud) Atlantic NEVADA 6 .8 kOhm Floor temperature sensor nominal resistance Aube 10 kOhm supported (can be selected in the SST Cloud Warmup 12 kOhm App) Devi 15 kOhm Eberle 33 kOhm Ensto 47 kOhm...
-
Page 20: Transportation And Storage
TRANSPORTATION AND STORAGE It is allowed to transport the thermostat by all transport means in accordance with the rules of transportation operating for the particu- lar means of transport used . SAFETY MEASURES The thermostat conforms to the requirements of the Technical Regulations EN 60730-1: 2016 EN 55014-1: 2017... -
Page 21: Guarantee Obligations
GUARANTEE OBLIGATIONS The manufacturer guarantees that the quality of the thermostat meets the requirements of Technical Specifications provided that transpor- tation rules as well as installation and operation guidelines are observed . Guarantee period – 3 years from the date of sale. During the guarantee period, the buyer has the right for repair or replacement of the unit when detecting failures occurred through the manufacturer’s fault and if the recommendations for installation and... - Page 22 . The Service Center: +7 495 728-80-80, garant@sst .ru 141008, Russia, Moscow region, Mytischi, Proektiruemyj proezd 5274, Bldg . 7 . Addresses and phone numbers of service centers in other regions...
-
Page 23: Guarantee Card
The thermostat EcoSmart 25, date of manufacture has passed factory tests and is certified as ready for operation QCD stamphere Date of sale Seller’s stamp here Passed for printing on 25 .05 .2020... - Page 24 The manufacturer: Zavod SST TP LLC Russia 141008 Mytischy, Moscow region, Proektiruemyj proezd 5274, Bldg . 7 Tel ./fax: +7 495 728-80-80; e-mail: sst@sst .ru; www .sst-iwarm .com...
Need help?
Do you have a question about the EcoSmart 25 and is the answer not in the manual?
Questions and answers