Table of Contents
Advertisement
Quick Links
Advertisement
Table of Contents

Related Manuals for Living & Co CM5018D-GS

Summary of Contents for Living & Co CM5018D-GS
- Page 1 INSTRUCTION MANUAL MODEL: CM5018D-GS...
- Page 3 CONTENTS Page IMPORTANT SAFETY INSTRUCTIONS PRODUCT OVERVIEW HOW TO USE 5-10 CLEANING 10-12 TROUBLE SHOOTING...
- Page 4 Before using the electrical appliance, the following basic precautions should always be followed including the following: • Read all instructions before use. Retain this guide for future reference. • This appliance is not intended for use by persons (including children) with reduced physical, sensory or mental capabilities, or lack of experience and knowledge, unless they have been given supervision or instruction concerning use of the appliance by a person responsible for their safety.
- Page 5 • • Never operate the coffee maker without water. • DO NOT remove the metal funnel while brewing coffee. Only remove the metal funnel to make additional coffee more than 10 seconds after brewing has finished. Caution should also be taken while removing the metal funnel since the metal parts will be hot.
-
Page 6: Control Panel
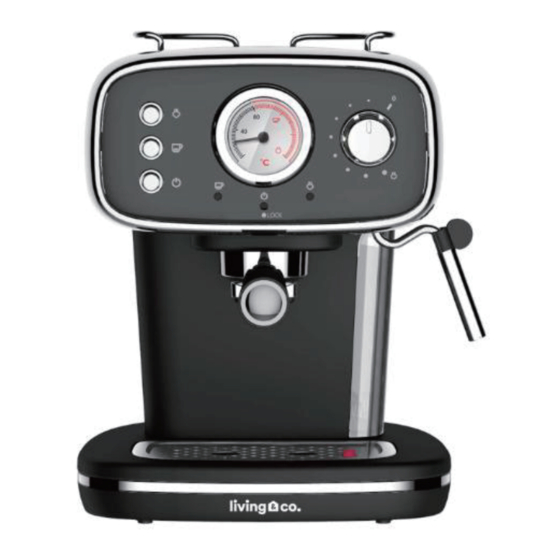
COFFEE MAKER AND ACCESSORIES Control Panel Water Steam Dial Tank Two cup filter Steam Wand Portafilter (with removable tube) Drip Plate Drip Tray One cup filter Coffee Spoon/ Tamper CONTROL PANEL Temperature gauge Coffee/steam On/Off button Steam pressure Pump On/Off outlet control dial control button ON/OFF button... -
Page 7: Before The First Use
INSERTING THE FILTER INTO THE PORTAFILTER 1. To insert the selected filter (two cup or one cup) in the portafilter, make sure to align the notch on the filter with the groove inside the portafilter. 2. Turn the filter to the left or right to lock in place. This will help secure the filter in the portafilter. - Page 8 BEFORE THE FIRST USE (Continued) 3. Place an espresso cup on the drip plate. Make sure the steam dial is in the “0” position. 4. Connect the supply plug to a wall socket and press the ON/OFF button “ ” to turn the appliance on.
-
Page 9: Making Espresso Coffee
MAKING ESPRESSO COFFEE 1. Connect the supply plug to a wall socket and press the ON/OFF button “ ” to turn the appliance on. The power indicator (red) will be illuminated. 2. Check that the water tank has sufficient water added and that the steam dial is set to “0”. 3. -
Page 10: Making Cappuccino
MAKING CAPPUCCINO You can make a cup of cappuccino by topping a cup of espresso with frothing milk. Note: During steaming, the portafilter must be assembled in position. Method: 1. Prepare espresso first as per the instructions above, make sure that the steam dial is at the "0" position. - Page 11 Note: After steaming, allow the coffee maker to cool down at least for 5 minutes before making coffee again, otherwise a burnt odour may be noticeable in the prepared coffee. If you want to make coffee immediately: press and release the coffee/ steam button and dip the steam wand into a cup. Press the pump on/off control button down and turn on the steam control dial;...
-
Page 12: Automatic Power Off Function
AUTOMATIC POWER OFF FUNCTION The appliance will turn off automatically if no function is activated within 29 minutes. DRIP TRAY FLOAT MECHANISM The drip tray incorporates a red coloured plastic float mechanism that will raise above the drip plate to indicate when the drip tray is full. In order to prevent overflow and spillage of liquids, please empty when full. -
Page 13: Cleaning Mineral Deposits
CLEANING MINERAL DEPOSITS To ensure your coffee maker operates efficiently, the internal piping should be cleaned every 1-2 months to guarantee optimal coffee flavour. 1. Fill the tank with water and descaler to the MAX level (the proportion of water and descaler is 4:1. - Page 14 WATER TANK EXTRACTION HOSE When removing and fitting the water tank into the recess slot, take care not to exert pressure onto the extraction hose. Angle the water tank downwards when inserting and manually place the hose into the tank. Try to limit the amount of bending and pressure applied to the hose and ensure this sits vertically when the tank has been refitted.
-
Page 15: Troubleshooting
TROUBLE SHOOTING Symptom Cause Corrections The coffee maker will The power outlet is not Ensure the plug of the power cord is not power on. switched on or is faulty. correctly fitted to the socket outlet, if the appliance still does not work, try a different socket outlet alternative... - Page 16 Warranty We pride ourselves on producing a range of quality home appliances that are both packed with features, and completely reliable. We are so confident in our products, we back them up with a 2 year warranty when accompanied with proof of purchase.
Need help?
Do you have a question about the CM5018D-GS and is the answer not in the manual?
Questions and answers