Table of Contents
Advertisement
Quick Links
Advertisement
Table of Contents

Summary of Contents for Fork farms FLEX FARM
- Page 1 FLEX FARM ASSEMBLY MANUAL Copyright © 2020 Fork Farms, All Rights Reserved...
-
Page 3: Table Of Contents
Warranty Information ........................5 Returns ..............................5 Shipping ..............................5 Contact Us............................... 5 Section 2 Flex Farm Assembly Unpack and Inspect ........................6 Assemble Caster Unit ........................11 Assemble Tanks & Pump ......................12 Assemble Root Chambers & Panels ..................16 Add Light Tower ..........................20 Set Aside Remaining Parts ....................... -
Page 5: Introduction And Safety
Fresh food awaits! Understand Your Flex Farm Your Flex Farm is a fully self-contained, indoor hydroponic growing system. Hydroponics is the practice of growing without soil. Instead, you add nutrients directly to the water supply to feed the plants. As water runs down the panels to wet the roots, the plants will pull the nutrients right from the water. -
Page 6: Safety First
Section 1 Safety First Be aware that the Flex Farm uses water and electricity, so there is a risk of electric shock if instructions are not followed carefully. Also, some of the materials used are caustic and should be kept out of the reach of children. -
Page 7: Warranty Information
Fork Farms offers a 14-day return policy on all Flex Farms. Returns must be initiated within 14 calendar days from the date the order was placed. To be eligible for a return, your Flex Farm must be unopened, unused and in the same condition that you received it. Your item must be in the original packaging. -
Page 8: Flex Farm Assembly
Your Flex Farm is a fully self-contained hydroponic growing system. Flex Farms Notice work great in classrooms, front lobbies, If you make changes to the Flex Farm, you will void cafeterias, homes and many more locations! the one-year limited warranty. For quick and easy assembly... -
Page 9: Unpack And Inspect
• Direct access to a grounded (three prong) 120V electrical outlet NOTE: Be sure to place the Flex Farm in an area where people will regularly see it, as that’s the easiest way to remember to work on it. The Flex Farm is easy to use, but needs to be monitored. - Page 10 Flex Farm Assembly Section 2 2. Inspect the contents to make sure everything is there: Description Caster Unit Left Right Assembly Kit • Left Caster Frame • Right Caster Frame • Assembly Kit Lock Screw Washer Tanks Left Right • Left Tank •...
- Page 11 Section 2 Flex Farm Assembly Description Vertical Irrigation Line Lid Plugs Root Chambers Panels Drip Lines • Left side has Y-fitting attached Top Caps Light Tower...
- Page 12 Flex Farm Assembly Section 2 Description Light Timer Panel Plugs Grower Toolkit • TDS Meter • Measuring Cup • Measuring Spoons • Bristle Brush Supply Kit • Rockwool Flats • Nursery Tray • Nutrient A (1 lb) • Nutrient B (1 lb) •...
-
Page 13: Assemble Caster Unit
Section 2 Flex Farm Assembly Assemble Caster Unit Caution Locate the caster unit (A) and an The pH solutions and hydrogen peroxide are caustic materials. Keep out of reach of children. adjustable or 3/8 inch wrench (optional). Handle carefully to avoid personal injury. -
Page 14: Assemble Tanks & Pump
Flex Farm Assembly Section 2 Assemble Tanks and Pump Gather two tanks (B), drainage valve (C), two lids (D), two tank knobs (E), pump (F), pump filter bag (G), vertical irrigation line (H), two lid plugs (I), hair dryer (optional) and Phillips head screwdriver (optional). - Page 15 Flex Farm Assembly Section 2 4. Place the tanks on the caster unit, aligning the caster frame to the grooves in the bottom of the tanks. NOTE: When properly assembled, the drainage valve will be positioned directly above where the caster unit halves are attached to one another.
- Page 16 Section 2 Flex Farm Assembly 7. Take the pump out of the box and attach the 1/2 inch fitting (included with pump). 8. Set the pump on top of the left tank lid and thread the power cord down through...
- Page 17 Notice Light will cause algae to bloom when it comes in contact with Flex Farm water. Keep the lid plugs inserted into the lids to prevent light from getting into the tanks. Only remove the lid plugs to add...
-
Page 18: Assemble Root Chambers & Panels
Section 2 Flex Farm Assembly Assemble Root Chambers and Panels Gather eight root chambers (J), 32 panels (K), two drip lines (L) and eight top caps (M). 2. Identify the side of the root chamber without notches. Insert that side into the tank through a slot in the tank lid. - Page 19 Flex Farm Assembly Section 2 3. Insert four panels, one at a time, into the top each root chamber by sliding them through the rails located on each side. NOTE: Insert panels tab side first into root chambers.
- Page 20 Flex Farm opens. NOTE: The left drip line will have a Y-fitting attached to the vinyl tubing on the opposite side from where the valve is attached.
- Page 21 Flex Farm Assembly Section 2 6. Connect the bottom of the Y-fitting to the vertical irrigation line attached to the pump. NOTE: When drip lines are installed properly, the Y-fitting will be positioned directly above the drainage valve connecting the two tanks.
-
Page 22: Add Light Tower
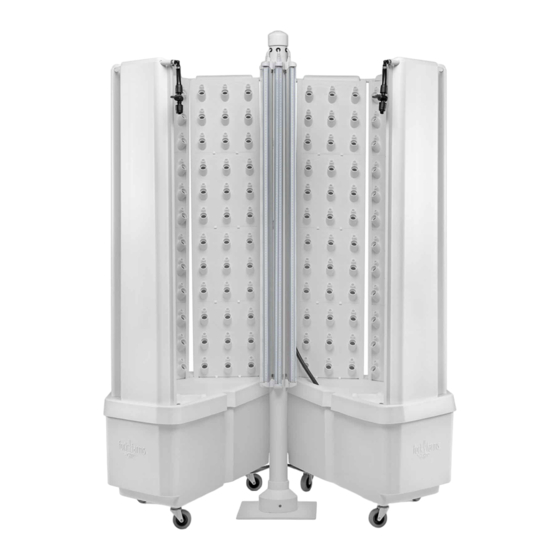
1. Locate the light tower (N). 2. Set light tower in between the Flex Farm tanks with power cord positioned in the same direction as the drainage valve. -
Page 23: Assembly Complete
FLEX FARM ASSEMBLY COMPLETE FRESH FOOD AWAITS!
Need help?
Do you have a question about the FLEX FARM and is the answer not in the manual?
Questions and answers