Table of Contents
Advertisement
SharkNinja Operating LLC
US: Needham, MA 02494
1-877-646-5288
ninjakitchen.com
Illustrations may differ from actual product. We are constantly striving to improve our products,
therefore the specifications contained herein are subject to change without notice.
FOODI and NINJA are registered trademarks of SharkNinja Operating LLC.
NINJA SPEEDI and SMARTLID are trademarks of SharkNinja Operating LLC.
This product may be covered by one or more U.S. patents. See sharkninja.com/patents
for more information.
© 2022 SharkNinja Operating LLC.
SF300_Series_IB_MP_Mv8_220429
RAPID COOKER AIR FRYER
@ninjakitchen
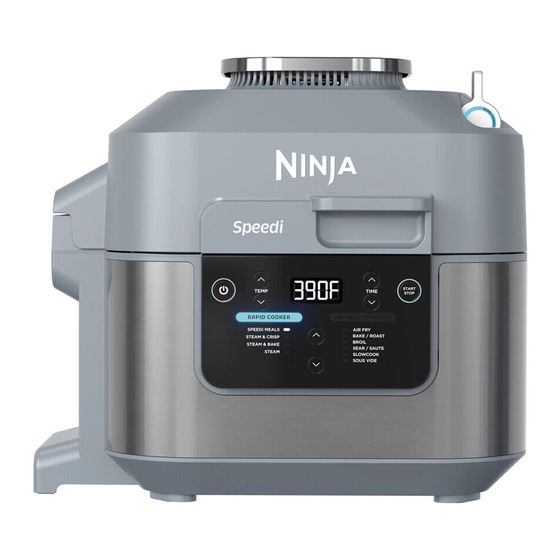
SF300
Series
OWNER'S GUIDE
OWNER'S GUIDE
ninjakitchen.com
Advertisement
Table of Contents

Related Manuals for Ninja Speedi SF300 Series


Summary of Contents for Ninja Speedi SF300 Series
- Page 1 Illustrations may differ from actual product. We are constantly striving to improve our products, therefore the specifications contained herein are subject to change without notice. FOODI and NINJA are registered trademarks of SharkNinja Operating LLC. NINJA SPEEDI and SMARTLID are trademarks of SharkNinja Operating LLC.
-
Page 2: Table Of Contents
Using Your Ninja Speedi™ Air Fryer ........ -
Page 3: Important Safeguards
IMPORTANT SAFEGUARDS HOUSEHOLD USE ONLY • READ ALL INSTRUCTIONS BEFORE USE WARNING DO NOT use this unit to cook instant rice. 34 The cooking pot and crisper tray become To eliminate a choking hazard for young To protect against electrical shock extremely hot during the cooking process. -
Page 4: Parts & Accessories
ACCESSORY ASSEMBLY & USING THE SMARTLID PARTS & ACCESSORIES ACCESSORY ASSEMBLY INSTRUCTIONS USING THE SMARTSWITCH The SmartSwitch allows you to change between CRISPER TRAY Accessories Included the two cook modes, which are labeled on the Elevated Position Bottom Position switch for your reference. Use elevated Use bottom position •Rapid Cooker... -
Page 5: Using The Control Panel
USING THE CONTROL PANEL BEFORE FIRST USE BEFORE FIRST USE REMOVING & INSTALLING THE 1 Remove and discard any packaging material, CONDENSATION COLLECTOR stickers, and tape from the unit. To install the condensation collector, slide it into the Pay particular attention to operational slot on the cooker base. -
Page 6: Using Your Ninja Speedi™ Air Fryer
USING YOUR NINJA SPEEDI AIR FRYER ™ Steam & Crisp USING THE RAPID COOKER FUNCTIONS 6 When preheating has completed, the timer will The unit will begin preheating to bring begin counting down. the liquid to a boil. The display will show Load ingredients according to recipe. -
Page 7: Using The Air Fry/Stovetop Functions
USING YOUR NINJA SPEEDI AIR FRYER - CONT. ™ USING THE AIR FRY/STOVETOP FUNCTIONS Bake/Roast Move SmartSwitch to AIR FRY/STOVETOP, then Sear/Sauté use the center front arrows to select BROIL. Air Fry Be sure to position the Crisper Tray in the Before getting started, be sure to remove the The default temperature setting will display. -
Page 8: Slow Cook
USING YOUR NINJA SPEEDI AIR FRYER - CONT. CLEANING & MAINTENANCE ™ Sous Vide Cleaning: Dishwasher & Hand-Washing AVOIDING CROSS CONTAMINATION & CLEANING THE LID When cook time reaches zero, the unit will beep NOTE: For best results when using the Sous and display "End". -
Page 9: Troubleshooting Guide
TROUBLESHOOTING GUIDE HELPFUL TIPS Progress bars are shown on the display screen when using RapidCooker functions. When referencing our Meal Charts, for larger cuts of meat add 3 to 5 minutes to the cook time (but please note this may overcook grains). We recommend sticking to suggested height and weight •... -
Page 10: Warranty
NOTES ONE (1) YEAR LIMITED WARRANTY The One (1) Year Limited Warranty applies to purchases made from authorized retailers of SharkNinja Operating LLC. Warranty coverage applies to the original owner and to the original product only and is not transferable. SharkNinja warrants that the unit shall be free from defects in material and workmanship for a period of one (1) year from the date of purchase when it is used under normal household conditions and maintained according to the requirements outlined in the Owner’s Guide,...
Need help?
Do you have a question about the Speedi SF300 Series and is the answer not in the manual?
Questions and answers