
Related Manuals for FLUS ET-951


Summary of Contents for FLUS ET-951
- Page 1 User's Manual Professional Humidity & Temperature Meter Please read this user's manual thoroughly before using this unit and keep it properly for your future reference.
-
Page 3: Table Of Contents
Contents 1. Safety............2 2. Introduction ..........3 3. Features ........... 3 4. Specifications ..........4 5. Meter Description ........5 6. LCD Display Description ......8 7. Operation Instruction........9 8. Notes ............. 13 9. Accessories..........13... -
Page 4: Safety
Safety Read the following safety information carefully before attempting to operate or service the meter. Use the meter only as specified in this manual; otherwise, the protection provided by the meter may be impaired Environment conditions ▲ RH≤90%(Non-Condensation) Operating Temperature: -30 ℃ ~ 60℃ ▲... -
Page 5: Introduction
2. Introduction The Humidity & Temperature Meter is designed with a high accuracy temperature & humidity sensor, providing high accuracy, fast response and stable readings. It is widely used for monitoring and collecting data of environment temperature and humidity. This meter is widely used for measurement of temperature and humidity of room, metro, library,commercial center, communication center room, etc. -
Page 6: Specifications
4. Specifications Measuring Accuracy range 0~20%RH, 80%~100%RH: ±4.0% Humidity 0~ 100%RH 20%~40%RH,60%~80%RH: ±3.0% 40%~60%RH: ±2.0% -35 ℃ ~-10 ℃ , 70 ℃ ~100 ℃ : ±1.0 ℃ -10 ℃ ~70 ℃ : ±0.5 ℃ Temp. -35 ℃ ~100 ℃ -31 ℉ ~+14 ℉ ,158 ℉ ~212 ) ℉... -
Page 7: Meter Description
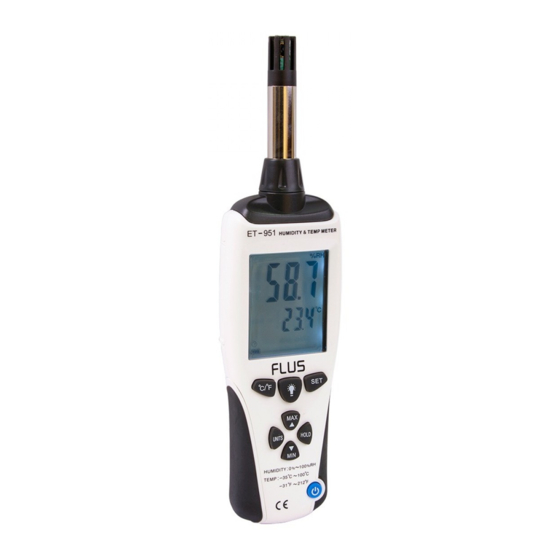
5. Meter Description... - Page 9 Temperature & Humidity sensor Metal bar LCD display Backlight ON/OFF key SET key Data hold key MIN/DOWN key Power ON/OFF key Dew point temperature key (10) MAX/UP key (11) temperature units ℃ ℉ (12) Tripod nut (13) Battery compartment...
-
Page 10: Lcd Display Description
6. LCD Display Description ① Humidity unit icon ② Humidity record ③ Temperature record ④ Temperature units icon ⑤ Dew point temperature units icon ⑥ Auto power off icon ⑦ Battery icon ⑧ MAX/MIN icon ⑨ Data hold icon... -
Page 11: Operation Instruction
7. Operation Instruction Open battery cover and install a 9-volt battery in the battery compartment. Power ON: Turn the meter on by pressing " " button for 1 second until the LCD is lighted, then loose the button. Power OFF: Turn the meter off by pressing and holding "... - Page 12 In the measuring mode, press " " button to convert the temperature units ℃ ℉ Auto power off icon, the meter will automatically turn off after approx. 15 minutes of inactivity. Dew Point Temperature: press " " button once, UNITS icon will appear on the LCD, which indicates the dew point temperature measurement is conducting, press this button again to exit this function.
- Page 13 The upper reading is the real humidity value, the middle reading is the calibration value and the lower one is the MAX icon, which indicates the calibration value is above 75%RH. Press “▲” or “▼” button to increase or decrease the value, after finished calibration, press "HOLD"...
- Page 14 will appear on the lower part of LCD, which indicates the calibration value is below 35%RH, Press “▲” or “▼” button to increase or decrease the value, after finished calibration, press "HOLD" button to exit it and the calibrated value will be kept automatically, LCD display will as below: 11) Backlight ON/OFF;In the Power ON mode, press "...
-
Page 15: Notes
8. Notes ① This meter has already been calibrated before delivery. Do not revise the calibration parameters without professional personnel and device. The recommended calibration period is one year. ② Repairs or servicing not covered in this manual should only be performed by qualified personnel. ③...
Need help?
Do you have a question about the ET-951 and is the answer not in the manual?
Questions and answers