Advertisement
Advertisement
Table of Contents

Related Manuals for Ariel Rider Ebikes X-Class

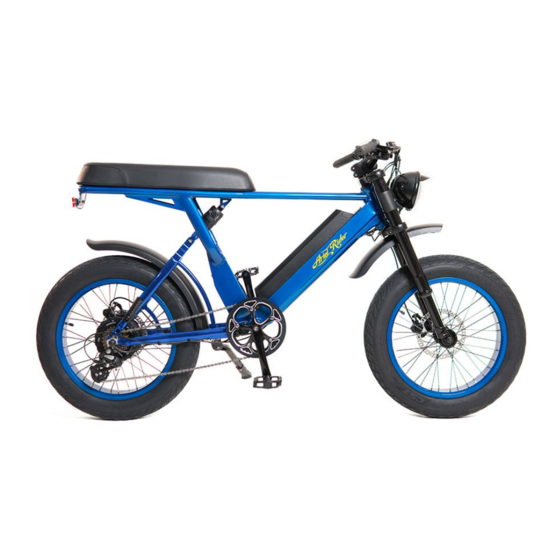
Summary of Contents for Ariel Rider Ebikes X-Class
- Page 2 Thank you for purchasing the X-Class from Ariel Rider Ebikes We take pride in bringing you a quality product that will offer years of enjoyment. Please read and understand this manual fully before assembling and riding your bike. If you have questions after reading this manual, please reference the Ariel Rider Ebikes Help Center, contact us by email, and/or give us a call on the phone.
-
Page 3: Using This Manual
All information in this manual should be carefully reviewed and if you have any questions you should contact Ariel Rider E-bikes immediately. The notes, warnings, and cautions contained within the manual and marked by the triangular Caution Symbol at the right of this page should also be given special care. - Page 4 Ariel Rider E-bikes makes every effort to ensure accuracy of its documentation and assumes no responsibility of liability if any errors or inaccuracies appear within.
-
Page 5: Table Of Contents
Table of Contents Using this Manual ......................1 General Info ........................3 Assembly Instructions ....................7 Battery Charging ......................15 Operation ........................19 Maintenance .........................32 Troubleshooting......................37 Warnings and Safety .....................39 Warranty ........................44 Links to Assembly Video and Online Resources ............46... -
Page 6: General Info
NOTICE: A critical aspect of assembling your bike from Ariel Rider E-bikes is securing the front wheel and checking the tightness of the rear wheel axle nuts. Both wheels need to be properly secured before operating your bike, and these nuts are to be checked every 45-50 miles. - Page 7 Ariel Rider E-bikes not explicitly recommended for your bike model, is at your own risk. Using aftermarket accessories or components that have not been tested by Ariel Rider E-bikes for safety and compatibility may void your warranty, create an unsafe riding condition, damage your bike by Ariel Rider...
- Page 8 If the throttle, brake lever cutoff switches, pedal assistance, or lighting is not functioning normally, intermittent, or not working, please discontinue using your X-Class immediately and contact the Ariel Rider E-bikes Technical Support team for assistance.
- Page 9 It is recommended that a certified, reputable bike mechanic performs all wheel tuning and truing operations on your bike from Ariel Rider E-bikes. Ensure your tires and inner tubes are in good working condition without any visual damage and have the correct amount of air pressure.
- Page 10 Accessories, Straps, and Hardware Ensure all hardware is secured and all approved accessories are properly attached per the specific component manufacturer’s instructions. It is good practice to look over all hardware, straps, and accessories before each ride and if you do discover something is wrong or find something you are not sure about, please have it checked by a certified, reputable bike mechanic.
-
Page 12: Assembly Instructions
NOTICE: The following assembly steps are only a general guide to assist in the assembly of your bike from Ariel Rider E-bikes and is not a complete or comprehensive manual of all aspects of assembly, maintenance, and repair. We recommend you consult a certified, reputable bike mechanic to assist in the assembly, repair, and maintenance of your bike. - Page 13 • Keys • If there are any missing parts, please contact Ariel Rider E-bikes. Step 2: Install handlebar onto stem. Be sure to center the handlebar and ensure hardware is properly secured. Before fully securing the handlebar to the stem, adjust the stem angle using the Allen bolts on the side of the stem.
- Page 14 Step 3: Install the front wheel components. Ensure front wheel is properly secured before moving on to the next step. When properly installed, the front wheel should be fully seated in the dropouts of the front fork, and the washers and nuts should be on the outside of the fork, please make sure everything is fully and properly secured.
- Page 15 into the pedal axle end, and a smooth exterior on the outside of the pedal axle (2, above). Carefully thread the right pedal onto the crank on the right side of the bike (the side with the drivetrain gears) slowly and by hand. Do not cross thread or damage the threads.
- Page 16 Step 5: Inflate tires to desired PSI. Recommended tire pressure is indicated on the tire sidewall. Do not overinflate or underinflate tires. Step 6: Always check that the battery is locked to the frame of the X-Class before riding. The Start-Up Procedure section of this manual has more information on the key positions of the battery;...
- Page 17 NOTICE: If you have any questions regarding the assembly of your bike, contact Ariel Rider E-bikes. If you are not able to ensure all the assembly steps in the assembly video are performed properly, or you are unable to view the assembly video, please consult a certified, reputable local bike mechanic for assistance in addition to contacting Ariel Rider E-bikes for help.
- Page 18 components are secured before moving on to next step otherwise damage to the bike, property, serious injury, or death could occur.
- Page 19 Hardware Location Hardware Torque Required (Nm) Handlebar Area Handlebar Stem Clamp Bolts Handlebar Area Stem Faceplate Bolts Handlebar Area Brake Lever Clamp Bolt Handlebar Area Shifter Clamp Screw Handlebar Area Stem Angle Adjust Brakes Caliper Adapter to Frame Brakes Caliper to Adapter Brakes Brake Cable to Caliper Clamp Brakes...
- Page 20 Bottom Bracket and Crank Pedal into Crank Arm Area Bottom Bracket and Crank Chainring Bolts Area Bottom Bracket and Crank Controller Mounting Bolts Area Fenders All Fender Mounting Bolts and Hardware...
- Page 21 Before using the bike, always check to ensure all latches, levers, and quick releases are properly secured and undamaged. Check that they are correctly secured before every ride and after every time the bike is left unsupervised, even for a short time. Otherwise, the handlebar stem and/or seat post may come loose and can result in loss of control, damage to the bike, property, serious injury, and/or death.
- Page 22 the Suspension Fork The X-Class comes equipped with an front suspension fork, These suspension forks can move up and down up to certain degree to cushion bumps in the riding surface, which can make riding on a rough road or trail smoother and more comfortable.
- Page 23 that pedal. Since the X-class doesn’t have an adjustable seat, in order to find your ideal riding position is positioning yourself towards the front end or the rear end of the banana seat.
-
Page 24: Battery Charging
Battery Charging Charging Procedure Follow these steps for charging your bike from Ariel Rider E-bikes: 1. Turn the bike off from the screen. 2. Remove the rubber cover on the charging port (other side of battery) on the opposite side of the battery from the key switch. - Page 25 Always charge your battery in temperatures between 50 °F – 77 °F (10 °C - 25 °C) and ensure the battery and charger are not damaged before initiating charge. If you notice anything unusual while charging, please discontinue charging and use of the bike and contact Ariel Rider E-bikes for help.
- Page 26 Battery Charging Information o Check the charger cables, charger, and battery for damage before beginning each charge. o Always charge in dry, indoor locations away from direct sunlight, dirt, or debris. o Charge in a clear area away from potential to trip on the charging cords or for damage to occur to the bike, battery, or charging equipment while parked and/or charging.
- Page 27 If the battery is physically damaged, non-functional, preforming abnormally, or was dropped or involved in a crash, with or without obvious signs of damage, please discontinue use and charging and contact Ariel Rider E-bikes immediately. Do not open the battery housing, which will void the warranty and can result...
- Page 28 In the case of damage to the terminals or battery mounts, please discontinue use and contact Ariel Rider E-bikes Technical Support immediately. When Installing the Battery onto the Bike o Do not force the battery onto the receptacle;...
- Page 29 the attachment of the battery to the mount. Charging Time When the input and output plugs of the charger are connected properly, and the battery is not fully charged, the red charging indicator light should illuminate, indicating the battery is charging. The time the charger takes to fully charge the battery is dependent on various factors including distance traveled, riding characteristics, terrain, payload, and battery age.
- Page 30 Charge the battery with the charger originally supplied with the bike from Ariel Rider E-bikes, or a charger purchased directly from Ariel Rider E-bikes, designed for use with your specific bike serial number, as approved by Ariel Rider E-bikes.
- Page 31 Ariel Rider E-bikes Technical Support. Please take special care in charging your bike from Ariel Rider E-bikes in accordance with the procedures and safety information detailed in this manual. Failure to follow proper charging procedures can result in damage to your bike from Ariel Rider E-bikes, the battery, the charger, personal property, and/or serious injury or death.
- Page 32 Long-Term Battery Storage If storing your bike from Ariel Rider E-bikes for longer than two weeks at a time, follow the instructions below to maintain the health and longevity of your battery. o Charge (or discharge) the battery to approximately 75% charged.
-
Page 33: Operation
Not taking care to familiarize yourself and practice the operation of the power system on your bike from Ariel Rider E-bikes can lead to death or serious injury, please heed this warning. - Page 34 Users must follow the instructions and warnings contained in this manual for safety. Do not attempt to operate your bike from Ariel Rider E-bikes until you have adequate knowledge of its control and operation. Damage caused by failing to follow instructions is not covered under warranty and could result in personal injury to you and others, and damage to property and/or your bike from Ariel Rider E-bikes.
- Page 35 2. Test the battery lock security. Ensure key port is aligned with the circle containing an “X,” in the “Locked” position indicating locked onto the frame mount. If needed, insert the key and align with the “Locked” icon. Remove the key and carefully use both hands to pull up on the battery to test that the lock is secure.
- Page 36 6. Begin riding carefully. With the proper safety gear, rider knowledge, and understanding you may now proceed to operate your bike from Ariel Rider E- bikes. You can begin by pedaling the bike in the appropriate drivetrain gear with pedal assist level 0 or 1.
- Page 37 Not taking care to familiarize yourself and practice the operation of the power system on your bike from Ariel Rider E-bikes can lead to death or serious injury, please heed this warning.
- Page 38 Handlebar Features Location on Component Handlebar LCD Display Shifter Thumb Throttle...
- Page 39 LCD Display Controls The display is controlled using the 3-button LCD Display Remote mounted on the left side of the handlebar (depicted at right). The top button shows an arrow pointing UP (1), the middle button is labeled “MODE” (2), and the bottom button shows an arrow pointing DOWN (3).
- Page 40 LCD Functional Description...
- Page 41 Power On/Off Press and hold Power button for 1 second can turn on/off the display. The Display can automatically shut down when the bike isn’t being used (X could be 0~9). Assist Levels Short press UP/DOWN button can change the assist level. Speed &...
- Page 42 **If there is no operation for 5 seconds, display will return Speed (Real-Time) display automatically. Headlight & Backlight Turn On/Off Press and hold UP/+ button for 2 seconds to turn on/off the headlight. *The motor does not work when the battery voltage is low, Display still can keep the headlight on for a while when E-bike is in riding.
- Page 43 Walking Mode (3 mph) Press and hold DOWN button to activate walking mode. Parameter Settings. Press MODE button (press no less than 2 seconds) to get into setting menus, press UP/DOWN buttons to change the parameter setting, and press MODE button can switch...
- Page 44 to next item. Press MODE (press no less than 2 seconds) button in order to exit from menu. * Display will automatically quit menu when there is no operation for 10 seconds. * For safety reasons, display can’t get into MENU when riding. * Display will quit MENU when start riding The order of parameters is as follows:...
- Page 45 Clear(Cr): Press Up / Down button to change yes can reset several temporary data, temporary data include AVG Speed / MAX Speed / Trip / Time.
- Page 46 System (S7): Press Up / Down button to switch between Metric / Imperial.
- Page 47 Brightness (b1): Press Up / Down button to change the brightness of the backlight, 1 is darkness 5 is brightness.
- Page 48 Auto off (OF): Press UP/DOWN button to change the auto power off time, from 0~15, the number represent time (minutes) to shutdown, OFF means disable auto off function, default value is 5 minutes.
- Page 49 Wheel (Hd): Press UP/DOWN can change the wheel setting, optional wheel diameter is 16~29 inch. Please keep X-Class wheel diameter at 24 inches in order to get correct speed readings on the screen.
- Page 50 Voltage set(bO) : Press UP/DOWN button rotate display the symbol 24V/36V/48V/52V/UbE, UbE means user-defined voltage setting, this parameter can be set through computer. Please do not change this value.
- Page 51 Password (Pd): Press MODE button can get into the advance setting menu, default password is ‘1919’.
- Page 52 Speed limit (SL): Press UP/DOWN will change speed limit, range 10km/h~41km/h. Default value is 25km/h.
- Page 53 Error Codes X-class can show warning message, icon shows on the screen, and show error code at the bottom of the screen, error code is from 01 E~0nE, and the definition see the table below.
- Page 55 Best Practices for Extending Range and Battery Life Notice: It is recommended that users pay close attention and ride within the following limitations to ensure the hub motor does not overheat or become damaged from excessive loading. o To ensure adequate airflow to cool the electric components, keep the bike moving over 10 mph, or under 500 watts.
- Page 56 Driving Range The range of your bike from Ariel Rider E-bikes is the distance the bike will travel on a single full charge of the onboard battery pack. The range values in this manual are estimates based on Ariel Rider E-bikes expected usage characteristics. Some of the factors which effect range include changes in elevation, speed, payload, acceleration, number of starts and stops, and ambient air temperatures.
- Page 57 Expected Operating Condition(s) Range 20 mi (32 km) Hilly Terrain Heavy Payload Windy High Pedal Assist Level/ High Throttle Use Light Pedaling 30 mi (48 km) Flat Terrain Normal Payload Not Windy Medium Pedal Assist Level/ Moderate Throttle Use Light Pedaling 40 mi (64 km) Flat Terrain Normal Payload...
- Page 58 Do not assume the bike is stable and balanced when using the kickstand. Always hold onto the bike when cargo is being loaded, in place, or attached to the bike by Ariel Rider E- bikes.
- Page 59 Carrying Cargo Carrying a cargo load involves additional risks, which require special attention and care to mitigate and manage. Braking, acceleration, and balancing are all significantly affected by the addition of cargo loaded on the X-Class. You must become accustomed to the braking, steering, and operational adjustments required to safely operate the X-Class with cargo.
- Page 60 normally easy to climb and descend without cargo can become challenging and dangerous once cargo is loaded onto the bike. o Become proficient at controlling the X-Class with the cargo load in a flat and open area before riding on roads or hills. Do not use the front brake by itself.
- Page 61 In public places, your bike from Ariel Rider E-bikes must be parked in accordance with local rules and regulations.
- Page 62 Ariel Rider E-bikes safe from theft. o Do not park, store, or transport your bike from Ariel Rider E-bikes on a rack not designed for the bike’s size and weight.
-
Page 63: Maintenance
Maintenance Basic Bike Care To ensure safe riding conditions you must properly maintain your bike from Ariel Rider E-bikes. Follow these basic guidelines and see a certified, reputable bike mechanic at regular intervals to ensure your bike is safe for use and fun to ride. See the Pre- Ride Safety Checklist and Recommended Service Intervals sections below for more detailed information. - Page 64 materials. If exposed to rain, dry your bike afterwards and apply anti-rust treatment to chain and other unpainted steel surfaces. 6. Riding on the beach or in coastal areas exposes your bike to salt, which is very corrosive. Wipe down your bike frequently and wipe or spray all unpainted parts with anti-rust treatment.
- Page 65 Tire Inflation and Replacement The X-Class employs 20’’ x 4’’ rubber tires with inner tubes. The tubes use Schrader valves to adding/reducing air pressure. The tires are designed for durability and safety for regular cycling activities and the tires need to be checked before each use for proper inflation and condition.
- Page 66 Failure to remove all air pressure from the inner tube could result in serious injury. Using aftermarket tires or inner tubes, not provided by Ariel Rider E-bikes may void your warranty, create an unsafe riding condition, or damage to your bike from Ariel Rider E-bikes.
- Page 67 Pre-Ride Safety Checklist Safety Check Basic Steps 1. Brakes Ensure front and rear brakes work properly. Check brake pads for wear and ensure they are not over-worn. Ensure brake pads are correctly positioned in relation to the rims. Ensure brake control cables are lubricated, correctly adjusted, and display no obvious wear.
- Page 68 4. Chain Ensure the chain is oiled, clean, and runs smoothly. Extra care is required in wet, salty/otherwise corrosive, or dusty conditions 5. Bearings Ensure all bearings are lubricated, run freely, and display no excess movement, grinding, or rattling. Check headset, wheel bearings, pedal bearings, and bottom bracket bearings. 6.
- Page 69 7. Derailleurs Check that the derailleur is adjusted and functioning properly. Ensure shifter and brake levers are attached to the handlebar securely. Ensure all brake and shift cables are properly lubricated. 8. Frame, Fork, and Seat Check that the frame and fork are not bent or broken. If either frame or fork are bent or broken, they should be replaced.
- Page 70 12. Accessories Ensure all reflectors are properly fitted and not obscured. Ensure all other fittings on bike are properly secured and functioning. Inspect helmet and other safety gear for signs of damage. Ensure rider is wearing helmet and other required riding safety gear. Ensure mounting hardware is properly secured if fitted with rear rack.
- Page 71 - Check hardware for proper torque: - Clean frame by wiping , 100- See Recommended Torque Values frame down with damp confirmed by Ariel Rider E- chart. cloth. bikes Technical Support or miles - Check drivetrain for proper alignment and...
- Page 72 Regular inspection and maintenance are key to ensure bikes from Ariel Rider E-bikes function as intended, and to reduce wear and tear on their systems. Recommended service intervals are meant to be used as guidelines. Real world wear and tear, and the need for service, will vary with conditions of use.
-
Page 73: Troubleshooting
Troubleshooting Basic Troubleshooting Symptoms Possible Causes Most Common Solutions 1 It doesn’t work Insufficient battery power Charge the battery pack Faulty connections Clean and repair Battery not fully seated in connectors tray Install battery correctly Improper turn on sequence Turn on bike with proper Brakes are applied sequence Disengage brakes... - Page 74 4 Reduced range Low tire pressure Adjust tire pressure Low or faulty battery Check connections or Driving with too many charge battery hills, headwind, braking, Assist with pedals or adjust and/or excessive load route Battery discharged for Replace the battery long period of time Adjust the brakes without regular charges...
-
Page 76: Warnings And Safety
Notice: It is recommended that users pay special attention to all the general operating rules below before operating their bike from Ariel Rider E-bikes. o When riding, obey the same road laws as all other road vehicles as applicable by law in your area. - Page 77 cyclists. o Familiarize yourself with all the features and operations of the bike by Ariel Rider E-bikes. Practice and become proficient at shifting gears, applying the brakes, using the power assist system, and using the throttle in a controlled setting before riding in riskier conditions. o Wear proper riding clothes including closed-toe shoes.
- Page 78 Safety Notes The following safety notes provide additional information on the safe operation of your bike from Ariel Rider E-bikes and should be closely reviewed. Failure to review these notes can lead to serious injury or death. o All users must read and understand this manual before their first use of the bike from Ariel Rider E-bikes.
- Page 79 Do not use this product with standard bike trailers, stands, vehicle racks, or accessories that Ariel Rider E-bikes has not tested for safety and compatibility and have verified as safe and compatible with the bike. Contact Ariel Rider E- bikes to check if your equipment will work with the bike.
- Page 80 o Bikes and bike parts have strength and integrity limitations and extreme riding should not be performed as it can damage bike components and/or cause or lead to dangerous riding situations in which you may be seriously injured or killed. o Failure to perform and confirm proper installation, compatibility, proper operation, or maintenance of any component or accessory can result in serious injury or death.
- Page 81 Always use the lowest assist level until you are comfortable with the bike and feel confident in controlling the power. o Any aftermarket changes to your bike from Ariel Rider E-bikes not expressly approved by Ariel Rider E-bikes could void the warranty and create an unsafe riding experience.
- Page 82 Helmets It is strongly advised that a properly fitting ANSI or SNELL approved bicycle safety helmet is always worn when riding your bike. Always wear a properly fitted helmet which covers the forehead when riding a bike. Many locations require specific safety devices. It is your responsibility to familiarize yourself with the local laws, rules and regulations where you ride and to comply with all applicable laws, including properly equipping yourself and your...
- Page 83 damage, injury, and death. Biking and controlled substances do not mix. Never operate a bike while under the influence of alcohol, drugs, or any substance or condition that could impair motor functions, judgement, or the ability to safely operate a bike/vehicle. The X-Class is designed for use by persons 18 years old and older.
- Page 84 Wet Weather It is recommended to not ride in wet weather if avoidable. Ride in wet weather only if necessary. This electric bike is not meant for use in puddles, heavy rain, or streams. Never immerse or submerge this product in water or liquid as the electrical system may be damaged.
- Page 85 o Wear reflective and light-colored clothing. o Slow down and use familiar roads with street lighting, if possible. o Ensure tire wall, pedal, and other reflectors are installed and unobstructed. o Ensure head light and taillight/brake light are functioning correctly and use them. A Note for Parents and Guardians As a parent/guardian, you are responsible for the activities and safety of your child.
-
Page 86: Warranty
Limited Warranty Warranty Info Every bike by Ariel Rider E-bikes is covered under a manufacturer's one-year all-inclusive warranty for the original owner against all manufacturing defects. Warranty details below are subject to change at any time; for the most current warranty version, visit https://arielrider.com/pages/warranty. - Page 87 wear, or water damage. Warranty Exclusions o Liability for material defects does not cover normal wear and tear, which occurs from the manufacturers’ intended use of the product. Components such as the battery pack, motor system, braking system, drivetrain system, seat, grips and pedals are all subject to intended use-related wear and are not covered under the warranty from normal wear.
- Page 88 Ariel Rider E-bikes will not be liable and/or responsible for any damage, failure, or loss caused by any unauthorized service or use of unauthorized parts. In no event shall Ariel...
- Page 89 power assistance. This is because the X-Class can travel at higher average speeds than regular cycles and has a greater weight. Higher wear is not a defect in the product and is not subject to warranty. Typical components affected are the tires, brake pads and rotors, suspension forks, spokes, wheels, and the battery pack.
- Page 90 We are here to help! If you have questions, please: Access Ariel Rider E-bikes Help Center (www.arielrider.com/help), Contact us directly by email to info@arielrider.com...
Need help?
Do you have a question about the Ebikes X-Class and is the answer not in the manual?
Questions and answers
What are the actual specs for this particular Motor
The Ariel Rider X-Class motor is a high-torque motor rated at 60V. It is designed for speed, power, and versatility, and is the highest torque motor in its class.
This answer is automatically generated