
Summary of Contents for Druck DPI 8 Series
-
Page 1: Table Of Contents
Data Logging Upgrade Kit Instruction Manual English 1 – 4 Deutsch 5 – 8 Español 9 – 12 Français 13 – 16 Italiano 17 – 20 Português 21 – 24 Русский 25 – 28 中文 29 – 32 日本語 33 – 36 Druck.com... - Page 3 A2.1 A2.2 Copyright 2005 Baker Hughes Company. English–DPI 8xx Series Data Logging Upgrade Kit | i...
- Page 4 B2-A DPI 800/802; DPI 811/812; DPI 821/822; DPI 832; DPI 841/842 B2-B DPI 880 Copyright 2005 Baker Hughes Company. ii | DPI 8xx Series Data Logging Upgrade Kit–English...
-
Page 5: English
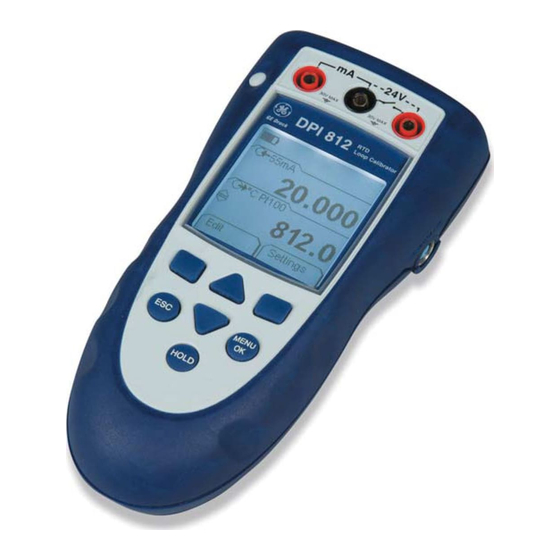
Druck DPI 8xx series instrument (Note: Snapshot is a A soft-key function. To select an available function, press Sk1/2 standard part of the Druck DPI 820 - Dual Input the soft-key below it. Example: Sk2 = Stop Log Thermometer). The display is showing data from one of the Snapshot The upgrade kit gives the applicable DPI 8xx instrument files. - Page 6 Table 1: (Part of table) Installation procedures for Snapshot Operation - Use the Snapshot functions Use Snapshot to record up to 1000 displays then examine the Step Procedure results on the display (Figure A2.2), or transmit all the data to For these models: DPI 800/802;...
- Page 7 Snapshot - Setup When you select Snapshot Setup (Table 3): Step Procedure 1. Set up a tag name for the Snapshot file. Example = abc A1 - Item 1b: Connect the 5-pin connector to the IDOS instrument. Menu: Edit...
- Page 8 4 - [EN] English K0397 Revision A...
-
Page 9: Deutsch
Die Datenlogger-Funktion ist so konfiguriert, dass die auf Mit dem Upgrade-Kit für Datenprotokolle können Sie die dem Display angezeigten Daten aufgezeichnet werden Option Datenlogger zu einem Gerät der Serie Druck DPI 8xx (Taste oder Periodisch) - Tabelle 3 hinzufügen (Anmerkung: Die Option Datenlogger gehört zur Datenlogger schreibt Daten in eine vorgegebene Datei. - Page 10 Tabelle 1: (Teil der Tabelle) Betrieb - Datenlogger-Funktionen verwenden Datenlogger-Installationsverfahren Verwenden Sie die Option Datenlogger, um bis zu 1000 Anzeigen aufzuzeichnen, die Ergebnisse auf dem Display zu Schritt Vorgehensweise untersuchen (Abbildung A2.2) oder alle Daten an einen PC Für diese Modelle: DPI 800/802; DPI 811/812; DPI 821/822; DPI 832; oder einen Drucker zu übertragen (Abbildung 3).
- Page 11 Datenlogger - Einstellung Wenn Sie Einstellung Logger wählen (Tabelle 3): Schritt Vorgehensweise 1. Geben Sie eine Tag-Nr. für die Datenlogger-Datei ein. A1 - Element 1b: Verbinden Sie den 5-poligen Stecker Beispiel = abc mit dem IDOS-Gerät. A1 - Element 1b: Verbinden Sie den 9-poligen Stecker Menü: ...
- Page 12 8 - [DE] Deutsch K0397 Revision A...
-
Page 13: Español
El kit de actualización de toma de muestras le permite añadir para grabar los datos en pantalla (Teclado o Periódico) - Imagen instantánea a un instrumento Druck de la serie Tabla 3 DPI 8xx (Nota: Imagen instantánea es estándar en el Imagen instantánea está... - Page 14 Tabla 1: (Tabla parcial) Procedimientos de instalación de Funcionamiento - Utilización de las funciones de Imagen Imagen instantánea instantánea Utilice Imagen instantánea para grabar hasta 1 000 pantallas Paso Procedimiento y examinar los resultados en la pantalla (Figura A2.2) o Para los modelos: DPI 800/802;...
- Page 15 Imagen instantánea - Configuración Al seleccionar Config. Imagen (Tabla 3): Paso Procedimiento 1. Configure un nombre de etiqueta para el archivo de A1 - Elemento 1b: Conecte el conector de 5 patillas al Imagen instantánea. Ejemplo = abc instrumento IDOS.
- Page 16 12 - [ES] Español K0397 Revisión A...
-
Page 17: Français
Mémorisation à un instrument de la fichier spécifique. série DPI 8xx de Druck (Remarque : Ce mode est disponible Fonction de touche programmable. Pour sélectionner en standard sur le thermomètre à double entrée DPI 820 de... - Page 18 Tableau 1 : Procédure d'installation du mode Mémorisation Fonctionnement - Utilisation des fonctions de (tableau partiel) mémorisation Le mode Mémorisation permet d'enregistrer jusqu'à Étape Procédure 1 000 affichages, puis d'examiner les résultats à l'écran Pour les modèles suivants : DPI 800/802 ; DPI 811/812 ; (Figure A2.2) ou de transmettre toutes les données vers un DPI 821/822 ;...
- Page 19 Mémorisation - Configuration Lorsque l'option Prog. Memo. est sélectionnée (Tableau 3) : Étape Procédure 1. Attribuer un nom au fichier de mémorisation. A1 - élément 1b : Raccorder le connecteur à Exemple = abc 5 broches à l'instrument IDOS. A1 - élément 1b : Raccorder le connecteur à...
- Page 20 16 - [FR] Français K0397 Révision A...
-
Page 21: Italiano
Snapshot scrive i dati nel file specificato. Il kit di registrazione dati consente di aggiungere le funzioni Snapshot a uno strumento della serie Druck DPI 8xx (Nota: lo Funzione a tasto. Per selezionare una funzione Snapshot è un elemento standard del termometro a doppio disponibile, premere il tasto sotto di essa. - Page 22 Tabella 1: (Parte della tabella) Procedure di installazione della Uso - Usare le funzioni Snapshot funzione Snapshot Usare le funzioni Snapshot per registrare fino a 1000 videate ed esaminarne i risultati sullo schermo (Figura A2.2) o Passi Procedura trasmettere i dati a un PC o una stampante (Figura 3). Per questi modelli: DPI 800/802;...
- Page 23 Snapshot - Impostazione Quando si seleziona Impostazione (Tabella 3): Passi Procedura 1. Si imposta un nome tag per il file Snapshot. Esempio = A1 - Numero 1b: Collegare il connettore a 5 pin allo strumento IDOS. A1 - Numero 1b: Collegare il connettore a 9 pin alla Menu: ...
- Page 24 20 - [IT] Italiano K0397 Revisione A...
-
Page 25: Português
Snapshot está gravando dados em um arquivo adicionar o Snapshot a um instrumento da série específico. Druck DPI 8xx (Observação: O Snapshot é uma parte padrão Uma função de tecla personalizada. Para selecionar do Termômetro de entrada dupla do Druck DPI 820). - Page 26 Tabela 1: (Parte da tabela) Procedimentos de instalação do Operação - Use as funções do Snapshot Snapshot Use o Snapshot para registrar até 1000 visores e examine os resultados do visor (Figura A2.2) ou transmita todos os dados Passo Procedimento para um PC ou impressora (Figura 3).
- Page 27 Snapshot - Conf. Quando você seleciona Ajuste do Snapshot (Tabela 3): Passo Procedimento 1. Ajuste um TAG para o arquivo do Snapshot. Exemplo = A1 - Item 1b: Conecte o conector de 5 pinos ao instrumento IDOS. A1 - Item 1b: Conecte o conector de 9 pinos à porta Menu: ...
- Page 28 24 - [PT] Português K0397 Revisão A...
-
Page 29: Русский
Функция счит-ние настраивается для записи данных на дисплее (кноп.управл или период.) - Таблица 3. Комплект обновления регистрации данных позволяет Функция счит-ние записывает данные в указанный добавлять считывание к прибору серии Druck DPI 8xx. файл. (Примечание. Считывание - стандартная часть Функция программной клавиши. Для выбора... - Page 30 Таблица 1. (начало) Процедуры установки для Эксплуатация. Использование функций считывания считывания Используйте считывание для записи до 1000 значений и последующего просмотра показаний на экране (рис. A2.2) Этап Процедура или передачи данных на ПК или принтер (Ðèñ. 3.). Для моделей: DPI 800/802; DPI 811/812; DPI 821/822; DPI 832; На...
- Page 31 Считывание. Настройка. При выборе установ считыв. (Таблица 3) выполните Этап Процедура указанные ниже действия. A1 - позиция 1b: подключите 5-контактный разъем к 1. Введите таг для файла считывания. Например = abc прибору IDOS. A1 - позиция 1b: подключите 9-контактный разъем к Меню: ...
- Page 32 28 - [RU] Русский K0397 Редакция A...
- Page 33 说明 用户手册 安装快摄 功能的目的是记录显示屏上的数据(按键或周期 的)- 表 3 介绍 快摄 正在将数据写入到指定的文件。 数据记录升级套件允许您向一台 Druck DPI 8xx 系列仪器添加 软键功能。要选择某项可用的功能,请按该功能下方的软 快摄 (注:“ 快摄 ” 属于 Druck DPI 820 (双输入热电偶) 键。示例:Sk2 = 停止记录 Sk1/2 的一个标准部件) 。 显示屏显示其中一个快摄 文件中的数据。 升级套件为相应的 DPI 8xx 仪器提供了以下附加功能: 标识快摄 文件的数据: 功能...
- Page 34 表 1: (续表)快摄的安装步骤 操作 - 使用快摄功能 使用快摄 最多可以记录 1000 条显示内容,记录之后可以检查 步骤 操作过程 显示屏上的结果(图 A2.2)或者将所有数据传输到 PC 或打印 适用于以下型号: 机 (Õº 3) 。 DPI 800/802£ªDPI 811/812£ªDPI 821/822£ªDPI 832£ªDPI 841/842 Õº 1 显示了不同的 DPI 8xx 型号的快摄 选择顺序。 B2-A:1 选择设置 选择 菜单: 快摄 快摄 B2-A:2 选择状态...
- Page 35 快摄 - 设定 选择快摄设定 (表 3)时,请执行以下操作: 步骤 操作过程 1. 为快摄 文件设置一个标签名。示例 = abc A1 - 编号 1b:将 5 针连接器连接至 IDOS 仪器。 , 菜单: A1 - 编号 1b:将 9 针连接器连接至 PC 上的串行端口或 编辑 编辑 快摄 连接至串行打印机 (请参考 PC 或打印机说明) 。 PC :...
- Page 36 32 - [ZH] 中文 K0397 修订版 A...
- Page 37 「スナップショット」機能は、ディスプレイのデータを はじめに 記録するように設定されます ( 「キープレス」 または 「時間間隔」) - 表 3 データロギングアップグレードキットは、 「スナップショッ 「スナップショット」は、指定されたファイルへデータ ト 」を 1 台の Druck DPI 8xx シリーズ機器に追加するもので を書き込みます。 す ( 注 : スナップショットは、Druck DPI 820 の標準部品で ソフトキー機能です。利用可能な機能を選択するには、 その機能の下のソフトキーを押します。例 : Sk2 = ログ す - デュアル温度計 )。...
- Page 38 表 1: ( 表の一部 ) スナップショットのインストール手順 操作 - スナップショット機能の使用 「スナップショット」を使用して、最大 1000 点の表示を記 ステップ 手順 録し、表示部 ( 図 A2.2) で その結果を調べるか、すべてのデ 以下のモデルの場合 : DPI 800/802; DPI 811/812; DPI 821/822; ータを PC またはプリンタに送信します (ê} 3)。 DPI 832; DPI 841/842 ê} 1 は、異なる DPI 8xx のモデルに対して 「スナップショ B2-A: 1 「セットアップ」を選択します。...
- Page 39 スナップショット - セットアップ 「スナップショット設定」を選択した場合 ( 表 3)): ステップ 手順 1. 「スナップショット」ファイルの 「タッグ・ネーム」を A1 - アイテム 1b: 5 ピンコネクタを IDOS 機器に接続 セットアップします。 例 = abc します。 A1 - アイテム 1b: 9 ピンコネクタを PC のシリアルポ メニュー: ートまたはシリアルプリンタに接続します (PC また スナップショッ...
- Page 40 36 - [JP] 日本語 K0397 改訂 A...
- Page 44 India Japan Toulouse Pune Tokyo +33 562 888 250 +91-2135-620421~425 +81 3 6894 1838 sensing.FR.cc@bakerhughes.com mcindia.inhouseservice@bakerhughes.com service.druck.jp@bakerhughes.com Abu Dhabi Leicester Billerica +971 2 4079381 +44 (0) 116 2317107 +1 (281) 542-3650 ...
Need help?
Do you have a question about the DPI 8 Series and is the answer not in the manual?
Questions and answers