Advertisement
Quick Links
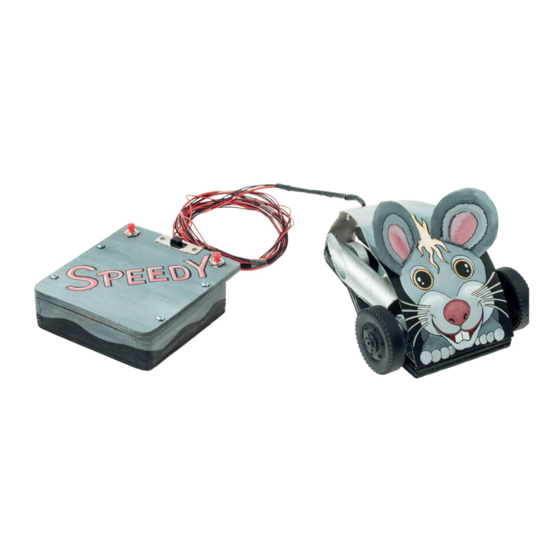
B i - P o w e r - S p e e d y w i t h W i r e d
Required Tools:
sand paper
fine saw or scroll saw
scissor, ruler, pencil
drill ø2.5, ø4, ø 7, ø10mm
wood glue and all purpose adhesive
modeling knife
soldering iron, solder flux
Contents list
Plywood
Plywood
Grey Cardboard
Hard Paper Pipe
Wooden Wheel
Impeller
Wooden Strip
Motor
Bow
Brass Case
Reducer
Push Button
Slide Switch
Tapping Screw
Tapping Screw
Blade Receptacle
Washer
Cable red
Cable black
E115855#1
115855
R e m o t e C o n t r o l
The OPITEC range of projects is not intended as play toys for young
children. They are teaching aids for young people learning the skills
of craft, design and technology. These projects should only be un-
dertaken and operated with the guidance of a fully qualified adult.
The finished projects are not suitable to give to children under 3
years old. Some parts can be swallowed. Danger of suffocation!
Qty
Dimensions(mm) Designation
1
200x100x5 Construction control
1
200x80x8 Construction vehicle
1
210x150x1 Construction vehicle
1
ø 19,5x300 Exhaust
1
2
1
350x25x10 Composition Controling
2
2
1
2
2
1
36x13, 6-polig Switch
1
8
2
6
2
2
Please Note
ø 30 Wheel Rear Axle
ø 45 Wheel Front Axle
Drive
21 Attachment Motor
ø4 x 8 Axle-Box Back Wheel
3/2 Reduction Motor Shaft
Control
2,9x25 Rear Axle
2,9x9,5 Screwing
Battery Connector
7/3,2 Washer
2000 Cabling
2000 Cabling
Part no.
1
2
3
4
5
6
7
8
9
10
11
12
13
14
15
16
17
18
19
1
Advertisement

Summary of Contents for Opitec 115855
- Page 1 R e m o t e C o n t r o l Required Tools: Please Note sand paper The OPITEC range of projects is not intended as play toys for young fine saw or scroll saw children. They are teaching aids for young people learning the skills scissor, ruler, pencil of craft, design and technology.
- Page 2 Instructions to build the vehicle: 1. Transfer the template of the base (page 7) on the plywood and saw it with the fretsaw. Clean and sand the sawed edges. Drill a ø2,5 mm drilling in the side edge. See picture! 17,5 3.
- Page 3 6. Fix the bevelled pipe pieces (4a), left and right of the 7. Insert a reducer (11) in the drilling hole of the wheels (6). 50mm pipe, on the base as shown. In addition put each wheel on a motor axis. scratch score 9.
- Page 4 Instructions to build the control: 11. Cut the wooden strip (7) as shown. Mark the center of a 80mm strip and drill a hole ø 4mm into it. 12. Cut the plywood (1) as shown in two parts with 90mm and 110mm. Take the piece which is 110mm long and saw the opening for the slide switch.
- Page 5 Cabling of the control: 15. Take a red and a black cable and cut a piece of 20 mm of each wire. Now re isolate the 4 ends and tin them. Connect the two cables crosswise to the external connections of the slide switch. (see diagram;...
- Page 6 17. Replace the lid on the control as shown and fix it with 4 screws (15). Hint: After function control glue the construction on the base with wood glue. Funktionsbeschreibung: Taster steuern die Motore einzeln links und rechts. Der Schiebeschalter ist ein Umpolschalter, d.h. Stellung V, Spee- dy fährt vorwärts, Stellung R, Speedy fährt rückwärts.
- Page 7 Template base Scale 1:1 Template hard paper pipe Scale 1:1 E115855#1...
- Page 8 E115855#2...
- Page 9 Template grey cardboard mouse Scale 1:1 E115855#1...
Need help?
Do you have a question about the 115855 and is the answer not in the manual?
Questions and answers