
Related Manuals for LG DF22BV2BR


Summary of Contents for LG DF22BV2BR
- Page 1 항목 Spec. 재질 모조지 평량 사이즈 페이지 수 인쇄 도수 1도 코팅 무 코팅 종류 무 양면 인쇄 여부 양면 접지 횟수 Card,Registration Living Appliance MBM6821507...
- Page 2 5. Before p roduct cont rolled by criteria sample. 6. This part should comply with the criteria of Level A-I, A-II restricted hazardous substances which refers to LGE standard LG(10)-A-9023 and the hazardous substance management manual for the suppliers DR COMPLETED 도면...
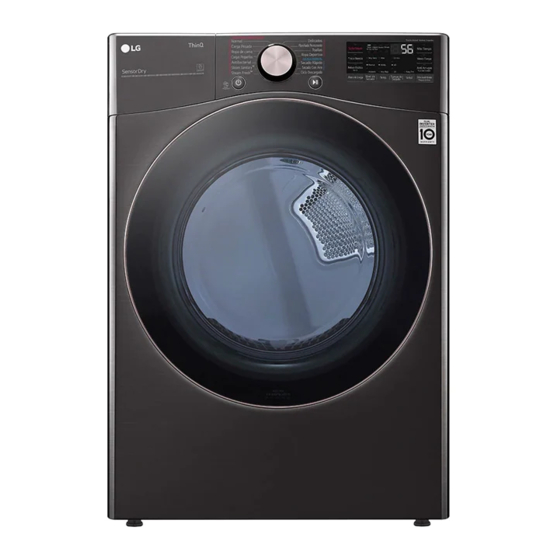
- Page 3 DRYER Read this owner’s manual thoroughly before operating the appliance and keep it handy for reference at all times. ENGLISH DF22BV2BR, DF22VV2SBR, DF22WV2BR, DF22BV2BRE, DF22VV2SBRE, DF22WV2BRE, DF22WV2R, DF22WV2RE www.lg.com MFL70442663 Rev.00_111621 Copyright © 2021 LG Electronics Inc. All Rights Reserved.
-
Page 4: Table Of Contents
TABLE OF CONTENTS PRODUCT FEATURES 43 SMART FUNCTIONS LG ThinQ Application SAFETY INSTRUCTIONS Smart Diagnosis™ Function IMPORTANT SAFETY INSTRUCTIONS 46 MAINTENANCE PRODUCT OVERVIEW Regular Cleaning Parts 47 TROUBLESHOOTING Accessories FAQs: Frequently Asked Questions 10 INSTALLATION User Support Videos Before Calling for Service... -
Page 5: Product Features
Steam Functions (Steam Models) LG’s steam technology allows you to inject fabrics with a swirling jet of hot steam to refresh clothes, reduce static, and make ironing easier. Simply select the Steam Fresh™ cycle, or you can add a Steam option to selected cycles. -
Page 6: Safety Instructions
SAFETY INSTRUCTIONS SAFETY INSTRUCTIONS READ ALL INSTRUCTIONS BEFORE USE Your safety and the safety of others are very important. We have provided many important safety messages in this manual and on your appliance. Always read and follow all safety messages. This is the safety alert symbol. -
Page 7: Important Safety Instructions
SAFETY INSTRUCTIONS IMPORTANT SAFETY INSTRUCTIONS WARNING To reduce the risk of explosion, fire, death, electric shock, scalding or injury to persons when using this product, follow basic precautions, including the following: INSTALLATION • Before use, the appliance must be properly installed as described in this manual. •... - Page 8 • Do not grasp the power cord or touch the appliance controls with wet hands. • Do not modify or extend the power cord. • If the product has been submerged, contact an LG Electronics customer information center for instructions before resuming use.
- Page 9 SAFETY INSTRUCTIONS • Read all instructions before using the appliance and save these instructions. • Use this appliance only for its intended purpose. • Do not abuse, sit on, or stand on the door of the appliance. • Do not allow children to play on, in or with the appliance. Close supervision of children is necessary when the appliance is used near children.
- Page 10 SAFETY INSTRUCTIONS MAINTENANCE • Do not repair or replace any part of the appliance. All repairs and servicing must be performed by qualified service personnel unless specifically recommended in this Owner’s Manual. Use only authorized factory parts. • Do not disassemble or repair the appliance by yourself. •...
-
Page 11: Product Overview
PRODUCT OVERVIEW PRODUCT OVERVIEW Parts Power Power Terminal Terminal Reversible Reversible Cord Cord Block Block door door (gas (gas Access Access Control Control models) models) Panel Panel panel panel (electric (electric models) models) Lint Lint filter filter Leveling Leveling connection connection feet feet... -
Page 12: Installation
Level the dryer Vent the dryer proper location Connect the inlet hose Connect the Gas dryer Connect the Electric dryer (steam models) DF22BV2BR, DF22VV2SBR, DF22WV2BR, DF22BV2BR, DF22VV2SBR, DF22WV2BR, DF22BV2BRE, DF22VV2SBRE, DF22WV2BRE DF22BV2BRE, DF22VV2SBRE, DF22WV2BRE DF22WV2R, DF22WV2RE DF22WV2R, DF22WV2RE Gas dryer... -
Page 13: Installation Location Requirements
INSTALLATION Installation Location Requirements WARNING • Read all installation instructions completely before installing and operating your dryer. It is important that you review this entire manual before installing and using your dryer. Detailed instructions concerning electrical connections, gas connections, and exhaust requirements are provided on the following pages. WARNING To reduce the risk of serious injury or death, follow basic precautions, including the following: •... -
Page 14: Clearances
12 INSTALLATION Clearances 14" max.* 14" max.* (356 mm) (356 mm) 18" min.* (457 mm) 18" min.* (457 mm) 1"* 30 - 30 5"** 1"* 5"** 30 - 30 1/8" (25 mm) (127 mm) (25 mm) 1/8" (127 mm) (761 - 765mm) (761 - 765mm) 3"... - Page 15 INSTALLATION Installation Spacing for Recessed Area or Closet, with Stacked Washer and Dryer 6" 3" (152 mm) (76 mm) 48 in. (310 cm 77 ½" (1968 mm) 24 in. (155 cm 3" (76 mm) 1" 5 ½" 1" 27" 1" (25 mm) (140 mm) (25 mm)
-
Page 16: Leveling The Dryer
14 INSTALLATION Leveling the Dryer Use an adjustable wrench to turn the leveling feet. Unscrew the legs to raise the dryer or screw in the legs to lower it. Adjust the leveling NOTE feet until the dryer is level from side to side and •... -
Page 17: Reversing The Door
INSTALLATION Reversing the Door While supporting the door, remove the 2 screws on the door hinge. Remove the door. Tools Required • Phillips screwdriver • Large flat blade screwdriver (recommended for hinge screws if they are tight or your Phillips screwdriver is worn) •... -
Page 18: Installing The Side Vent Kit
An adapter kit, part number 383EEL9001B, may be Elbow Elbow 1½" (38 mm) 1½" (38 mm) purchased from your LG retailer. This kit contains duct components necessary to change the dryer vent location. Remove the rear exhaust duct retaining screw. Option 2: Bottom Venting Pull out the exhaust duct. -
Page 19: Stacking The Dryer
INSTALLATION Stacking the Dryer To ensure safe and secure installation, please observe the following instructions. Stacking Kit Installation Make sure the surface of the washer is clean This stacking kit includes: and dry. Remove paper backing from the tape on one of the stacking kit side brackets. •... -
Page 20: Venting The Dryer
18 INSTALLATION Venting the Dryer WARNING • Ductwork is not provided with the dryer. You WARNING should obtain the necessary ductwork locally. The vent hood should have hinged dampers to To reduce the risk of fire or explosion, electric prevent backdraft when the dryer is not in use. shock, property damage, injury to persons or •... - Page 21 INSTALLATION Routing and Connecting Ductwork Correct Venting NOTE Follow the guidelines below to maximize drying performance and reduce lint buildup and condensation in the ductwork. Ductwork and fittings are NOT included and must be purchased separately. • Use 4-inch (10.2 cm) diameter rigid, semi-rigid or flexible metal ductwork.
-
Page 22: Connecting The Inlet Hose (Steam Models)
20 INSTALLATION Connecting the Inlet Hose WITHOUT WASHER: If the dryer does not share the cold water tap with a washer. (Steam Models) a. Connect the straight end of the long hose to the cold water faucet. The dryer must be connected to the cold water tap using the new water supply hose. -
Page 23: Connecting Gas Dryers
INSTALLATION Connecting Gas Dryers WARNING Gas Supply Requirements (continued) WARNING • Supply line requirements: Your laundry room must have a rigid gas supply line to your dryer. To reduce the risk of fire or explosion, electric In the United States, an individual manual shutoff shock, property damage, injury to persons, valve MUST be installed within at least 6 ft. - Page 24 22 INSTALLATION NOTE NOTE • DO NOT use old connectors. • In the Commonwealth of Massachusetts: This product must be installed by a licensed plumber Securely tighten all connections between the or gas fitter. When using ball-type gas shut off dryer and your laundry room’s gas supply.
-
Page 25: Connecting Electric Dryers
INSTALLATION Connecting Electric Dryers WARNING WARNING • Do not modify the plug and internal wire provided with the dryer. To reduce the risk of fire or explosion, electric • The dryer should be connected to a 4-hole outlet. shock, property damage, injury to persons, or death when using this appliance, follow •... - Page 26 24 INSTALLATION Four-Wire Power Cord Tighten all screws securely. • A UL-listed strain relief is required. • Use a 30-amp, 240-volt, 4-wire, Reinstall the terminal block access cover. UL-listed power cord with #10 AWG- minimum copper conductor and closed Hot (Black) Hot (Black) Neutral (White) Neutral (White)
- Page 27 INSTALLATION Four-Wire Direct Wire Attach the two hot leads of the power cord to the outer terminal block screws. • A UL-listed strain relief is required. • Use UL-listed 4-wire #10 AWG- minimum copper conductor cable. Attach the white neutral wire to the center screw Allow at least 5 ft.
- Page 28 26 INSTALLATION Three-Wire Power Cord Reinstall the terminal block access cover. • A 3-wire connection is NOT permitted Hot (Black) Hot (Black) Neutral (White) Neutral (White) on new construction after January 1, Hot (Red) Hot (Red) 1996. Ground Screw Ground Screw •...
- Page 29 INSTALLATION Three-Wire Direct Wire Attach the neutral (white) wire to the center terminal block screw. • A 3-wire connection is NOT permitted on new construction after January 1, 1996. Connect the external ground (if required by local • A UL-listed strain relief is required. codes) to the green ground screw.
-
Page 30: Final Installation Check
28 INSTALLATION Final Installation Check Once you have completed the installation of the dryer and it is in its final location, confirm proper operation with the following tests and Installation Test (Duct Check). Testing Dryer Heating GAS MODELS Close the dryer door and press the Encendido/ Apagado(Power) button to turn the dryer on. -
Page 31: Installation Test (Duct Check)
Check the display for results. the dryer. This test should be performed to alert you to any serious problems in the exhaust system of (DF22BV2BR, DF22VV2SBR, DF22WV2BR, your home. DF22BV2BRE, DF22VV2SBRE, DF22WV2BRE) During the test cycle, monitor the Flow Sense™... - Page 32 30 INSTALLATION Restricted or Blocked Airflow Check the Duct Condition If the Flow Sense™ Display is turned on, check the Avoid long runs or runs with multiple elbows or exhaust system for restrictions and damage. Repair bends. or replace the exhaust system as needed. NOTE •...
-
Page 33: Operation
OPERATION OPERATION WARNING • To reduce the risk of fire, electric shock, or injury to persons, read the SAFETY INSTRUCTIONS before operating this appliance. Using the Dryer Clean the Lint Filter If the lint filter has not already been cleaned, lift out the filter and remove the lint from the last load. -
Page 34: Check The Lint Filter Before Every Load
32 OPERATION Check the Lint Filter Before Grouping Similar Items Every Load For best results, sort clothes into loads that can be dried with the same drying cycle. Always make sure the lint filter is clean before Different fabrics have different care requirements, starting a new load;... -
Page 35: Control Panel
OPERATION Control Panel Non-Steam Models (DF22WV2R, DF22WV2RE) Steam Models (DF22BV2BR, DF22VV2SBR, DF22WV2BR, DF22BV2BRE, DF22VV2SBRE, DF22WV2BRE) NOTE • Model numbers can be found on the cabinet inside the door. - Page 36 On Secado LG’s steam technology allows you to inject fabrics Manual (Manual Dry) cycles, these settings can be with a swirling jet of steam to refresh clothes, reduce adjusted using the cycle modifier buttons anytime static, and make ironing easier.
- Page 37 OPERATION DF22BV2BR, DF22VV2SBR, DF22WV2BR, DF22WV2R, DF22WV2RE DF22BV2BRE, DF22VV2SBRE, DF22WV2BRE AI Sensor Dry Indicator Cycle Completion Indicator • AI Sensor Dry optimizes drying times and This portion of the display shows which stage temperatures by detecting the laundry’s of the drying cycle is currently underway characteristics.
-
Page 38: Cycle Guide
Cycle Guide Sensor de Secado (Sensor Dry) Cycles Sensor de Secado (Sensor Dry) cycles utilize LG’s unique dual sensor system to detect and compare the moisture level in clothes and in the air and adjust the drying time as needed to ensure superior results. - Page 39 OPERATION Non-Steam Models (DF22WV2R, DF22WV2RE) = default setting = allowable option ● * = Ahorro de Energía (Energy Saver) on by default Nivel de Alerta Secado Anti Arrugas Cycle Fabric Type Secado(Dry Temp. Húmedo(Damp (Wrinkle Care) Level) Dry Signal) SENSOR DE SECADO(SENSOR DRY) Normal Media Alta (Med.High)
- Page 40 38 OPERATION Steam Models (DF22BV2BR, DF22VV2SBR, DF22WV2BR, = default setting DF22BV2BRE, DF22VV2SBRE, DF22WV2BRE) = allowable option ● * = Ahorro de Energía (Energy Saver) on by default Alerta Anti Secado Reducir Nivel de Arrugas Húmedo Estática Cycle Fabric Type Secado(Dry Temp.
-
Page 41: Cycle Modifier Buttons
Señal(Signal) slightly damp. The appliance plays a melody when the drying cycle (DF22BV2BR, DF22VV2SBR, DF22WV2BR, is finished. the buttons make a sound each time a DF22BV2BRE, DF22VV2SBRE, DF22WV2BRE) button is pressed. Use this button to turn the melody •... -
Page 42: Special Functions
Some cycle option buttons also activate secondary functions. These special functions are marked with an LG’s new steam technology injects fabrics with a asterisk (*). Press and hold the option button marked swirling jet of hot steam to refresh clothes, reduce with the special function to activate it. - Page 43 OPERATION The Steam Options The Reducir Estática(Reduce Static) option injects steam late in the drying cycle to reduce the static electricity caused by dry fabrics rubbing together. NOTE • When Sensor de Secado(Sensor Dry) is selected with the Reducir Estática(Reduce Static) option, the dry levels below Normal cannot be selected.
- Page 44 42 OPERATION Steam Cycle Guide = default setting = allowable option ● Default Fabric Fabric Maximum Steam Temp. Time Level State Type Amount Comforter Single Bedding (1 each) Steam Turbo 31 minutes Alta(High) Sanitary Steam Children’s 3 lbs. clothing Media Single Alta(Med.
-
Page 45: Smart Functions
Connect your smartphone to the wireless router. Installing the LG ThinQ Application Search for the LG ThinQ application from the Google Play Store or Apple App Store on a smart phone. Follow instructions to download and install the application. - Page 46 NOTE Smart Diagnosis™ • Once the Inicio Remoto(Remote Start) mode is enabled, you can start a cycle from the LG ThinQ This function provides useful information for smartphone application. If the cycle is not started, diagnosing and solving issues with the appliance the machine will wait to start the cycle until it is based on the pattern of use.
-
Page 47: Smart Diagnosis™ Function
If you experience a problem with your Wi-Fi equipped appliance, it can transmit troubleshooting data to a smartphone using the LG ThinQ application. • Launch the LG ThinQ application and select the Smart Diagnosis™ feature in the menu. Follow the instructions provided in the LG ThinQ application. -
Page 48: Maintenance
46 MAINTENANCE MAINTENANCE Maintaining Ductwork Vent ductwork should be checked for lint buildup Regular Cleaning once per month and cleaned at least once per year. If any noticeable reduction in airflow or drying performance occurs, immediately check ductwork for obstructions and blockages. Contact a qualified WARNING technician or service provider. -
Page 49: Troubleshooting
For further assistance, there are videos and tutorials available through the LG.com website. On the lg.com/us home page, click on the Support menu tab to bring up the menu selections. Select Video Tutorials. Scan this QR code to quickly access the video search page on the LG website. -
Page 50: Before Calling For Service
48 MAINTENANCE Before Calling for Service This dryer is equipped with an automatic error-monitoring system to detect and diagnose problems at an early stage. If the dryer does not function properly or does not function at all, check the following before you call for service. - Page 51 MAINTENANCE Problem Possible Cause Solutions • Heavy fabrics take longer to dry because they tend to retain more moisture. To help reduce and maintain Large load of heavy fabrics. more consistent drying times for large and heavy fabrics, separate these items into smaller loads of a consistent size.
- Page 52 50 MAINTENANCE Performance Problem Possible Cause Solutions Fabric softener used • Confirm and follow the instructions provided with your incorrectly. fabric softener. • Use your dryer to dry only clean items. Soil from dirty Clean and dirty clothes are clothes can transfer to the clean clothes in the same or being dried together.
- Page 53 MAINTENANCE Problem Possible Cause Solutions • Use a fabric softener or the Reducir Estática(Reduce Fabric softener is not used or Static) option, if equipped, to reduce static electricity. used incorrectly. Be sure to follow the manufacturer’s instructions. • Overdrying a load of laundry can cause a buildup of static electricity.
- Page 54 52 MAINTENANCE Steam Functions (Steam Models) Problem Possible Cause Solutions • This is steam condensation. The Water drips from nozzle when This is normal. dripping water will stop after a short STEAM CYCLE starts time. • Small loads of 1 to 5 items work best. Garments still wrinkled after Steam Too many or overly different Load fewer garments.
- Page 55 MAINTENANCE Error Codes Problem Possible Cause Solutions Temperature sensor Error code: tE1 through tE7 • Turn off the dryer and call for service. failure. Power cord is connected • Check the connection of the power cord to Display shows error code: PS incorrectly.
- Page 56 54 MEMO...
- Page 57 MANUAL DEL PROPIETARIO SECADORA Lea el manual del propietario detenidamente previo a operar el electrodoméstico y mantengalo al alcance para futuras referencias. ESPAÑOL DF22BV2BR, DF22VV2SBR, DF22WV2BR, DF22BV2BRE, DF22VV2SBRE, DF22WV2BRE, DF22WV2R, DF22WV2RE www.lg.com Copyright © 2021 LG Electronics Inc. Todos los Derechos Reservados.
- Page 58 TABLA DE CONTENIDOS CARACTERÍSTICAS DEL 43 FUNCIONES INTELIGENTES PRODUCTO Aplicación LG ThinQ Función Smart Diagnosis™ (Diagnóstico Inteligente) INSTRUCCIONES DE SEGURIDAD INSTRUCCIONES IMPORTANTES DE 46 MANTENIMIENTO SEGURIDAD Limpieza regular DESCRIPCIÓN GENERAL DEL 47 SOLUCIÓN DE PROBLEMAS PRODUCTO Preguntas frecuentes Partes Videos de soporte para el usuario Accesorios Antes de llamar al servicio técnico...
-
Page 59: Características Del Producto
Funciones de vapor (Modelos con vapor) La tecnología de vapor de LG permite inyectar un chorro de vapor caliente en forma de remolino en los tejidos para refrescar la ropa, reducir la estática y facilitar el planchado. Simplemente, seleccione el ciclo Steam Fresh™ o añada una opción de vapor a los ciclos seleccionados. -
Page 60: Instrucciones De Seguridad
INSTRUCCIONES DE SEGURIDAD INSTRUCCIONES DE SEGURIDAD LEA TODAS LAS INSTRUCCIONES ANTES DE UTILIZAR Su seguridad y la de los demás son muy importantes. Tanto en este manual como en el equipo, hemos proporcionado muchos mensajes de seguridad importantes. Siempre debe leer y respetar todos los mensajes de seguridad. Este es el símbolo de alerta de seguridad. -
Page 61: Instrucciones Importantes De Seguridad
INSTRUCCIONES DE SEGURIDAD INSTRUCCIONES IMPORTANTES DE SEGURIDAD ADVERTENCIA Para disminuir el riesgo de explosiones, incendios, descargas eléctricas, quemaduras, lesiones o muerte para las personas que usen este artefacto, siga las precauciones básicas, incluidas las siguientes: INSTALACIÓN • Antes de ser utilizado, este artefacto debe ser correctamente instalado, conforme a lo descrito en este manual. - Page 62 • No sujete el cable de alimentación ni toque los controles del artefacto con las manos húmedas. • No modifique ni extienda el cable de alimentación. • Si el producto se ha mojado accidentalmente, comuníquese con el Centro de Información al Cliente de LG Electronics para que le den instrucciones antes de reanudar el uso.
- Page 63 INSTRUCCIONES DE SEGURIDAD • Lea todas las instrucciones antes de usar el artefacto y consérvelas. • Use el artefacto únicamente para el fin previsto. • No maltrate la puerta, no se siente ni se pare sobre ella. • No permita que los niños jueguen con el artefacto. Es necesario supervisar atentamente a los niños cuando el artefacto esté...
- Page 64 INSTRUCCIONES DE SEGURIDAD MANTENIMIENTO • No repare ni reemplace ninguna pieza del artefacto. Todas las reparaciones y el servicio de mantenimiento deben ser realizados por un miembro del personal de servicio calificado, a menos que se recomiende lo contrario en este Manual del propietario. Use solamente piezas de fábrica autorizadas. •...
-
Page 65: Descripción General Del Producto
DESCRIPCIÓN GENERAL DEL PRODUCTO DESCRIPCIÓN GENERAL DEL PRODUCTO Partes Cable de Cable de Panel de Panel de Puerta Puerta alimentación alimentación acceso acceso reversible reversible (Modelos de (Modelos de del bloque del bloque Panel de Panel de gas) gas) de bornes de bornes control control... -
Page 66: Instalación
Nivele la secadora Ventile la secadora adecuada Conecte la manguera Conecte la secadora de gas Conecte la secadora eléctrica de entrada DF22BV2BR, DF22VV2SBR, DF22WV2BR, DF22BV2BR, DF22VV2SBR, DF22WV2BR, (Modelos con vapor) DF22BV2BRE, DF22VV2SBRE, DF22WV2BRE DF22BV2BRE, DF22VV2SBRE, DF22WV2BRE DF22WV2R, DF22WV2RE DF22WV2R, DF22WV2RE Secadora de gas Secadora eléctrica... -
Page 67: Requisitos Del Lugar De Instalación
INSTALACIÓN Requisitos del lugar de instalación ADVERTENCIA • ¡Lea todas las instrucciones de instalación antes de instalar y operar su secadora. Es importante que revise este manual por completo antes de instalar y usar su secadora. En las siguientes páginas, se proporcionan instrucciones detalladas con respecto a las conexiones eléctricas, a las conexiones de gas y a los requisitos de escape. -
Page 68: Espacios Libres
12 INSTALACIÓN Espacios libres 14" max.* 14" max.* (356 mm) (356 mm) 18" min.* (457 mm) 18" min.* (457 mm) 1"* 30 - 30 5"** 1"* 30 - 30 5"** 1/8" (25 mm) (127 mm) (25 mm) 1/8" (127 mm) (761 - 765mm) (761 - 765mm) 3"... - Page 69 INSTALACIÓN Espacio necesario para la instalación de lavadora y secadora apiladas en áreas empotradas o dentro de armarios 6" 3" (152 mm) (76 mm) 48 in. (310 cm 77 ½" (1968 mm) 24 in. (155 cm 3" (76 mm) 1" 5 ½"...
-
Page 70: Nivelación De La Secadora
14 INSTALACIÓN Nivelación de la secadora Utilice una llave de tuercas ajustable para girar las patas niveladoras. Desenrosque las patas para levantar la secadora o enrósquelas para bajarla. NOTA Suba o baje la secadora con las patas niveladoras • Ajuste las patas niveladoras solo en la medida hasta que se encuentre nivelada de lado a lado y de necesaria para nivelar la secadora. -
Page 71: Inversión De La Puerta
INSTALACIÓN Inversión de la puerta Mientras sostiene la puerta, quite los 2 tornillos de la bisagra de la puerta. Retire la puerta. Herramientas necesarias • Destornillador Phillips • Destornillador de punta plana grande (recomendado para los tornillos de las bisagras si están apretados o si su destornillador Phillips está... -
Page 72: Instalación Del Paquete De Ventilación Lateral
Opción 2: Ventilación inferior Puede adquirirse un paquete adaptador, número de pieza 383EEL9001B, de su distribuidor LG. Este paquete contiene los componentes de conducto necesarios para Introduzca a presión el conducto adaptador en cambiar la ubicación de la ventilación de la secadora. -
Page 73: Apilamiento De La Secadora
INSTALACIÓN Apilamiento de la secadora Para asegurarse de realizar una instalación segura y sin riesgos, siga las siguientes instrucciones. Instalación del paquete de apilamiento Asegúrese de que la superficie de la lavadora esté Este paquete de apilamiento incluye: limpia y seca. Quite el papel protector de la cinta adhesiva de uno de los soportes laterales del kit de •... -
Page 74: Ventilación De La Secadora
18 INSTALACIÓN Ventilación de la secadora ADVERTENCIA ADVERTENCIA • No se proporcionan los conductos con la secadora. Debe obtener los conductos necesarios en su Para reducir el riesgo de incendio o explosión, localidad. La campana de ventilación deberá tener descargas eléctricas, daños a la propiedad, reguladores de tiro con bisagras para prevenir lesiones personales o la muerte al usar este una contracorriente de aire cuando no se use la... - Page 75 INSTALACIÓN Ventilación correcta Recorrido y conexión de los conductos NOTA Siga las pautas a continuación para maximizar el rendimiento de secado, para reducir la acumulación de pelusa y la condensación en los conductos. Los conductos y las conexiones NO están incluidos y deben adquirirse por separado.
-
Page 76: Conexión De La Manguera De Entrada (Modelos De Vapor)
20 INSTALACIÓN Conexión de la manguera de entrada SIN LAVADORA: Si la secadora no comparte el grifo de agua fría con una lavadora. (Modelos de vapor) a. Conecte el extremo recto de la manguera larga al grifo La secadora debe conectarse al grifo de agua fría mediante de agua fría. -
Page 77: Conexión De Secadoras De Gas
INSTALACIÓN Conexión de secadoras de gas ADVERTENCIA Requisitos de suministro de gas (continuación) ADVERTENCIA • Requerimientos de la línea de suministro: Su cuarto de lavandería debe tener una línea de suministro Para reducir el riesgo de incendio o explosión, rígido de gas para su secadora. En los Estados descargas eléctricas, daños a la propiedad, Unidos, una válvula de cierre manual individual lesiones personales o la muerte al usar este... - Page 78 22 INSTALACIÓN NOTA NOTA • En la Mancomunidad de Massachusetts: Este • NO use conectores viejos. producto debe ser instalado por un plomero o gasista Ajuste bien todas las conexiones entre la secadora matriculado. Cuando se usan válvulas de paso y el suministro de gas de su cuarto de lavado.
-
Page 79: Conexión De Secadoras Eléctricas
INSTALACIÓN Conexión de secadoras eléctricas ADVERTENCIA • No modifique el enchufe ni el cable interno provistos ADVERTENCIA con la secadora. • La secadora deberá conectarse a una toma de Para reducir el riesgo de incendio o explosión, corriente de 4 agujeros. descargas eléctricas, daños a la propiedad, •... - Page 80 24 INSTALACIÓN Cable de alimentación de cuatro hilos Ajuste bien todos los tornillos. • Se requiere un aliviador de tensión homologado por UL. Reinstale la cubierta de acceso al bloque de • Use un cable de alimentación de bornes. 30 amperios, 240 voltios, de 4 hilos Vivo (negro) Vivo (negro) Neutro (blanco)
- Page 81 INSTALACIÓN Conexión directa de cuatro hilos Conecte los dos conductores vivos del cable de alimentación a los tornillos exteriores del bloque de • Se requiere un aliviador de tensión bornes. homologado por UL. • Use un cable conductor de cobre de Conecte el alambre neutro de color blanco al tornillo 4 hilos homologado por UL N.°...
- Page 82 26 INSTALACIÓN Cable de alimentación de tres hilos Reinstale la cubierta de acceso al bloque de bornes. • NO se permite una conexión de 3 hilos en construcciones nuevas posteriores al Vivo (negro) Vivo (negro) Neutro (blanco) Neutro (blanco) 1 de enero de 1996. Vivo (rojo) Vivo (rojo) •...
- Page 83 INSTALACIÓN Conexión directa de tres hilos Conecte el alambre neutro (blanco) al tornillo central del bloque de bornes. • NO se permite una conexión de 3 hilos en construcciones nuevas posteriores al 1 de enero de 1996. Conecte el cable de conexión a tierra exterior (si •...
-
Page 84: Revisión Final De La Instalación
28 INSTALACIÓN Revisión final de la instalación Una vez que haya completado la instalación de la secadora y esta se encuentre en su ubicación definitiva, verifique si funciona correctamente realizando las siguientes pruebas y la Prueba de instalación (Revisión de conductos). Prueba de calentamiento de la secadora MODELOS DE GAS Cierre la puerta de la secadora y presione el botón... -
Page 85: Prueba De Instalación (Revisión De Conductos)
Verifique la pantalla para ver los resultados. condiciones del sistema de escape sean las adecuadas para el funcionamiento correcto de la secadora. Esta (DF22BV2BR, DF22VV2SBR, DF22WV2BR, prueba debe realizarse para identificar si existe algún DF22BV2BRE, DF22VV2SBRE, DF22WV2BRE) problema grave en el sistema de escape de su casa. - Page 86 30 INSTALACIÓN Flujo de aire restringido o bloqueado Verifique las condiciones del conducto Si el LED de Flow Sense™ está encendido, revise Evite tendidos largos o con muchos codos o curvas. el sistema de escape para verificar que no haya restricciones ni daños.
-
Page 87: Funcionamiento
FUNCIONAMIENTO FUNCIONAMIENTO ADVERTENCIA • Para reducir el riesgo de incendios, descargas eléctricas o lesiones a las personas, lea las INSTRUCCIONES DE SEGURIDAD antes de operar este artefacto. Cómo usar la secadora Limpie el filtro de pelusa Si el filtro de pelusa no se ha limpiado aún, extráigalo y elimine las pelusas de la última carga. -
Page 88: Revise El Filtro De Pelusa Antes De Cada Carga
32 FUNCIONAMIENTO Revise el filtro de pelusa antes Conjuntos de prendas similares de cada carga Para lograr mejores resultados, clasifique las prendas en cargas que puedan secarse con el mismo ciclo de Asegúrese siempre de que el filtro de pelusa esté limpio secado. -
Page 89: Panel De Control
FUNCIONAMIENTO Panel de control Modelos sin Vapor (DF22WV2R, DF22WV2RE) Modelos a Vapor (DF22BV2BR, DF22VV2SBR, DF22WV2BR, DF22BV2BRE, DF22VV2SBRE, DF22WV2BRE) NOTA • Los números de los modelos se encuentran en el gabinete, dentro de la puerta. - Page 90 En los ciclos de Secado Manual, estas configuraciones La tecnología de vapor de LG permite inyectar un pueden ajustarse mediante los botones de configuración chorro de vapor en forma de remolino en los tejidos de ciclo en cualquier momento antes de iniciar el ciclo.
- Page 91 FUNCIONAMIENTO DF22BV2BR, DF22VV2SBR, DF22WV2BR, DF22WV2R, DF22WV2RE DF22BV2BRE, DF22VV2SBRE, DF22WV2BRE Indicador de secado con sensor IA Indicador de finalización del ciclo • El secado con sensor IA optimiza el tiempo y la Esta parte de la pantalla muestra la etapa del temperatura de secado mediante la detección de...
-
Page 92: Guía De Ciclos
Ciclos de Sensor de Secado Los ciclos de Sensor de Secado utilizan el sistema exclusivo de sensor doble de LG para detectar y comparar el nivel de humedad en las prendas y en el aire, y ajustar el tiempo de secado según sea necesario para garantizar resultados superiores. - Page 93 FUNCIONAMIENTO Modelos sin Vapor (DF22WV2R, DF22WV2RE) = configuración predeterminada = opción admisible ● * = Ahorro de Energía Nivel de Alerta Secado Ciclo Tipo de tela Temp. Anti Arrugas Secado Húmedo SENSOR DE SECADO Normal Ropa de trabajo, ropa de Media Alta (Entre Alta Normal* ●...
- Page 94 38 FUNCIONAMIENTO Modelos a Vapor (DF22BV2BR, DF22VV2SBR, DF22WV2BR, = configuración predeterminada DF22BV2BRE, DF22VV2SBRE, DF22WV2BRE) = opción admisible ● * = Ahorro de Energía Alerta Nivel de Reducir Ciclo Tipo de tela Temp. Anti Arrugas Secado Secado Estática Húmedo SENSOR DE SECADO...
-
Page 95: Botones Modificadores De Ciclo
La aplicación reproduce una melodía una vez que ligeramente húmedas. termina el ciclo de secado. Los botones emiten un sonido (DF22BV2BR, DF22VV2SBR, DF22WV2BR, cada vez que se presiona uno de ellos. Utilice este botón DF22BV2BRE, DF22VV2SBRE, DF22WV2BRE) para encender o apagar la melodía y los tonos del botón. -
Page 96: Funciones Especiales
Algunos botones de opciones de ciclo también activan funciones secundarias. Estas funciones especiales están La nueva tecnología de vapor de LG inyecta un chorro marcadas con un asterisco (*). Mantenga presionado de vapor caliente en forma de remolino en los tejidos el botón de opción que indica la función especial para... - Page 97 FUNCIONAMIENTO Las opciones de vapor La opción Reducir Estática inyecta vapor al final del ciclo de secado para reducir la electricidad estática que producen los tejidos secos con la frotación. NOTA • Cuando se selecciona Sensor de Secado con la opción de Reducir Estática, no se puede seleccionar un nivel de Menos seco o Húmedo.
- Page 98 42 FUNCIONAMIENTO Guía de ciclos de vapor = configuración predeterminada = opción admisible ● Tiempo Nivel de Estado del Tipo de Cantidad Vapor Temp. Predet. Secado Tejido Tejido Máxima Colcha, ropa Único Turbo de cama (1 unidad) Steam Steam 31 minutos Alta Seco Sanitary...
-
Page 99: Funciones Inteligentes
Conecte su teléfono inteligente al enrutador Instalando la Aplicación LG ThinQ inalámbrico. Busque la aplicación LG ThinQ en la tienda Google Play Store o Apple App Store desde un teléfono inteligente. Sigue las instrucciones para descargar e instalar la aplicación. - Page 100 Solamente puede guardarse un ciclo por vez en el 3 segundos para habilitar la función Inicio Remoto. artefacto. Inicie un ciclo desde la aplicación LG ThinQ en su Una vez que se completa la descarga de un ciclo en el teléfono inteligente.
-
Page 101: Función Smart Diagnosis™ (Diagnóstico Inteligente)
LG ThinQ. • Inicie la aplicación LG ThinQ y seleccione la función Smart Diagnosis™ en el menú. Siga las instrucciones provistas en la aplicación LG ThinQ. -
Page 102: Mantenimiento
46 MANTENIMIENTO MANTENIMIENTO Mantenimiento de los conductos Se deben revisar los conductos de ventilación para Limpieza regular verificar que no tengan acumulación de pelusa una vez por mes y se deben limpiar, al menos, una vez por año. Si se percibe una reducción notoria del flujo de aire o del desempeño de secado, revise los conductos ADVERTENCIA de inmediato para verificar que no estén bloqueados ni... -
Page 103: Solución De Problemas
Videos de soporte para el usuario Si necesita más ayuda, puede encontrar videos y tutoriales en el sitio web LG.com. En la página de inicio de lg.com/us, haga clic en la pestaña del menú Soporte para ver las selecciones del menú. Seleccione Video Tutorials. -
Page 104: Antes De Llamar Al Servicio Técnico
48 MANTENIMIENTO Antes de llamar al servicio técnico Esta secadora está equipada con un sistema de monitoreo de errores automático para la detección y el diagnóstico de problemas en una etapa temprana. Si la secadora no funciona correctamente o no funciona en absoluto, consulte la siguiente información antes de llamar al servicio técnico. - Page 105 MANTENIMIENTO Problema Causa posible Soluciones • Los tejidos pesados tardan más tiempo en secarse, ya que tienden a retener más humedad. Para ayudar a reducir y Carga grande de tejidos mantener tiempos de secado más constantes para tejidos pesados. pesados y de mayor tamaño, separe estas prendas en cargas más pequeñas de un tamaño similar.
- Page 106 50 MANTENIMIENTO Desempeño Problema Causa posible Soluciones No se usó correctamente el • Confirme y siga las instrucciones provistas por el fabricante suavizante de ropa. del suavizante. • Use la secadora para secar prendas limpias solamente. Se están secando juntas ropa La suciedad de la ropa sucia puede transferirse a la ropa limpia y sucia.
- Page 107 MANTENIMIENTO Problema Causa posible Soluciones • Use suavizante de ropa o la opción REDUCIR ESTÁTICA, No se usó suavizante de ropa o si su secadora la incluye, para reducir la electricidad no se lo usó adecuadamente. estática. Asegúrese de seguir las instrucciones del fabricante.
- Page 108 52 MANTENIMIENTO Funciones de vapor (Modelos con vapor) Problema Causa posible Soluciones • Se trata de condensación de vapor. El Gotea agua de la boquilla cuando Esto es normal. agua dejará de gotear después de unos comienza el CICLO DE VAPOR momentos.
- Page 109 MANTENIMIENTO Códigos de error Problema Causa posible Soluciones Falla del sensor de Código de error: tE1 a tE7 • Apague la secadora y llame al servicio técnico. temperatura. La pantalla muestra el código de El cable de alimentación • Revise la conexión del cable de alimentación al error: PS no está...
Need help?
Do you have a question about the DF22BV2BR and is the answer not in the manual?
Questions and answers