Advertisement
Quick Links
BALL VALVE SERVO INSTALLATION GUIDE
PACKAGE CONTENTS
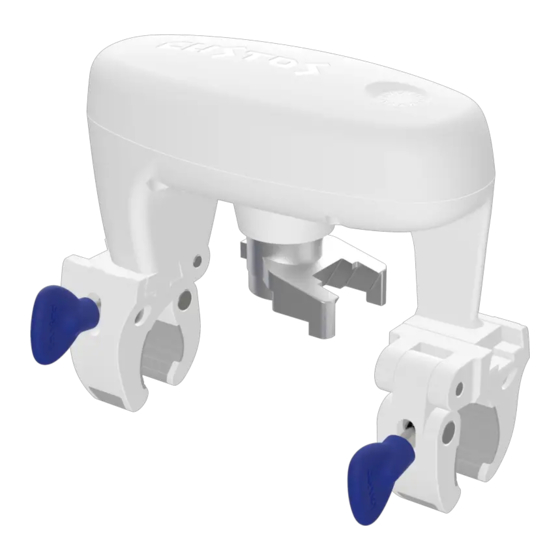
Ball Valve Servo (BVS)
1
2
Power Adapter
3
Water Detection Probe 55.1 inch
4
Spacer
1. CLOSE VALVE
1
Rotate the handle from position
2. PREPARE YOUR BVS
Position the BVS over the top of the handle of ball valve
Make sure the knobs are
facing on the same side as
the water valve handle
3. INSTALL BVS ON YOUR VALVE
Align the pivot of the transmission fork is with the hex bolt
on top of the valve Press down firmly to engage the spring
loaded gear, then tighten 2 clamps.
if you have oversized valve or your valve has adjacent pipe elbow, you may
slide any or both clamps in or out to fit the space.
Check the transmission fork mechanic engagement by visual
You SHOULD NOT see the PATTERN on the top of transmission fork, if you do, you
may not install it securely, please double check, make sure you have pushed the BVS
down enough for a secured installation.
Otherwise you have a rare ultra low profile valve, the handle is too low for spring
loaded mechanic to engage, in this case, please put the Spacer
bolt head of the valve
2
and the transmission fork.
If you don't see the pattern without Spacer, DO NOT use the Spacer.
PATTERN SEEN
PATTERN NOT SEEN
1
3
BALL VALVE SERVO INSTALLATION
2
to position
to turn off your valve
1
2
1
between the hex
1
2
2
4
4. CONNECT SPC AND POWER ADAPTER
If you have purchased Smart Power Capsule, connect it
between Ball Valve Servo and power adapter. SPC is the
optional back up power device, it provides up to 32 hours of
back up power for BVS if there is a power failure.
1
2
Insert the male jack
water tight female jack
extra force to secure contact and
water proof result
You may install local water detection probe (included) for close area leak detection, plug the male
jack
1
to the female jack
2
from the power supply cable branch, It will trigger the valve to close
whenever water is detected. (remove the protection cap from female jack first)
If you are installing the Ball Valve Servo outdoor, you may consider to disable the
touch sensing button to prevent it activated from rain drops or pets.
To Disable the button:
Tap and hold the touch sense button for 3 beeps, then quickly tap 3 times in a row.
If successful, the Yellow LED will flash once, then the Red LED with 1 beep. The LED
will slowly flashing Yellow indicating the touch sense button has been locked.
To Re-Enable the button:
Tap and hold the touch sense button for 3 beeps, then quickly tap 3 times in a row.
If successful, the Yellow LED will flash once, then the Red LED with 3 beeps. LED will
then slowly flashing Green indicating the touch sense button has been unlocked.
Do NOT use on other types of valves.
1
into the
with
2
Touch Sense Button
Advertisement

Related Manuals for UbiTech Custos BVSLWU

Summary of Contents for UbiTech Custos BVSLWU
- Page 1 BALL VALVE SERVO INSTALLATION GUIDE PACKAGE CONTENTS Ball Valve Servo (BVS) Power Adapter Water Detection Probe 55.1 inch Spacer Do NOT use on other types of valves. BALL VALVE SERVO INSTALLATION 1. CLOSE VALVE 4. CONNECT SPC AND POWER ADAPTER If you have purchased Smart Power Capsule, connect it between Ball Valve Servo and power adapter.
- Page 2 USER GUIDE Contents 1 INTRODUCTION ................................1.1 Custos BVS ................................1.2 Connectors & Interfaces.............................. 2 SPECIFICATIONS ................................ 2.1 Physical Specifications............................... 2.2 Hardware Specifications ............................. 3 WORKING MODE & FEATURES............................. 3.1 Standalone Mode............................... 3.2 Network Mode ................................3.3 Ball Valve Actuator..............................3.4 Water Leak Sensor &...
-
Page 3: Specifications
Success: The LED indicator changes to Yellow LED blinking. Power Supply AC-DC: AC (110V 60Hz / 220V 50Hz); DC (12V / 1A) Power Consumption Standby: ~10mA@12VDC=0.12W Full Operation: Max~700mA@12VDC=8.4W Ubitech Ltd. Version: 2.0 PAGE 1... -
Page 4: Temperature Sensor
Keylock Disable Disable Lock Key Function Long beep x 3 click 3 times one by one with 3 beeps Success–“In Network Mode” Green LED slow blinking Success – “In Standalone Mode” Yellow LED blinking Ubitech Ltd. Version: 2.0 PAGE 2... -
Page 5: Warranty
STATEMENT OF WARRANTY: 1 Year Limited Warranty Ubitech Limted ("Ubitech”) warrants to the original retail purchaser ("Purchaser”) that the Ubitech (the “Product”) will be free of defects in materials or workmanship under use for one (1) year from the date of purchase (the “Warranty period").