Table of Contents
Advertisement
Quick Links
Advertisement
Table of Contents

Subscribe to Our Youtube Channel
Summary of Contents for Btwin ANT+ SAT COUNT
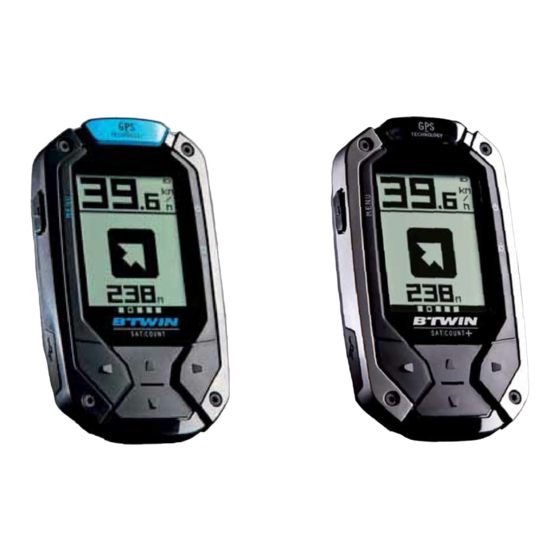
- Page 1 All manuals and user guides at all-guides.com...
- Page 2 All manuals and user guides at all-guides.com...
-
Page 3: Table Of Contents
All manuals and user guides at all-guides.com TABLE OF CONTENTS SETTiNgS ..................3 1.1 Setting the device for the first time ............... 3 1.2 General settings ......................4 1.3 User settings ......................5 1.4 Activating the sensors ................... 5 1.5 Setting the altimeter ....................7 1.6 Activating and setting targets ................7 1.7 Customising the display ..................8 1.8 Battery level display ....................8 1.9 Restoring the default settings ................ - Page 4 All manuals and user guides at all-guides.com The GPS SATCOUNT counter is ideal for cyclists concerned with their performance (distance, length of training, altitude, gradients, etc.), and who want a device with GPS navigation technology. The guided routes are programmed via the Internet, or are rides already completed and recorded in the SATCOUNT.
-
Page 5: Settings
All manuals and user guides at all-guides.com 1 SETTiNgS 1.1 Setting the device for the first time 3 s. Setting the Setting the time Setting the hour language format Setting the Setting the Setting the sex Setting the age Setting the minutes date height Setting the weight Continue... -
Page 6: General Settings
All manuals and user guides at all-guides.com 1.2 General settings Adjustment method for each setting: Scroll Go to the next step to language confirm your choice English 1.2.1 Setting the time Main settings main time time time time time alerts alerts alerts alerts alerts time time time time time light light light light light alerts alerts alerts alerts... -
Page 7: User Settings
All manuals and user guides at all-guides.com 1.2.3 Setting the brightness (sequential/permanent) time time time Return to the alerts alerts alerts general settings screen light light light night mode night mode night mode Choose the mode then confirm quick mode (default) (light pusher = 5sec light) night mode 1.3 User settings (light pusher = on/o light) English/français/italiano/espanol... - Page 8 All manuals and user guides at all-guides.com Activate the accessories that you want to use in Mode or in the Settings Menu: 4 s. 30 s. Turn the wheel and the pedal Set the size of the wheel 4 s. 30 s. Turn the wheel and the pedal Set the size of the wheel Humidify the belt If a ? appears after searching for the sensors, this means that the connection failed. Check the installation of the sensors and start again.
-
Page 9: Setting The Altimeter
height All manuals and user guides at all-guides.com 180 cm weight 75 kg Setting the altimeter This setting is only available on the SATCOUNT+. You can manually adjust the altitude calculated by the GPS Warning this value can vary depending on the weather conditions then return to the menu language english units 1.6 Activating and setting targets km - kg gender This setting is only available on the SATCOUNT+. height 1.6.1 Cardio 180 cm... -
Page 10: Customising The Display
All manuals and user guides at all-guides.com 1.6.2 Cadence cardio cardio cardio cardio cardio cadence cadence cadence cadence cadence 90 rpm Set the minimum Set the maximum cadence cadence cardio cardio then confirm cardio then confirm cardio cardio cadence cadence cadence cadence cadence 90 rpm 1.7 Customising the display line 1 line 1 distance... -
Page 11: Restoring The Default Settings
All manuals and user guides at all-guides.com 1.9 Restoring the default settings 2 s. this will restore all settings to the default values. continue Prompt for confirmation 2 uSiNg ThE dEviCE 2.1 Getting started 2.1.1 Installing the SATCOUNT on a bike Installation on the stem Installation on the handlebar... - Page 12 All manuals and user guides at all-guides.com 2.1.2 Turning the device on and accessing the modes Press to enter each Mode. The different Modes: Ride Mode In Ride Mode, you see the route, the altitude, the curve of the gradients covered, the length of the session, see p. 12. Navigation Mode In Navigation Mode, as well as all the features in Ride Mode, the device leads you along a programmed route, see p. 13.
- Page 13 All manuals and user guides at all-guides.com 2.1.3 Connecting the sensors to the SATCOUNT+ These accessories can only be used with the SATCOUNT+ model. To install, see the instructions for each accessory. Cadence Sensor With this sensor you can see your pedalling frequency, expressed in revolutions per minute (RPM). Speed sensor With this sensor you can see the speed for the entire session, as well as the average and maximum speeds for an indoor session.
-
Page 14: Ride Mode
All manuals and user guides at all-guides.com Humidify the belt If a ? appears after searching for the sensors, this means that the connection failed. Check the installation of the sensors and start again. ride mode In Ride Mode, you can see the route, the altitude, the curve of the gradients covered, the length of the session. -
Page 15: Navigation Mode (Only Works Outdoors)
All manuals and user guides at all-guides.com N av i g at i o n M o d e ( o n l y wo r k s o u t d o o r s ) In Navigation Mode, the device leads you on a programmed route. -
Page 16: Challenge Mode
All manuals and user guides at all-guides.com Challenge mode In Challenge Mode, you try to beat your records for the routes already completed. You can see the route, the altitude, the curve of the gradients covered, the length of the session. Select a challenge and confirm... - Page 17 All manuals and user guides at all-guides.com Directions (If sensors Image of your Image of the Performance to follow activated) position on the map gradient Performance checkpoints during the Challenge: Checkpoint number You are behind 4 s. The route is divided Continue the route into 3 segments of by following the equal length. directions Along the route, a pop-up appears after each segment. You are in the lead End of the Challenge: 4 s.
-
Page 18: Indoor Training (Satcount+)
All manuals and user guides at all-guides.com 2.5 Indoor training (SATCOUNT+) In Indoor Mode, depending on the sensors used and/or activated (sold separately), (see p. 5), you can measure your performance: distance travelled, speed, length of training, and you can see your heart rate. When the sensors are not activated, you have just the stopwatch. Without sensors activated: Stopwatch With sensors activated:... -
Page 19: Mark A Spot
All manuals and user guides at all-guides.com 2.6 Mark a spot You can mark a spot on the map when you are in Ride, Navigation, Challenge and Go Back Home Modes, by pressing the Menu key. MENU The selected spot Select the type of appears on the route spot and confirm Type of spot: Camp site Fountain... -
Page 20: Description Of The Route
All manuals and user guides at all-guides.com 4 s. 4 s. same route same route go straight go straight Follow the directions Repeat the same Go straight route 4 s. Go back to initial mode You returned home! 2.8 Description of the route At any time, you can zoom in on your route using the Up/ Down keys . -
Page 21: Pause/Stop/Save
All manuals and user guides at all-guides.com 2.9 Pause/Stop/Save 2.9.1 Pause Continue the session 2.9.2 Turning the device off 3 s. 2.9.3 End the session, save then shut down... - Page 22 All manuals and user guides at all-guides.com 2.9.4 Stop, save, then continue a session 2.9.5 Stop then continue a session without saving...
-
Page 23: Logbook
All manuals and user guides at all-guides.com 3 LOgBOOk 3.1 Session logbook 3.1.1 See a session Select a saved session and confirm Shows the Shows the total Shows the average speed time distance travelled Shows the Shows the Shows the Shows the Shows average fastest heart calories burned maximum speed average cadence heart rate rate Total up hill Total down hill gradients gradients... - Page 24 All manuals and user guides at all-guides.com 3.1.2 Creating a route and a challenge, deleting a session...
-
Page 25: Navigation Logbook
All manuals and user guides at all-guides.com 3.2 Navigation logbook 3.2.1 See navigation Select a saved or downloaded route Shows the confirm distance travelled 3.2.2 Delete navigation Select a saved or downloaded route confirm Return to the route list... -
Page 26: Challenge Logbook
All manuals and user guides at all-guides.com 3.3 Challenge logbook 3.3.1 See a challenge Select a saved or downloaded route Shows the time Shows the confirm taken distance travelled Shows the average speed 3.3.2 Delete a challenge Select a saved or downloaded route confirm Return to the route list... -
Page 27: Pop-Up Messages And Actions
All manuals and user guides at all-guides.com 4 POP-uP mESSAgES ANd ACTiONS 4.1 GPS lost and connection to the sensors lost Each time the GPS loses the signal and when a sensor loses its connection, a pop-up window appears on the screen to indicate the problem. ACTIONS A flashing signal Go away from buildings or... -
Page 28: Battery Level
All manuals and user guides at all-guides.com Battery level ACTION This window appears when 20% of the Recharge the battery. battery power remains. The same pop- ► see p. 27. up appears when 10% and 5% remain. low battery The window stays until the user presses remaining a key to hide it. -
Page 29: Charging The Battery
All manuals and user guides at all-guides.com 5 ChArgiNg ThE BATTEry SATCOUNT Computer Type of connection: USB/mini USB. 6 SAviNg yOur PErFOrmANCE ON-LiNE SATCOUNT Computer Type of connection: USB/mini USB. Analysing performance and downloading the software: • Click on: http://my.geonaute.com/home and create an account. • Download the ON CONNECT software. -
Page 30: Technical Characteristics
All manuals and user guides at all-guides.com 7 TEChNiCAL ChArACTEriSTiCS SATCOUNT SATCOUNT + Specifications Device dimensions (WxLxD) 50.39 x 90.81 x 22.23 mm Screen size (W x L) 32 x 42 mm Screen resolution 96 x 128 pixels Backlit LCD Weight Battery rechargeable lithium ion... -
Page 31: Precautions For Use And Warranties
All manuals and user guides at all-guides.com 8 PrECAuTiONS FOr uSE ANd wArrANTiES -10°C 60°C -50°F 140°F B'twin guarantees to the initial purchaser of this product that it is free from material or manufacturing defects. This product is guaranteed for two years from the date of purchase. - Page 32 CONTACT uS We would like to hear your feedback on the quality, features and use of our products at: www. btwin.com We will reply as soon as possible. OXYLANE 4 Boulevard de Mons – BP 299...
Need help?
Do you have a question about the ANT+ SAT COUNT and is the answer not in the manual?
Questions and answers