Advertisement
Quick Links
Advertisement

Related Manuals for M&W ASZT001

Summary of Contents for M&W ASZT001
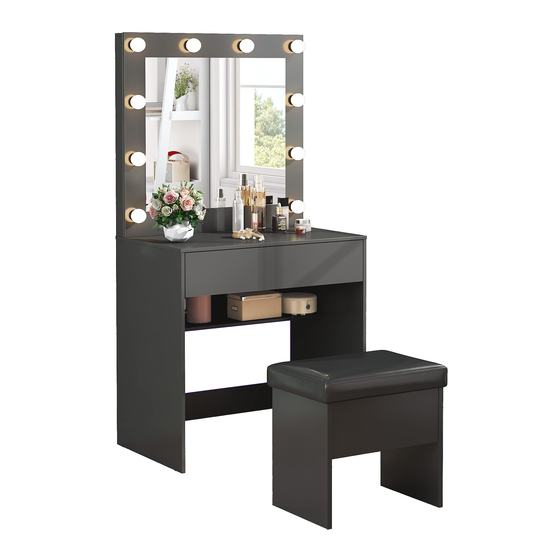
- Page 1 ASZT001 Wood 1 Drawer Vanity with Mirror V2.0 mw-cs@devaise.com...
-
Page 2: General Guidelines
IMPORTANT INFORMATION READ CAREFULLY. KEEP THIS INFORMATION FOR FURTHER REFERENCE. GENERAL GUIDELINES • • Please read the following instruction carefully and use the product accordingly. • Please keep this manual and hand it over when you transfer the product. This summary may not include every detail of all variations and considered steps. Please contact us when further information and help are needed. - Page 3 If you have any further questions, please feel free to contact us by email or official website: mw-cs@devaise.com We will reply ASAP. Before installation, please make sure you have all the hardware, the serial numbers are properly labeled corresponging to the list, and the quantity is correct.
-
Page 4: Exploded Drawing
EXPLODED DRAWING:... - Page 5 PARTS: M4x14 M5x40 M6x30 REMARK: MINIFIX POSITION...
- Page 6 REMARK: 1. Press the plastic part in the indicated direction to separate drawer runner before assembling. 2. Please grip the part while sliding the part. PRESS Separate the light part to part and part...
- Page 7 REMARK: Please do not screw too deep or too shallow. Appropriate position Too deep Too shallow REMARK: ×4 Put a blanket under the board to avoid scratch or damage. ×12 ×4...
- Page 8 REMARK: When installing, please make sure the screws are flattened, Not crooked; Otherwise the drawers will not be installed M4x14 perfectly. REMARK: 1. Please locate the holes from the back of part FRONT E1 Back: E1 Front: 2. Then please install part from the front of part...
- Page 11 10 /...
- Page 12 REMARK: Let the grooves on part 7 and 8 be connected to the groove on part 9 . 11 /...
- Page 13 REMARK: Please assemble the mirror part on a rug or blanket to avoid scratching. 12 /...
- Page 14 M6x30 13 /...
- Page 15 base REMARK: Hold the base, not the bulb when installing the screw nut, and do not fully tighten it first. 14 /...
- Page 16 REMARK: Please make sure the 3 same colored wires correspond separately, then connect J1 and J2 , and fully tighten the screw nuts. color match Align 15 /...
- Page 17 16 /...
- Page 18 M5x40 REMARK: Part I is optional according to your need. 17 /...
- Page 19 18 /...
- Page 20 19 /...
- Page 21 M4x11 20 /...
- Page 22 BALL BEARING REMARK: 1.Please full extend the slide runners. 2.Simply push the ball bearing cart all the way to the end of the slide(in both sides). 21 /...
- Page 23 REMARK: 1. Align the slide runners on the drawer with the unit and push it carefully inside until it stops. 2. If the drawer does not go in smoothly please take it out and repeat the step. 22 /...
- Page 24 ×2 23 /...
- Page 25 24 /...
- Page 26 25 /...
Need help?
Do you have a question about the ASZT001 and is the answer not in the manual?
Questions and answers