Philips DVP3960 Owner's Manual
Philips owner's manual dvd video player dvp3960
Hide thumbs
Also See for DVP3960:
- Specifications (2 pages) ,
- Manual (49 pages) ,
- Quick start manual (2 pages)

Related Manuals for Philips DVP3960


Summary of Contents for Philips DVP3960
- Page 1 DVD VIDEO PLAYER 01-53_dvp3960_37_eng2.indd 1 01-53_dvp3960_37_eng2.indd 1 DVP3960 2006-12-28 11:24:28 AM 2006-12-28 11:24:28 AM...
- Page 2 Registering your model with PHILIPS makes you eligible for all of the valuable benefits listed below, so don't miss out. Complete and return your Product Registration Card at once, or register online at www.philips.com/usasupport to ensure:...
- Page 3 Class II equipment symbol This symbol indicates that the unit has a double insulation system 01-53_dvp3960_37_eng2.indd 3 01-53_dvp3960_37_eng2.indd 3 2006-12-28 11:24:36 AM 2006-12-28 11:24:36 AM...
- Page 4 WARNING To reduce the risk of fi re or electric shock, do not expose this equipment to rain or moisture. Use of controls or adjustments or performance of procedures other than herein may result in hazardous radiation exposure. The set complies with the FCC-Rules, Part B 15 and with 21 CFR 1040.10.
- Page 5 01-53_dvp3960_37_eng2.indd 5 01-53_dvp3960_37_eng2.indd 5 Index English ------------------------------------------6 Français -------------------------------------- 54 Español --------------------------------------102 This product incorporates copyright protection technology that is protected by method claims of certain U.S. patents and other intellectual property rights owned by Macrovision Corporation and other rights owners. Use of this copyright protection technology must be authorized by Macrovision Corporation, and is intended for home and other limited viewing uses only unless otherwise authorized...
-
Page 6: Environmental Information
BACKPLATE OF THE SET NEVER MAKE OR CHANGE CONNECTIONS WITH THE POWER SWITCHED ON. Specifi cations are subject to change without notice. Trademarks are the property of Koninklijke Philips Electronics N.V. or their respective owners. LASER Type Semiconductor laser InGaAlP (DVD) -
Page 7: Language Code
01-53_dvp3960_37_eng2.indd 7 01-53_dvp3960_37_eng2.indd 7 Language Code 2006-12-28 11:24:38 AM 2006-12-28 11:24:38 AM... -
Page 8: Table Of Contents
Contents Care and Safety Information Setup ...10 Cleaning discs ...10 General Information Accessories supplied ... 11 Region codes ... 11 Connections Connecting to television ...12~13 Using Composite Video jacks (CVBS) ...12 Using Component Video jacks (YPbPr) ...12 Using an accessory RF modulator ...13 Connecting the power cord ...14 Optional connections Connecting to an stereo system ...15... - Page 9 Preview ...28 Viewing Audio CD playback information ...29 Disc Go To / Track Go To / Track Selection ...29 Special DVD Features ...29 Playing a Title ...29 Changing the Audio Language ...29 Subtitles ...29 Special VCD and SVCD Feature ...30 Playback Control (PBC) ...30 Playing a DivX ®...
-
Page 10: Care And Safety Information
Since the optical unit (laser) of the DVD player operates at a higher power than regular DVD or CD players, cleaning CDs intended for DVD or CD players may damage the optical unit (laser). -
Page 11: General Information
01-53_dvp3960_37_eng2.indd 11 01-53_dvp3960_37_eng2.indd 11 General Information Region codes This DVD player is designed to support the Region Management System. Check the regional code number on the disc package. If the number does not match the player’s region number (see table below), the player may be unable to playback the disc. -
Page 12: Connections
To hear sound of this DVD player through your television, use the audio cables (white/red) to connect AUDIO OUT (L/R) jacks of the DVD player to the corresponding AUDIO IN jacks on the television (cable supplied). TIPS: Before making or changing any connections, make sure that all the devices are disconnected from the power outlet. -
Page 13: Using An Accessory Rf Modulator
RF In,) you will need an RF modulator in order to view the DVD playback on the television. See your electronics retailer or contact Philips for details on RF modulator availability and operations. Using an accessory RF modulator Use the composite video cable (yellow) to connect the DVD player’s TV OUT... -
Page 14: Connecting The Power Cord
Never make or change any connections with the power switched on. When no disc is loaded, press STANDBY-ON on the DVD player front panel. “NO DISC” may appear on the display panel. TIPS: Before making or changing any connections, make sure that all the devices are disconnected from the power outlet. -
Page 15: Optional Connections
Connect the COAXIAL socket of the DVD player to the corresponding Digital Audio In jack on your receiver (cable not supplied). Set the DVD player’s digital output to PCM-Only or ALL depending on the capabilities of your receiver (see page 37 {Digital Output}). -
Page 16: Hdmi Connections
DVD player’s HDMI OUT to HDMI IN on the HDMI TV. To hear sound via TV only, Set the DVD player’s {Digital Output – PCM-Only} for HDMI connection (see page 37). TIPS: Before making or changing any connections, make sure that all the devices are disconnected from the power outlet. -
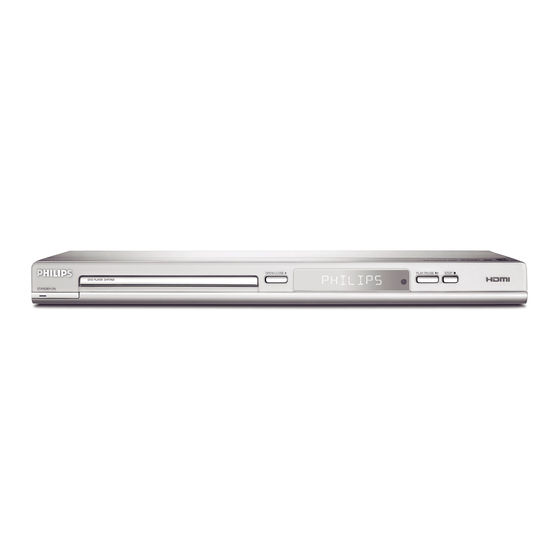
Page 17: Product Overview
OPEN/CLOSE – Opens or closes the disc tray. Display panel – Shows information about the current status of the DVD player. Mains ~ (AC Power Cord) – Connect to a standard AC outlet HDMI OUT – Connect to HDMI compatible... -
Page 18: Remote Control
– Repeat playback a specifi c section on a disc 01-53_dvp3960_37_eng2.indd 18 01-53_dvp3960_37_eng2.indd 18 (continued) – To switch the DVD player to standby mode or ON DISPLAY – Displays information on TV screen during playback – Cursor buttons for moving to the left or right, do a fast forward/reverse search. -
Page 19: Getting Started
If you are using external equipment, (such as audio system or receiver), turn it on and select the appropriate input source for the DVD player output. Refer to the equipment user’s manual for detail. 2006-12-28 11:24:43 AM 2006-12-28 11:24:43 AM... -
Page 20: Step 3: Setting Up Progressive Scan Feature
DVD VIDEO disc in the progressive scan mode. In such a case, turn off the progressive scan feature on both the DVD player and your TV. CANCEL CANCEL 2006-12-28 11:24:44 AM... -
Page 21: Step 4: Tv Color System
Step 4 : TV color system The color system of the DVD player, disc and TV should match in order for the disc to play. Video Setup Page TV Type NTSC TV Display Progressive Picture Setting Closed Captions HDMI Setup Press SETUP. -
Page 22: Step 5: Setting The Language
On-screen display (OSD) language Select this to change the language of this DVD player screen display menu. The menu language (on-screen display) for the system will remain as you set it. General Setup Page... -
Page 23: Playback From Disc
(Formats 1.0, 1.1, 2.0) Super Video CD TIPS: Some discs cannot be played on this DVD player due to the confi guration and characteristics of the disc, or due to the condition of recording and authoring software that was used. -
Page 24: Playback Features
(see page 45). For more playback features, see pages 24~32. Tips: – Do not overturn the DVD player while disc loading, playing or ejecting. – Do not close the disc tray manually even if the power switched off. -
Page 25: Operations For Video Playback
Operations for video playback Using the Disc Menu Depending on the disc, a menu may appear on the TV screen once you load in the disc. To select a playback feature or item keys or numeric keypad (0-9) on the remote, then press OK to start playback. -
Page 26: Selecting Various Repeat Functions
Playback Features Selecting various repeat functions Repeat play mode The repeat play options vary depending on the disc type. While playing a disc, press REPEAT continuously to choose a repeat options. For DVD – Chapter (currently playing chapter) – Title (currently playing title) –... -
Page 27: Viewing The Disc Playback Information
Viewing the disc playback information Using the OSD menu OSD menu shows the disc playback information (for example, title or chapter number, elapsed playing time, audio/ subtitle language), a number of operations can be done without interrupting disc playback. During playback, press DISPLAY on the remote control. -
Page 28: Time Display
Playback Features Time Display Press to select {Time Disp.} (Time Display), then press to access. Depending on the disc in the DVD player, the following display types appear on the TV screen. For DVD – TT Elapsed (elapsed playing time of current Title) –... -
Page 29: Viewing Audio Cd Playback Information
Viewing Audio CD playback information This function displays audio disc information on the TV screen during playback. During playback, press DISPLAY. A list of available disc information appears on the TV screen. Disc Go To / Track Go To / Track Selection Press DISPLAY repeatedly to select an option. -
Page 30: Special Vcd And Svcd Feature
Always refer to the instructions supplied with the discs. 01-53_dvp3960_37_eng2.indd 30 01-53_dvp3960_37_eng2.indd 30 (continued) Playing a DivX This DVD player supports the DivX movie playback that you download from your computer onto a CD-R/RW or DVD±R/RW (see page 35 for more information). -
Page 31: Playing Mp3/Wma/Jpeg Picture Cd
Playing MP3/WMA/JPEG/ Picture CD This DVD player can playback MP3, WMA, JPEG and Picture CD fi les on a personally recorded CD-R/RW disc, commercial CD. IMPORTANT! You have to turn on your TV and set to the correct Video In channel. (See page 19 ‘Finding your viewing channel’). -
Page 32: Preview Function (Jpeg)
Playback Features Preview Function (JPEG) This function shows the content of the current folder or the whole disc. Press DISPLAY during playback. 12 thumbnail pictures will appear on the TV screen. Press PREV í / NEXT ë to display the other pictures on the previous / next page. -
Page 33: Dvd Menu Options
This DVD Player setup is carried out via the TV, enabling you to customize the DVD player to suit your particular requirement. Using the General setup menu Press SETUP on the remote control. The system setup menu appears. General Setup Page... -
Page 34: Programming Disc Tracks
DVD Menu Options Programming disc tracks (not for Picture CD/MP3/WMA/DivX You can play the contents of the disc in the order you want by programming the tracks to be played. Up to 20 tracks can be stored. In ‘General Setup Page’, press select { Program }, then press select { Input Menu }. -
Page 35: Sleep
DVD player automatically after a preset time. In ‘General Setup Page’, press select { Sleep }, then press { 15 Mins } Turn off the DVD player after 15 minutes. { 30 Mins } Turn off the DVD player after 30 minutes. -
Page 36: Using The Audio Setup Menu
Select this option when output delivers sound from only the two front speakers. { LT/RT } Select this option if your DVD player is connected to a Dolby Pro Logic decoder. { V SURR } Allows the DVD player to use virtual surround sound effects. -
Page 37: Sound Mode
For example, if you use the AUDIO OUT sockets to connect to a TV or stereo system. LPCM Output If you connect the DVD player to a PCM compatible receiver via the digital terminals, such as coaxial or optical etc, you may need to adjust ‘LPCM Output’. -
Page 38: Cd Upsampling
DVD Menu Options CD Upsampling This feature allows you to convert your music CD to a higher sampling rate using sophisticated digital signal processing for better sound quality. In ‘Audio Setup Page’, press select { CD Upsampling }, then press { Off } Select this to disable CD Upsampling. -
Page 39: Using The Video Setup Menu
Using the Video setup menu Press SETUP on the remote control. The system setup menu appears. Video Setup Page TV Type TV Display Progressive Picture Setting Closed Captions HDMI Setup Press to select { Video Setup Page }. Press to select an item, then press to access. -
Page 40: Progressive
In the progressive scan mode, you can enjoy the high quality picture with less fl ickers. It only works when you have connected the DVD player’s YPbPr jacks to your TV that supports the progressive video input. Otherwise, a distorted picture will appear on the TV. -
Page 41: Closed Caption
Press to highlight one of the following options. BRIGHTNESS Increase the value to brighten the picture or vice versa. Choose zero (0) for average setting. CONTRAST Increase the value to sharpen the picture or vice versa. Choose zero (0) to balance the contrast. -
Page 42: Hdmi Setup
– If no display or distorted pictures appears on the TV screen due to unsupported resolution, reconnect any available video output to your DVD player and re-adjust the resolution setting. – When changing the resolution of the DVD player, the HDMI TV will automatically change to fi t the TV resolution. -
Page 43: Using The Preference Setup Menu
Wait for 5 seconds for the auto recovery. Use the composite video cable (yellow) to connect the DVD player’s TV OUT (CVBS) jack to the DVI TV Video In jack to switch to CVBS mode. Select the available resolution that could be supported by the DVI TV in the HDMI setup menu. -
Page 44: Subtitle/Audio/Disc Menu
DVD Menu Options Subtitle/Audio/Disc Menu These menus contains various language options for audio, subtitle and disc menu which may be recorded on the DVD. For details, see page 22. Parental Depending on the DVD, you may be asked to change the parental level while playing the disc. -
Page 45: Pbc
You can set the PBC to {On} or {Off}. This feature is available only on SVCD or Video CD 2.0 with playback control (PBC) feature. For details, see page 30. MP3/JPEG Menu MP3/JPEG Navigator can be set only if the disc is recorded with menu. It allows you to select different display menu for easy navigation. -
Page 46: Setting The Divx Subtitle Font
DVD Menu Options ® Setting the DivX subtitle font You can set the font type that supports the recorded DivX ® subtitle. In ‘Preference Page’, press ® { DivX Subtitle }, then press { Standard } Albanian, Danish, Dutch, English, Finnish, French, Gaelic, German, Italian, Kurdish (Latin), Norwegian, Portuguese, Spanish Swedish and Turkish. -
Page 47: Software Upgrade
Software upgrade Periodically Philips will issue software upgrade to enhance your user experience. IMPORTANT! – Power supply must not be interrupted during upgrade! To check the current software version of this DVD player; Press OPEN/CLOSE ç on the DVD player to open the disc tray. -
Page 48: Troubleshooting
No picture. The picture is distorted or black & white during playback. No sound. Disc does not play. Need Help? Visit us at www.philips.com/support 01-53_dvp3960_37_eng2.indd 48 01-53_dvp3960_37_eng2.indd 48 Solution – Press STANDBY-ON button on the front of the DVD player to turn on the system. - Page 49 An DivX movies does not repeat. ® Certain DivX files does not play or are skipped. Need Help? Visit us at www.philips.com/support 01-53_dvp3960_37_eng2.indd 49 01-53_dvp3960_37_eng2.indd 49 Troubleshooting Solution – The aspect ratio is fi xed on the DVD disc. – Depending on the TV, it may not be possible to change the aspect ratio.
- Page 50 Troubleshooting Problem No HDMI video output No HDMI audio output Need Help? Visit us at www.philips.com/support 01-53_dvp3960_37_eng2.indd 50 01-53_dvp3960_37_eng2.indd 50 (continued) Solution – HDMI connection can only be made to HDMI-equipped devices with HDCP (High Bandwidth Digital Content Protection). Use a separate adaptor (DVI to HDMI) for DVI TV connection (equipped with HDCP).
-
Page 51: Specifi Cations
TV STANDARD (PAL/50Hz) (NTSC/60Hz) Number of lines Playback Multistandard (PAL/NTSC) VIDEO PERFORMANCE Video DAC 12 bit, 108 MHz YPbPr 0.7 Vpp ~ 75 ohm Video Output 1Vpp ~ 75 ohm VIDEO FORMAT Digital MPEG 2 for DVD,SVCD Compression MPEG 1 for VCD DivX ®... -
Page 52: Glossary
HDMI Working Group that combines multi-channel audio and high defi nition video and that controls signals into a single digital interface for use with DVD player, digital television, and other audiovisual devices. 2006-12-28 11:24:52 AM... -
Page 53: Limited Warranty
Philips is not liable for any damage to or loss of any programs, data, or other information stored on any media contained with- in the product, or any non-Philips product or part not covered by this warranty.
Need help?
Do you have a question about the DVP3960 and is the answer not in the manual?
Questions and answers