
Summary of Contents for Redgum GX390
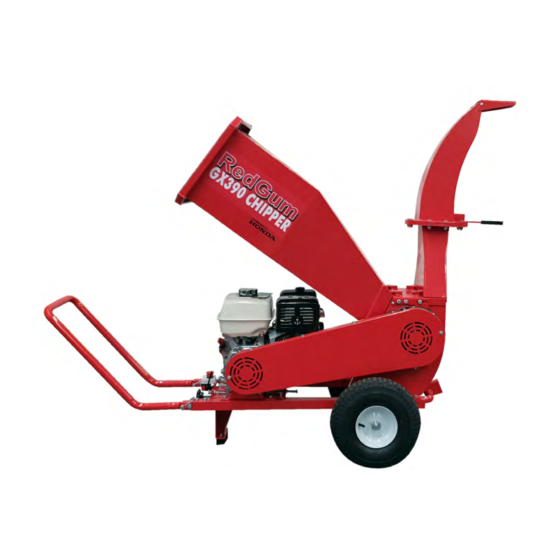
- Page 1 RedGum GX390 Chipper RedGum GX390 Chipper Owner’s Manual This manual accompanies the RedGum GX390 Chipper, powered by the Honda GX390 engine WARNING Read this manual, before operating or servicing the GX390 Chipper.
-
Page 2: Hazards And Safe Operation Symbols
IMPORTANT: READ BEFORE USE PLEASE KEEP THIS MANUAL FOR FUTURE REFERENCE Read this operation manual carefully before attempting to assemble, adjust or operate the machine. Please read the included engine manual for more information on your specifi c engine. Hazards and safe operation symbols Attention and warning Danger - Rotating blades. -
Page 3: Safety
Safety These safety messages are designed to alert you to possible dangers or hazards that could cause death, injury or equipment/property damage if not understood or followed. Safety messages and warnings are identifi ed throughout this manual with this symbol. It is important that you read and understand the instruction manual before use and keep the manual in a safe place for future reference. - Page 4 You must wear appropriate protective equipment when operating, servicing, or when in the operating area of the equipment to help protect from serious injury, including eye injury, inhalation of toxic fumes, burns, and hearing loss. Always wear eye protection. Protective equipment such as non-skid safety shoes, hearing protection, gloves, goggles etc should be used. Other people nearby should also wear appropriate personal protective equipment. Do not wear loose clothing or jewellery, which can be caught in moving parts. Keep hair and clothing away from the equipment. General equipment use and care Do not force the equipment. Use the correct equipment for your application. The correct equipment will perform better and be safer within its design parameters.
-
Page 5: Operating Warnings
- Do not refuel a hot engine. - Open the fuel cap carefully to allow any pressure build-up in the tank to release slowly. - Always refuel in well ventilated areas. - Always check for fuel leakage. If fuel leakage is found, do not start or run the engine until all leaks are fi xed. General Safety - Replacement parts must be original equipment manufacturer (OEM) to help ensure that equipment safety is maintained. -
Page 6: Table Of Contents
Table of Contents Hazards and Safe Operation Symbols Safety Operating Warnings Chipper Warranty Before Use Checklist Check cutting blades Engine oil Fuel Engine starting and stopping Chipper component Identification What Does my Chipper Process Chipping Warnings Operating Instructions How to use the chipper Clearing Jammed Blades Adjusting the Output Flap Adjusting the directional chute adjuster... -
Page 7: Before Use Checklist
The cutting system features a rotating drum that has 2 blades. For safe and correct operation, the clearance between the fixed Anvil (Blade) and rotor blades must be between 0.5mm - 0.8mm and all blade fasteners must be tight. After the first hour of use, re-check the blades. Engine Oil The Honda GX390 engine on this chipper requires 10W-30 engine oil. Severe or irrepairable damage may occur if the engine is allowed to run without engine oil. The engine oil level should be checked before each use. Ensure that the oil level is at or just under the maximum level indicator. Refer to engine owners manual. Fuel The chipper uses regular unleaded fuel. -
Page 8: Chipper Component Identification
Chipper Component Identifi cation Name Name Infeed Hopper Throttle control Discharge chute Handle Wheel Blade shaft access Support leg Emergency stop Frame Towbar Drive belt cover Spark Plug Direction adjuster Starting Cord Discharge fl ap Fuel Tank Cap Hopper fl aps Fuel Tap Air Filter Cover Choke Drive Belt Tensioner... -
Page 9: What Does My Chipper Process
What Does My Chipper Process This chipper is designed for the following materials under 90mm in diameter: Branches & Pruning’s Palm Fronds Grass / Hay Bark Vegetable matter Paper / Cardboard Use caution when feeding the below through the chipper, as they may shorten blade life span: Hard &... -
Page 10: Operating Instructions
Operating Instructions Make sure you fully understand the Red Gum Chipper owner’s manual and engine owner’s manual before attempting to operate this machine. Ensure the Chipper has been serviced in ac- cordance with this manual and the engine manual supplied with this chipper. Preparation 1.Put the machine securely on a level surface. 2.Keep the operator area clear of other objects and obstacles. 3.Ensure no children, animals or bystanders are within a 15m (36ft) radius of the machine. 4.Before operating the machine, please check the direction of the wind to avoid working downwind of the exhaust and the discharge chute. - Page 11 8. Pre-cut large side branches so that the branch will self feed more efficiently 9. Short pieces of timber tend to bounce around in the Chipper hopper (1). Feeding short pieces together with longer branches reduces this. 10. Once you have become more accustom to the way your GX390 chipper operates, try to prune your branches to suit the chipper. 11. If you are feeding soft materials into the chipper it is advisable to follow them with a more solid branch. Mixing up the materials you want to chip will improve your chipping efficiency and reduce potential blockages.
-
Page 12: How To Use The Chipper
How to Use the Chipper CLEARING JAMMED BLADES: If the machine becomes clogged or jammed: follow these instructions: •First turn off the engine and remove the spark plug cap, •Ensure the engine and blade drum have come to a complete stop. •Remove the Chipper hopper (1) by removing the retaining bolts on the underside of the hopper. •Slide the Chipper hopper (1) side ways to clear the locating pins. WARNING: the Chipper hopper (1) is heavy and requires two (2) people to remove it. •You may also need to remove the Discharge chute (2) by removing the retaining bolts at the front of the chipper. •You must continue to wear all eye and hand protection while unblocking the chipper. •Caution: The chipper blades are extremely sharp and there is danger of entrapment and injury. •Caution: Be careful when removing debris from around the knife drum as the drum may rotate unexpectantly resulting in injury. -
Page 13: Adjusting The Output Flap
Adjusting the output flap The output chute has an adjustable flap that can be used to help direct where chippings will fall. To adjust: 1. Loosen (rotate anti clockwise) the thumb-screw (A). 2. Rotate the flap (B) as required – the higher it is, the further away the chippings will fall. 3. Firmly tighten the thumb-screw by hand. Adjusting the directional chute adjuster The output chute has directional chute adjuster which allows the operator to adjust the chute into 11 different positions. To adjust: 1) Push down on the directional chute adjustment lever until the locking pin is released. (A) -
Page 14: Maintenance
Maintenance MAINTENANCE WARNINGS: - Running petrol engines in confined areas CAN KILL IN MINUTES. Engine exhaust fumes contain carbon-monoxide – a deadly gas that you cannot smell or see. NEVER run a petrol engine in confined areas EVEN IF windows and doors are open. - Petrol is extremely flammable – keep clear of naked flames or other ignition sources. - Do not have the engine running during inspection and maintenance unless specifically required. - The engine should be cool enough before performing maintenance activities - Some maintenance activities described may be beyond the scope of some users. For procedures that you are not comfortable with or do not have the tools or experience for, have the unit serviced by a service centre or qualified technician. - Always wear hand and eye protection when performing any maintenance. To keep the equipment performing at optimal efficiency, regular checks and maintenance is required. Proper care and maintenance ensures best performance and longest service life. Check Before Each Use After 2 Hours Every 20 Hours Check engine oil Clean/non-stale fuel Air Cleaner Ensure input/output chutes are clear of obstructions Ensure all guards/deflectors are in good working condition Loose nuts &... -
Page 15: Blades
Blades BLADE WARNINGS: - If a blade is damaged (cracked etc), replace both blades. - Keep blades in sets that are the same width. This will ensure proper drum balance - Ensure that blades are kept in good condition and correct clearance (0.6-0.8mm) is maintained. - Ensure that all bolts securing the blades are firmly tightened – check them regularly. -
Page 16: Checking Blade Clearance
4. Using a spanner on the drum shaft, turn the blade drum slowly inside the chipper body so that the blades align into the proper position (So they are visible and easily accessed). Caution: Be careful when removing the blades as the drum may rotate expectantly resulting in injury. We recommend that you lodge a piece of timber between the blade drum and chipper housing to stop the drum from rotating while servicing the chipper. 5. Remove the bolts (rotate right) that attach the blades to the blade drum. 6. Remove the blades and clean the surface under the blades so it is free of any debris. -
Page 17: Anvil Adjustment/Removal And Installation
Anvil adjustment/removal and Installation Over time the Anvil blade may wear. 1. To remove the Anvil loosen, but do not remove the bolts connecting the anvil to the machine. 2. Gently slide the anvil out. 3. Clean all surfaces and then slide new or sharpened anvil back in. 4. When reinstalling the anvil, the gap (A) between the anvil and the blades at the closest point should be between 0.6-0.8 mm 5. Tighten anvil bolts once the gap has been set. Gently turn the blade drum with a spanner to ensure the blades do not touch the anvil as they pass it. 6. The anvil can be sharpened or replaced when worn. WARNING: Ensure all bolts are re-tightened properly •Note: The anvil sharpness & positioning are critical to the performance of the chipper. •Do not attempt to service or repair the machine or engine if you are not competent to do Blade Shaft Lubrication The shaft bearing housing (C) on either side of the machine features a grease nipple (D). A grease gun and grease are... -
Page 18: Drive Belts
Drive Belts DRIVE BELT WARNINGS: If a drive belt is damaged (cracked, breaking, torn etc), have it replaced. Ensure that drive belt tension is maintained. The machine uses 2 “V” profi le belts to rotate the blade shaft. The belts use friction against the belt pulleys to provide drive. If the belts are adjusted incorrectly, or are worn, slippage may occur. Slippage is usually noticeable by a “squealing” noise and/or slowing or stopping of the drum when the machine is under load. The belts require maintenance/replacement when necessary. Belt Tension Adjustment To adjust belt tension: 1. Remove (rotate anti clockwise) the 8 bolts (A) securing the drive belt cover (B), and remove the cover. -
Page 19: Belt Removal/Installation
Belt Removal/Installation The drive belts can be replaced. When replacing belts, always use the correct belt type and replace both belts at the same time. 1. Remove the drive belt cover, as per process described earlier under “Belt tension adjustment”. 2. Loosen the engine mounting and locating bolts. Back off the rear engine locating bolts sufficiently so that the engine can be moved enough to remove/install the belts. 3. Remove the belt from the drive pulleys. 4. Ensure the drive pulleys are clean and smooth. 5. Place the new belt over the pulleys then adjust as described above. Cleaning Guidelines CLEANING WARNINGS: - Do not use solvents, chemicals or abrasives when cleaning the machine, as this may damage some surfaces of the chipper - Do not use high-pressure sprayers near the blade shaft bearings as bearing damage may result. - Wear gloves or use suitable tools to assist in cleaning – do not use bare hands. -
Page 20: Troubleshooting
Troubleshooting NOTE: Some procedures listed here may need to be performed by a service centre or qualified technician. Do not attempt any chipper maintenance or servicing if you are not competent to do so, or if you do not have the correct tools available. Difficulty starting the engine Possible Fault Action Lack of Fuel Check that there is fuel in the tank and the fuel system is primed. To further check if fuel is reaching the carburettor, remove the carburettor drain plug, and check if fuel drains. Engine “OFF” Ensure engine ON/OFF switch is in the ON position. - Page 21 Difficulty re-starting the engine after use, or engine stops during use Possible Fault Action No fuel or engine oil Check fuel level and ensure adequate fuel is available. An engine oil sensor will automatically switch off the engine or prevent starting if a low engine oil level is detected. Blades jammed Remove jammed material from the machine Overheating Allow engine to cool before restarting. Ensure all air vents and heat dissipation surface are clean and free of debris. If possible, improve engine cooling, such as operating in lower temperatures. Carbon build up on Remove the spark plug and clean any carbon from the electrodes spark plug before re-installing it. Carburettor blocked Clean the carburettor Reduced engine speed/power during use...
-
Page 22: Specification
nancial loss, loss of employee time or an inconvenience requiring compensation. - If this item has been purchased in error after considering the points above, simply contact the retailer directly for details of their returns policy, if required. For the latest information on The RedGum GX390 Chipper please visit our website www.RedGumProducts.com.au...