Table of Contents
Advertisement
Quick Links
Advertisement
Table of Contents

Summary of Contents for SunFounder RasPad 3
- Page 1 SunFounder RasPad 3 www.sunfounder.com May 10, 2022...
-
Page 3: Table Of Contents
Contents 1 SAFETY NOTICES Precautions about the use of the product ....... . . Precautions about the maintenance of lithium batteries . - Page 4 7.4.5 Add DIY Device with ESP32 ........7.4.6 Start the Home Assistant Service at Boot .
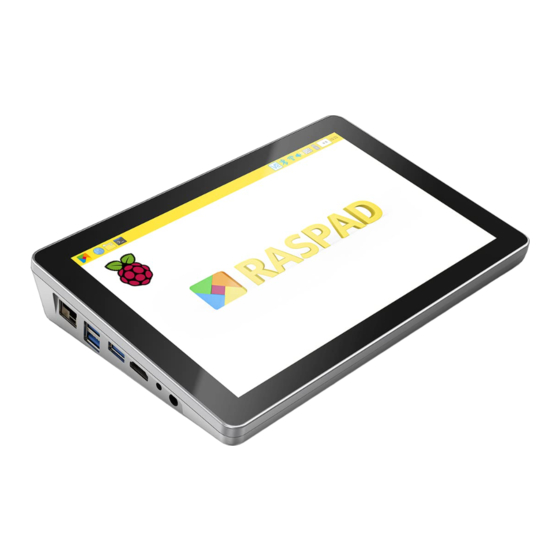
- Page 5 SunFounder RasPad 3 An ideal programming Raspberry Pi tablet perfectly compatible with Raspberry Pi 4B. RasPad with internal 10.1 inch IPS Pi touchscreen LCD monitor, high resolution of 1280Ã ˚ U800 pixels, 10-finger touch, 5 hours long battery life. Easily assembled with 2 steps to get started anytime anywhere.
- Page 6 SunFounder RasPad 3 Contents...
-
Page 7: Safety Notices
Chapter 1 SAFETY NOTICES 1.1 Precautions about the use of the product • Be sure to use the dedicated power adapter for this product for charging and discharging, and never use an overpowered power adapter; • Do not use the product in a high temperature environment, and the battery power should not be too low. Gener- ally, it is best to start charging at about 30%;... - Page 8 SunFounder RasPad 3 Chapter 1. SAFETY NOTICES...
- Page 10 SunFounder RasPad 3 Chapter 2 COMPONENTS LIST Chapter 2. COMPONENTS LIST...
-
Page 11: Assembly Instructions
Chapter 3 ASSEMBLY INSTRUCTIONS 1. Before inserting the Micro SD card, connect the button-board to the Raspberry Pi using the included FFC cable. 2. Connect all the cables, and then attach the Raspberry Pi with four of the M2.5x4 screws. 3. - Page 12 SunFounder RasPad 3 Detailed Assembly Steps Take out the RasPad, then flip it over to remove the back cover. Chapter 3. ASSEMBLY INSTRUCTIONS...
- Page 13 SunFounder RasPad 3 Below is an image of the internal structure of the RasPad. Note: Avoid pressing on the two speakers during assembly. Connect the Ethernet port of the Raspberry Pi and the Main Board.
- Page 14 SunFounder RasPad 3 Connect the Raspberry Piâ ˘ A ´ Zs USB 3.0 port to the RasPad Main Board with the included USB cable. Chapter 3. ASSEMBLY INSTRUCTIONS...
- Page 15 SunFounder RasPad 3 Connect the two Micro-HDMI cables. Note: Cable A is slightly longer than Cable B.
- Page 16 SunFounder RasPad 3 Connect the USB-C cable. Chapter 3. ASSEMBLY INSTRUCTIONS...
- Page 17 SunFounder RasPad 3 Plug the FFC cable into the Micro SD card board. Insert the Micro SD card board into the Raspberry Piâ ˘ A ´ Zs Micro SD card slot.
- Page 18 SunFounder RasPad 3 Insert the other end of the FFC cable into the RasPad button board. Fix the Raspberry Pi with 4 M2.5x4 screws. Chapter 3. ASSEMBLY INSTRUCTIONS...
- Page 19 SunFounder RasPad 3 Attach the three heat-sinks to the Raspberry Pi, and insert the Accel SHIM module for the RasPadâ ˘ A ´ Zs auto-rotate function.
- Page 20 SunFounder RasPad 3 To use the GPIO pins of the Raspberry Pi, connect a 40-pin GPIO ribbon cable to the Raspberry Pi, and route the ribbon cable out the top of the case. Chapter 3. ASSEMBLY INSTRUCTIONS...
- Page 21 SunFounder RasPad 3 Attach the fan onto the back cover with four PWA1.7X9 screws. Note: The logo faces out towards the exterior vent.
- Page 22 SunFounder RasPad 3 Connect the fan to the Main Board. Attach the back cover with five M2.5x4 screws. Note: Do not force the back cover in place. If the enclosure is hard to connect, or the screw-holes do not line up correctly, please check that there are no internal components interfering with the fit before trying to reattach the back...
- Page 23 SunFounder RasPad 3...
- Page 24 SunFounder RasPad 3 Chapter 3. ASSEMBLY INSTRUCTIONS...
-
Page 25: Quick User Guide
Chapter 4 QUICK USER GUIDE This chapter includes flashing the Raspberry Pi image, installing the virtual keyboard, setting the right-click function and calibrating the rotating screen function. 4.1 Install the Raspberry Pi OS An operating system needs to be installed onto the Micro SD card before inserting it into the RasPad button-board. Note: Skip this chapter if the Raspberry Pi already has an operating system installed. - Page 26 SunFounder RasPad 3 Insert the Micro SD card into the computer or laptopâ ˘ A ´ Zs SD card slot. If the computer or laptop only has a full-size port for SD cards, use a Micro SD card adapter. Warning: Upgrading the Raspberry Pi OS to Debian Bullseye will cause some features to not work, so it is recommended to continue using the Debian Buster version.
- Page 27 SunFounder RasPad 3 Select the SD card you are using. Click the WRITE button. 4.1. Install the Raspberry Pi OS...
- Page 28 SunFounder RasPad 3 The Imager will overwrite any files already on the SD card. If the SD card has any files, back up these files before clicking Yes. After the Imager completes installing the Operating System on the SD card, click Continue to complete the installation.
- Page 29 SunFounder RasPad 3 Insert the Micro SD card into the Micro SD port of the RasPad, then press the power button for over three seconds, RasPad will turn on. The power button is on the right side. Press and hold for over three seconds to power the RasPad on or off. A short press will turn the screen on or off.
-
Page 30: Install Virtual Keyboard On Raspad
SunFounder RasPad 3 Warning: The SD card slot is a snap-in style attached to the back cover. Before removing or replacing the back cover, remove the Micro SD card to avoid damaging the Micro SD card and the RasPadâ ˘ A ´ Zs internal button board. - Page 31 SunFounder RasPad 3 In the Window option, check Dock to screen edge. And in Auto-show option, check Auto-show when editing text again. 4.2. Install Virtual Keyboard on RasPad...
- Page 32 SunFounder RasPad 3 The next 2 items are optional, the ones checked in the picture are recommended by us, you can also check other ones. In Layout option, Small is recommanded. In Theme option, DarkRoom is recommanded. Chapter 4. QUICK USER GUIDE...
- Page 33 SunFounder RasPad 3 After the setting is complete, restart RasPad. Every time you restart RasPad, you need to click General Access -> Onboard to enable the virtual keyboard. 4.2. Install Virtual Keyboard on RasPad...
- Page 34 SunFounder RasPad 3 Now you can use this keyboard to edit your files or codes. Chapter 4. QUICK USER GUIDE...
-
Page 35: Right Click On Raspad
SunFounder RasPad 3 4.3 Right Click on RasPad Touchscreen tablets and displays make it easy for you to perform simple navigation tasks with your fingers or stylus, but at some point, you may want to use right-click commands to quickly access context-specific shortcuts. -
Page 36: Install Rotating Screen Service
SunFounder RasPad 3 After entering rc.local, add the following command before exit 0. sudo /usr/local/bin/evdev-rce & Press Ctrl+C -> Y to exit and save the rc.local file, and then run sudo reboot to restart RasPad. sudo reboot After restarting, you can long press on the RasPad desktop and see if the right click function appears. - Page 37 SunFounder RasPad 3 After the first installation, some angles may not trigger the auto-rotation function, please try to turn it in the opposite direction for one second and then turn it back again, it will automatically calibrate. Or rotate RasPad slowly 720 degrees on three axes and it will also auto-calibrate.
- Page 38 SunFounder RasPad 3 Chapter 4. QUICK USER GUIDE...
-
Page 39: Raspad Launcher
Chapter 5 RASPAD LAUNCHER 5.1 Introduction RasPad Launcher is an open source software that simulates a launcher menu, with a focus on improving the users touchscreen experience with the RasPad or other touchscreens. Note: If you want to use the original desktop of the Raspberry Pi, you can skip this chapter. -
Page 40: Installation Guide
SunFounder RasPad 3 5.2 Installation Guide Download the RasPad Launcher package, and extract it. wget https://github.com/raspad-tablet/raspad-launcher/releases/latest/download/raspad- launcher.zip unzip raspad-launcher.zip cd raspad-launcher The script will install the following: • RasPad launcher with desktop profile. • RasPad FAQ desktop profile (Just a quick icon to browser RasPad FAQ webpage). -
Page 41: Interfaces Introdction
Chapter 6 INTERFACES INTRODCTION • Micro SD Card Port: The SD card slot is a snap-in style attached to the back cover. Before removing or replacing the back cover, remove the micro-SD card to avoid damaging the micro-SD card and the RasPadâ ˘ A ´ Zs internal button board. -
Page 42: Charge The Raspad
SunFounder RasPad 3 • Battery Indicator: Lights up in green. When charging, the corresponding LED flashes; when fully charged, all 3 LEDs are on. • Power Indicator: When RasPad is turned on, it lights up as red. • Ethernet Port: Standard Ethernet port. - Page 43 SunFounder RasPad 3 Insert one side of the power cable into the power adapter, and the other side to an outlet. 6.1. Charge the RasPad...
- Page 44 SunFounder RasPad 3 Plug the power adapter into the RasPad power port. At this time, one of the green LED might be blinking and the charging icon will appear, indicating that the RasPad is charging. Chapter 6. INTERFACES INTRODCTION...
-
Page 45: Volume And Brightness Settings
SunFounder RasPad 3 6.2 Volume and Brightness Settings Next to the power button, the red LED should now be lit, indicating that the RasPad is powered on. At this point, the RasPad should be booted up. If the screen is too bright, give the brightness button a short press to enter the screen-brightness adjustment page. - Page 46 SunFounder RasPad 3 The brightness can be adjusted via these two buttons. After three seconds without operation, the brightness bar on the screen automatically disappears. The brightness should not be too high or too low, otherwise it will be harmful to the eyes.
- Page 47 SunFounder RasPad 3 To adjust the volume, press the volume button once to enter the volume adjustment page. Then press these two buttons to adjust the volume. 6.2. Volume and Brightness Settings...
-
Page 48: Connect Headphones Or Other Screens
SunFounder RasPad 3 6.3 Connect Headphones or Other Screens Plug in the headphone if you need. The headphone volume can only be adjusted on the desktop screen. Enter the Raspberry Pi desktop by tapping the top left menu icon of the RasPad Launcher. - Page 49 SunFounder RasPad 3 Tap the speaker icon and the volume control box will appear. Slide the volume cursor up or down tto adjust the headphoneâ ˘ A ´ Zs volume. Warning: When wearing headphones, do not adjust the volume too high.
- Page 50 SunFounder RasPad 3 Chapter 6. INTERFACES INTRODCTION...
- Page 51 SunFounder RasPad 3 6.3. Connect Headphones or Other Screens...
- Page 52 SunFounder RasPad 3 Chapter 6. INTERFACES INTRODCTION...
-
Page 53: Raspad Projects And Activities
Chapter 7 RASPAD PROJECTS AND ACTIVITIES To get started using the RasPad, this chapter includes some interesting and challenging projects to choose from. 7.1 Multimedia Options Watch videos, read e-books, or play games on the RasPad. 7.1.1 Watch Video The RasPad has a built-in video player: VLC Video Player. Watch a local video directly by double-clicking on the VLC Video Player icon, or log in to the YouTube website from Google Chrome browser to watch videos. -
Page 54: Read E-Book
SunFounder RasPad 3 7.1.2 Read E-book Read online from the Google Chrome browser. Chapter 7. RASPAD PROJECTS AND ACTIVITIES... -
Page 55: Play Game
SunFounder RasPad 3 7.1.3 Play Game Click Preferences -> Recommended Software -> Games to install games on RasPad 3. For example, install Minecraft, and plug in a keyboard and mouse to play. 7.1. Multimedia Options... -
Page 56: Retro Games Console
SunFounder RasPad 3 7.2 Retro Games Console 7.2.1 Description You can turn RasPad 3 into a retro games console playing with your friends, letâ ˘ A ´ Zs see how we can do it! Chapter 7. RASPAD PROJECTS AND ACTIVITIES... -
Page 57: Required Components
SunFounder RasPad 3 7.2.2 Required Components • A RasPad 3 • 8G+ MicroSD Card • Micro-SD Card Reader • Keyboard • Gamepad It is recommended to use a Raspberry Pi 4 as the main control board, with Retro Pie as the Operating System. - Page 58 SunFounder RasPad 3 When playing games, a gamepad and a keyboard are needed. The RasPad is equipped with a 1280x800 LCD touch screen, a 2-watt stereo speaker, and three USB 3.0 ports, allowing for high resolution and sound quality to provide an excellent gaming experience.
-
Page 59: Game System Installation
SunFounder RasPad 3 7.2.3 Game System Installation RetroPie allows you to turn your Raspberry Pi, ODroid C1/C2, or PC into a retro-gaming machine. It builds upon Raspbian OS, Emulation Station, RetroArch and many other projects to enable you to play your favorite Arcade, home-console, and classic PC games with the minimum set-up. - Page 60 SunFounder RasPad 3 Installing RetroPie: Step 1: Download the SD image compatible with the Raspberry Pi 4 on the RetroPie official website. Chapter 7. RASPAD PROJECTS AND ACTIVITIES...
- Page 61 SunFounder RasPad 3 Step 2: After the download is complete, unzip the downloaded package containing the image file. Step 3ïijŽThen flash the RetroPie image into the micro-SD card. • For Windows, use: Raspberry Pi Imager, Etcher, or Win32DiskImager. Note: Win32DiskImager requires an .img file extracted from the .img.gz image downloaded in step 2. You can use a program like 7zip to do this.
-
Page 62: Retropie Configuration
SunFounder RasPad 3 Step 4: Insert the micro-SD card into the RasPad, and press the power button to boot up the system. Warning: The SD card slot is a snap-in style attached to the back cover. Before removing or replacing the back cover, remove the micro-SD card to avoid damaging the micro-SD card and the RasPadâ... -
Page 63: Printer Monitor
SunFounder RasPad 3 7.3 3D Printer Monitor When using a 3D printer, we will need to use OctoPrint. It is an open source 3D printer controller application, which provides a web interface for the connected printers. It displays printersâ ˘ A ´ Z status and key parameters and allows user to schedule prints and remotely control the printer. -
Page 64: Touch Ui
SunFounder RasPad 3 Please refer to Install the Raspberry Pi OS. • Webcam Option: A camera will need to be installed on the RasPad for webcam use. Please refer to the tutorial: Assemble the Camera Module. • Touch UI Option: A new Raspberry Pi image might not have an auto start function for Touch UI. Please refer to the tutorial: Touch UI to configure the settings for the Touch UI function. - Page 65 SunFounder RasPad 3 Select the version you need. When installing Ultimaker Cura, please note that in the choose components step, Open STL files with Cura has been checked by default, so that .stl files can be sliced. If you want to slice other types of model files, check the corresponding option, otherwise you can install it directly.
- Page 66 SunFounder RasPad 3 When opening Ultimaker Cura for the first time, there will be a series of configuration prompts. At the Add a Printer step, select the model of printer used and click Next. Chapter 7. RASPAD PROJECTS AND ACTIVITIES...
- Page 67 SunFounder RasPad 3 After selecting the correct printer model, verify that the parameters provided by Ultimaker Cura in the Machine Settings page are correct, or change the parameters directly. Follow the onscreen prompts to complete the configuration of Ultimaker Cura.
- Page 68 SunFounder RasPad 3 Once Ultimaker Cura has successfully launched, click the Folder icon in the upper left-hand corner and browse to the folder with the .stl 3D model file that needs to be sliced, and click Open to add the .stl file to Ultimaker Curaâ ˘ A ´ Zs library.
- Page 69 SunFounder RasPad 3 After the file has been added, click the Slice option in the lower right-hand corner, and Ultimaker Cura will automati- cally perform the slicing operation. After slicing is complete, click the Save to Disk option in the lower right corner to save the sliced â ˘ A ´ Nâ ˘ A ´ Nfile locally.
-
Page 70: Print 3D Model
SunFounder RasPad 3 7.3.3 Print 3D Model After the .stl file has been sliced, the 3D model file can be sent to the 3D printer through OctoPrint to be printed. Open the RasPadâ ˘ A ´ Zs browser, and enter http://192.168.18.179/?#temp to log in to OctoPrint. - Page 71 SunFounder RasPad 3 Click the Upload option to select the sliced â ˘ A ´ Nâ ˘ A ´ N3D model file. 7.3. 3D Printer Monitor...
- Page 72 SunFounder RasPad 3 Click the print icon. The 3D printer will start to print the 3D model file after the slicing process is complete. If you have transferred the sliced â ˘ A ´ Nâ ˘ A ´ Nfile to the Raspberry Pi, you can also open the OctoPrint UI in RasPad to print.
-
Page 73: Video
And RasPad 3 is powered by Raspberry Pi 4 with 10.1â ˘ A ˙ I HD touch screen and 5 hours battery life. We also wrote scripts for it to boot up and full screen self-start, so you can use Home Assistant on RasPad more easily and quickly. -
Page 74: Install Home Assistant
SunFounder RasPad 3 7.4.1 Install Home Assistant Install Docker Here will introduce how to use the container environment to install and run Home Assistant. We recommend using Docker as the container environment. The way to install Docker is very simple, just run the following commands. -
Page 75: Install And Configure Esphome
SunFounder RasPad 3 Now you can enter http://<localhost>:8123 in the browser to enter the Home Assistant operation interface. For example, my Raspberry Pi IP is 192.168.6.136, then visit http ://192.168.6.136:8123. Note: 1. If you need to configure boot-up, please refer to: Start the Home Assistant Service at Boot 2. - Page 76 SunFounder RasPad 3 esphome dashboard config/ Configure ESPHome 1. Open a browser and enter ESPHome Dashboard through http://localhost:6052 or http://X.X.X.X:6052 (replace X.X.X.X with your Raspberry Piâ ˘ A ´ Zs IP address). 2. Create configuration. Click on the â ˘ AIJ+â ˘ A ˙ I to start adding configurations.
- Page 77 SunFounder RasPad 3 Select the device type (ESP32 for example). 7.4. Home Assistant...
- Page 78 SunFounder RasPad 3 Enter Once added, you will see them in the Dashboard of ESPHome. Note: When it is not the first time to add a device, click â ˘ AIJ+â ˘ A ˙ I on the main page, follow the prompts to enter the device name, WIFI and password, select the device type.
- Page 79 SunFounder RasPad 3 3. Edit the .yaml file. Click EDIT in the bottom right corner to go inside the .yaml file, you will see the following default components. 7.4. Home Assistant...
- Page 80 SunFounder RasPad 3 • esphome: Contains the name, platform, and board type that you set up. • logger: The logger component automatically logs all log messages through the serial port and through MQTT topics. • api: The ESPHome native API is used to communicate with clients directly, with a highly-optimized network protocol.
- Page 81 SunFounder RasPad 3 the configured WiFi fails. After 1 minute of unsuccessful WiFi connection attempts, the ESP will start a WiFi hotspot (with the credentials from your configuration). Now start to add other components. There are a lot of components in the ESPHome official website, including Sensor Components, Output Components, Light Components, etc., Here we take Binary Light in Light Components as...
- Page 82 SunFounder RasPad 3 4. Install the .yaml file to ESP32 board. After editing, click INSTALL in the lower right corner to compile and install. There are 2 methods for you to choose: Wirelessly and USB Port. But for the first installation you need to connect the ESP32 board to the Raspberry Pi using USB and then choose the second installation method.
-
Page 83: Log In
SunFounder RasPad 3 After successful installation, if you connect an LED to GPIO16 in ESP32 board, you will see the LED is lit. Also please record this IP, you will need to fill in this IP when you add ESPHome to Home Assistant. - Page 84 SunFounder RasPad 3 2. Create a name for your home and select your region. Chapter 7. RASPAD PROJECTS AND ACTIVITIES...
- Page 85 SunFounder RasPad 3 3. Select the content you want to share to Home Assistant. 7.4. Home Assistant...
- Page 86 SunFounder RasPad 3 4. You can choose to configure the device now, or later. It is recommended that beginners configure the device later, as the configuration is described in detail later in the tutorial. Chapter 7. RASPAD PROJECTS AND ACTIVITIES...
- Page 87 SunFounder RasPad 3 5. After setting up, enter your login username and password in the login screen. Note: If the login screen does not jump automatically, please open Home Assistant again via http://localhost:8123. After logging in successfully, you will enter your Home.
-
Page 88: Add Smart Devices
SunFounder RasPad 3 7.4.4 Add Smart Devices You can add your purchased smart devices to Home Assistant, such as smart sound, smart desk lamp, etc. You can also make your DIY device with ESP32 and add it in. In this section, you will learn how to add your smart devices. - Page 89 SunFounder RasPad 3 2. Add Integration Now, visit http://ip:8123 to access your Home Assistant, then click Configuration in the left column and select Inter- grations. 7.4. Home Assistant...
- Page 90 SunFounder RasPad 3 If Home Assistant finds a device on your network, it will display the corresponding integration, which can be easily added with just a few clicks. Chapter 7. RASPAD PROJECTS AND ACTIVITIES...
- Page 91 SunFounder RasPad 3 If your smart device has not been discovered yet, donâ ˘ A ´ Zt worry, click the + ADD INTEGRATION button at the bottom right and search for your integration in the list. Each integration may be different in use, you can visit Home Assistant Integration for details.
- Page 92 SunFounder RasPad 3 Edit Dashboard Now a CARD needs to be added to control this smart device. Return to the Overview page. If the device you just added does not appear, you need to Edit Dashboard. Click Overview –> Edit Dashboard –> ADD CARD, you can select the corresponding CARD according to your needs, for example, select Button here, and then select the corresponding Entity.
-
Page 93: Add Diy Device With Esp32
SunFounder RasPad 3 7.4.5 Add DIY Device with ESP32 You can add your purchased smart devices to Home Assistant, such as smart sound, smart desk lamp, etc. You can also make your DIY device with ESP32 and add it in. - Page 94 SunFounder RasPad 3 2. If Home Assistant finds a device on your network, it will display the corresponding integration, which can be easily added with just a few clicks. If your smart device is not yet discovered, donâ ˘ A ´ Zt worry, you can add it via the + ADD INTERGATION button at the bottom right.
- Page 95 SunFounder RasPad 3 3. Search for ESPHome in the pop-up window and fill in the Host (the IP recorded after the INSTALL step in chapter Install and configure ESPHome), with the option to place your esp-light in the bedroom, kitchen or other area of your choice.
- Page 96 SunFounder RasPad 3 4. After clicking Finish, you will see it in the list. Edit Dashboard Now a CARD needs to be added to control this esp-light. Click Overview –> Edit Dashboard –> ADD CARD, you can select the corresponding CARD according to your needs, for example, select Button here, and then select the corresponding Entity.
- Page 97 SunFounder RasPad 3 After clicking SAVE, you will be able to use this Button to control the esp-light (if you connect an LED to GPIO16 in ESP32 board, click on the Button to make the LED light up or turn off).
-
Page 98: Start The Home Assistant Service At Boot
SunFounder RasPad 3 For more styles, you can refer to Official Demo. 7.4.6 Start the Home Assistant Service at Boot Normally, Docker is self-starting after booting by default, which also means that after you install Home Assistant, you can use it as long as you start the Raspberry Pi. - Page 99 SunFounder RasPad 3 4. Exit full screen. computer: Method 1: Press F11. Method 2: Move the mouse to the upper column of the screen and click the exit button that appears. Method 3: Right-click the pop-up menu, select â ˘ AIJExit full screenâ ˘ A ˙ I.
-
Page 100: Home Assistant File Structure
SunFounder RasPad 3 7.4.8 Home Assistant File Structure Homeassistant creates a configuration file by default under the path of the executing user (created homeassistant) at the ~/.homeassistant path. The file directory structure is as follows: • .storage directory contains a lot of user-related information, including user login information (user- name/password, encrypted in auth_provider.homeassistant file). -
Page 101: Cloud4Rpi
SunFounder RasPad 3 7.5 Cloud4RPi Cloud4RPi is a cloud-based control panel for IoT projects. Cloud4RPi uses dashboard widgets to control IoT devices remotely and show real-time device data. 7.5.1 Quick Guide on Cloud4RPi Install Cloud4RPi in Your Raspberry Pi It is advisable to update your system before installing. - Page 102 SunFounder RasPad 3 Once logged in, you should see two buttons at the top of Cloud4RPi, Devices to display the device connections and Control Panels to display the information received or sent from the Raspberry Pi on the webpage. Connect Your Raspberry Pi to Cloud4RPi After logging in, click the Devices option, and then click New Device.
- Page 103 SunFounder RasPad 3 Open the terminal of the Raspberry Pi and download the test examples provided by Cloud4RPi. cd /home/pi git clone https://github.com/cloud4rpi/cloud4rpi-raspberrypi-python.git Use a text editor such as Nano to modify the content of the control.py file. cd cloud4rpi-raspberrypi-python sudo nano control.py...
- Page 104 SunFounder RasPad 3 Using the Cloud4RPi Control Panels The control panel on the Cloud4RPi server provides many useful widgets for IoT applications. These widgets can be used to control the conponents or display sensor data. After entering Control Panels, click the New Control Panel button.
- Page 105 SunFounder RasPad 3 For example, we select the Text widget and then select Hot Water ¡ r C, so that we can see it on the newly created control panel. 7.5. Cloud4RPi...
-
Page 106: Learn More About Control.py
SunFounder RasPad 3 Note: We will introduce these displayed data in detail in the chapter Learn More about control.py. 7.5.2 Learn More about control.py In order to better understand the projects that follow, letâ ˘ A ´ Zs take a look at the official sample code provided by Cloud4RPi. -
Page 107: Projects
SunFounder RasPad 3 the data type of the transferred content ('numeric' is a numeric type, 'string' is a string type, 'bool' is a boolean type, and 'location' is a list containing two dictionaries). Through the analysis of the variables dictionary, we can know that Cloud4RPi will read the keys of the variables dictionary and display the value corresponding to the key in the Control Panel. - Page 108 SunFounder RasPad 3 cp -r /home/pi/raspad3/iot/ * /home/pi/cloud4rpi-raspberrypi-python Temperature and Humidity Acquisition In this project, we use DHT11 to read the surrounding temperature and humidity, and then display them on Cloud4RPi. Experimental Procedures Build the circuit. Open the code. cd /home/pi/cloud4rpi-raspberrypi-python sudo nano temperature_and_humidity_acquisition.py...
- Page 109 SunFounder RasPad 3 Select a Chart widget with both Room Temp and CPU Temp as the variables to be displayed. 7.5. Cloud4RPi...
- Page 110 SunFounder RasPad 3 Once added, you will see the temperature (Room Temp) and humidity (CPU Temp) curves over time, and you can adjust the display window by clicking on the options at the bottom right. Chapter 7. RASPAD PROJECTS AND ACTIVITIES...
- Page 111 SunFounder RasPad 3 Code Explanation dht11 = DHT11.DHT11(17) Instantiate a dht11 object. def getTem(): result = dht11.get_result() while True: if result: break else: result = dht11.get_result() return result[1] The temperature (result[1]) is obtained by this function, and the function will not be interrupted until the reading is successful.
- Page 112 SunFounder RasPad 3 (continued from previous page) 'type': 'numeric', 'bind': getTem 'CPU Temp': { 'type': 'numeric', 'bind': getHum The temperature is stored in the 'bind' of the 'Room Temp' key, and the humidity is stored in the 'bind' of the 'CPU Temp' key.
- Page 113 SunFounder RasPad 3 Go to Cloud4RPi, add a new Control Panel named project2, and click Add Widget to add a Switch widget. Once added, you can use the Switch widget to control the relay. 7.5. Cloud4RPi...
- Page 114 SunFounder RasPad 3 Code Explanation RELAY_PIN = 18 Relay connected to GPIO18 of the T-expansion board. GPIO.setmode(GPIO.BCM) GPIO.setup(RELAY_PIN, GPIO.OUT) Set to BCM nomenclature and set RELAY_PIN to output. def relay_control(value=None): GPIO.output(RELAY_PIN, value) return GPIO.input(RELAY_PIN) This function controls the relay according to the value and returns the current level of the relay.
- Page 115 SunFounder RasPad 3 Experimental Procedures Build the circuit. Open the code. cd /home/pi/cloud4rpi-raspberrypi-python sudo nano smart_light.py Find the line below and fill in the correct device token. DEVICE_TOKEN = '__YOUR_DEVICE_TOKEN__' Run the code. sudo python3 smart_light.py Go to Cloud4RPi, add a new Control Panel named project3, and click Add Widget to add a Slider widget.
- Page 116 SunFounder RasPad 3 Once added, you can use the Slider widget to control the brightness of the LED. Chapter 7. RASPAD PROJECTS AND ACTIVITIES...
- Page 117 SunFounder RasPad 3 Code Explanation led_val = GPIO.PWM(LED_PIN, 2000) led_val.start(0) Call the GPIO.PWM() function to define LED_PIN as PWM pin and set the frequency of PWM pin to 2000Hz, then use the start() function to set the initial duty cycle to 0.
- Page 118 SunFounder RasPad 3 Experimental Procedures Build the circuit. Open the code. cd /home/pi/cloud4rpi-raspberrypi-python sudo nano smart_curtain.py Find the line below and fill in the correct device token. DEVICE_TOKEN = '__YOUR_DEVICE_TOKEN__' Run the code. sudo python3 smart_curtain.py Go to Cloud4RPi, add a new control panel named project4 and add 3 widgets (Switch, Text and Chart widgets) via the Add Widget button.
- Page 119 SunFounder RasPad 3 Once added, you can use the Switch widget to control the LED; the value of the photoresistor on the Text widget will be updated every 1 minute, when the value > 100, the motor rotates clockwise for 5 seconds; if the value is less than 20, the motor rotates counterclockwise for 5 seconds.
- Page 120 SunFounder RasPad 3 (continued from previous page) 'bind': getValue Pass getValue() into the 'bind' key as a callback function, so that the brightness value (the return value of the getValue() function) can be sent to the Text widget. Attendance system In this project, we use MFRC522 RFID Module and Cloud4RPi to make a system, you can view the attendance information on Cloud4RPi, or open the local .csv file to view the attendance records.
- Page 121 SunFounder RasPad 3 Open the code. cd /home/pi/cloud4rpi-raspberrypi-python sudo nano attendance_system.py Find the line below and fill in the correct device token. DEVICE_TOKEN = '__YOUR_DEVICE_TOKEN__' Run the code. sudo python3 attendance_system.py Go to Cloud4RPi, add a new control panel named project5 and add 2 widgets (text and chart widgets) via the Add widget button.
- Page 122 SunFounder RasPad 3 Open it with the following command. sudo nano attendance_sheet.2021.06.28.csv In this way, you can read the punch-in records of different time periods. On the left is the ID of different MFRC522 RFID modules, and on the right is the time of punching in.
- Page 123 SunFounder RasPad 3 Code Explanation RedPin = 13 GreenPin = 11 GPIO.setmode(GPIO.BOARD) GPIO.setup(RedPin, GPIO.OUT, initial=GPIO.HIGH) GPIO.setup(GreenPin, GPIO.OUT, initial=GPIO.HIGH) Set 2 LEDs as output and set the initial value to high. def get_time(): time.time() year = str(time.strftime('%Y',time.localtime(time.time()))) month = str(time.strftime('%m',time.localtime(time.time()))) day = str(time.strftime('%d',time.localtime(time.time()))) hour = str(time.strftime('%H',time.localtime(time.time())))
-
Page 124: Gpio Programming
Returns the length of attendance_list, i.e. the number of attendees. 7.6 GPIO Programming RasPad 3 can connect the 40 I/O pins of the Raspberry Pi to the breadboard, so you can use these pins to do some interesting projects. Note: Refer to GPIO Extension Board instructions for extending the 40 pins of the Raspberry Pi inside the RasPad to the external breadboard. -
Page 125: Da Vinci Kit For Raspberry Pi
7.7 Scratch Projects In this chapter, you will learn to use Scratch on RasPad 3, which includes 10 examples. If you are a user who has just used Scratch, we recommend that you try the teaching examples in order so that you can quickly get started with Scratch. -
Page 126: Animate A Name
Click the green flag to start. Or click Animate A Name, and then learn online tutorial on the Scratch official website. Required Components • A RasPad 3 • Scratch 3 (either¢ a online¢ a or¢ a offline) You Will Learn •... - Page 127 SunFounder RasPad 3 First delete the original sprite, we donâ ˘ A ´ Zt need it. Then choose a sprite. 7.7. Scratch Projects...
- Page 128 SunFounder RasPad 3 Find the Letter sprite. Repeat several times to spell out your name, like me, â ˘ AIJAbbyâ ˘ A ˙ I. Chapter 7. RASPAD PROJECTS AND ACTIVITIES...
- Page 129 SunFounder RasPad 3 7.7. Scratch Projects...
- Page 130 SunFounder RasPad 3 A can change its color. Click on the Glow-A sprite and letâ ˘ A ´ Zs write a bit of code for it. When A is clicked, it changes its color. Click on the sprite, find ã ˘ A ˇ Nwhen this sprite clikedã ˘ A in Events, and drag it to the right coding area.
- Page 131 SunFounder RasPad 3 At this time, we click on the letter A on the stage and it will change its color. B can rotate 360¡ r . Click on the Glow-B sprite, letâ ˘ A ´ Zs write a code for the Glow-B wizard. When the letter B on the stage is clicked, it will rotate in a circle.
- Page 132 SunFounder RasPad 3 Do you know why B is rotated 15 degrees 24 times? Because 24*15=360, it turns 360 degrees! B2 can zoom in and out. Click on the Glow-B2 sprite, and let us write a code for the Glow-B2 sprite.
- Page 133 SunFounder RasPad 3 Y can show and disappear. Click on the Glow-Y sprite and let us write a piece of code for the Glow-Y sprite. When the Y on the stage is clicked, it will repeatedly disappear and appear. 7.7. Scratch Projects...
-
Page 134: Create A Story
SunFounder RasPad 3 Challenge I believe that you will be smart enough to program and implement this game soon. Next, we will add some challenges to enrich our game content. • Add two new sprites, one of which will blink and change color when clicked; the other will zoom and rotate when clicked. - Page 135 SunFounder RasPad 3 Required Components • A RasPad 3 • Scratch 3 (either¢ a online¢ a or¢ a offline) You Will Learn • Choose the sprite you want. • Let the sprites move around. • Let the sprites talk to each other.
- Page 136 SunFounder RasPad 3 Harley is hungry. He asked his friend Perry where is the banana? Click on your Harley sprite, and then click on the Event category. Drag ã ˘ A ˇ Nwhen ⎠´ S clickedã ˘ A to the coding area on the right.
- Page 137 SunFounder RasPad 3 Click on the Looks category and drag ã ˘ A ˇ Nsay â ˘ AIJHello!â ˘ A ˙ I for 2 secondã ˘ A to the bottom of â ˘ AIJwhen ⎠´ S clickedâ ˘ A ˙ I.
- Page 138 SunFounder RasPad 3 Change what it says and how long it says in the input box. Perry had seen bananas in the park, so he told Harley. Perry is a Frog, add Frog sprite and Forest backdrop. Chapter 7. RASPAD PROJECTS AND ACTIVITIES...
- Page 139 SunFounder RasPad 3 Click on the Frog sprite, add a 3 second ã ˘ A ˇ Ndelayã ˘ A block (wait for Harley to finish speaking), and then it speaks. 7.7. Scratch Projects...
- Page 140 SunFounder RasPad 3 Now, click on the green flag, we can see Harley and Perry chat. Harley went to the park and found bananas on the table. Now, click on the Backdrop and let it switch after 6 seconds (after the conversation ends).
- Page 141 SunFounder RasPad 3 But Harley should come to the park alone, and there should be bananas on the table. So, we have to make Perry â ˘ AIJdisappearâ ˘ A ˙ I. Click on the Frog sprite, add an event, ã ˘ A ˇ Nwhen backdrop switches toâ ˘ A˛ e ã ˘ A , and find â ˘ AIJhideâ ˘ A ˙ I and â...
- Page 142 SunFounder RasPad 3 Add the Banana sprite and adjust the angle. Chapter 7. RASPAD PROJECTS AND ACTIVITIES...
- Page 143 SunFounder RasPad 3 Also let it appear at the right time. 7.7. Scratch Projects...
-
Page 144: Make Music
SunFounder RasPad 3 Now, click on the green flag and you can see a complete story. Challenge Believe that you who are smart will be able to program and implement this game soon, then we will add some challenges to enrich our story content. - Page 145 SunFounder RasPad 3 Required Components • A RasPad 3 • Scratch 3 (either¢ a online¢ a or¢ a offline) You Will Learn • Use the Scratch Add Extension function to add music extension. • Modify the initial size of the sprite.
- Page 146 SunFounder RasPad 3 Chapter 7. RASPAD PROJECTS AND ACTIVITIES...
- Page 147 SunFounder RasPad 3 Play Drum-highhat. Click on the Drum-highhat sprite and drag out the ã ˘ A ˇ Nplay drumâ ˘ A˛ e ã ˘ A block in the Music expansion module. Change the option to (5) Open Hi-Hat, then use the â ˘ AIJnext costumeâ ˘ A ˙ I block to switch the appearance of Drum- highhat.
- Page 148 SunFounder RasPad 3 Play Drum-snare. Click on the Drum-snare sprite and drag out the ã ˘ A ˇ Nplay drumâ ˘ A˛ e ã ˘ A block in the Music expansion module. Change the option to (1) Snare Drum, then use the â ˘ AIJnext costumeâ ˘ A ˙ I block to switch the appearance of Drum- snare.
-
Page 149: Clicker Game
Click the green flag to start. Or click Clicker Game, and then learn online tutorial on the Scratch official website. Required Components • A RasPad 3 • Scratch 3 (either¢ a online¢ a or¢ a offline) You Will Learn • Pick random number. - Page 150 SunFounder RasPad 3 Set the balloon to a random position. Chapter 7. RASPAD PROJECTS AND ACTIVITIES...
- Page 151 SunFounder RasPad 3 Let it change the color and size randomly. 7.7. Scratch Projects...
- Page 152 SunFounder RasPad 3 Now, run the green flag and you can see the balloons randomly change in the stage area. Click on the balloon to add score. Now, we need to establish a scoring mechanism. Whenever the balloon is clicked, the score will increase by one.
- Page 153 SunFounder RasPad 3 We will see it in the upper left corner of the stage. When the balloon is clicked, the score is increased by one. When you click the green flag (the game starts), the score will be reset to zero.
-
Page 154: Shooting Game
Click on the green flag to start. Use the space bar to shoot an bullet. Or click Shooting Game, and then learn online tutorial on the Scratch official website. Required Components • A RasPad 3 • Scratch 3 (either¢ a online¢ a or¢ a offline) • Crosshair Sprite •... - Page 155 SunFounder RasPad 3 You Will Learn • Upload new sprites and background images to Scratch. • The coordinate range of the Scratch stage. • Stop scripts run by other sprites and get the result of the game. • Use of Scratch color picker.
- Page 156 SunFounder RasPad 3 Chapter 7. RASPAD PROJECTS AND ACTIVITIES...
- Page 157 SunFounder RasPad 3 7.7. Scratch Projects...
- Page 158 SunFounder RasPad 3 Letâ ˘ A ´ Zs take aim. When aiming, the Crosshair will slightly shake, we are now going to use the ã ˘ A ˇ Nglideâ ˘ A˛ e ã ˘ A block to achieve this effect.
- Page 159 SunFounder RasPad 3 Now, click on the green flag to see the effect of this aimingâ ˘ A˛ e very good. Letâ ˘ A ´ Zs guess, change the time in the ã ˘ A ˇ Nglideâ ˘ A˛ e ã ˘ A block, will the front sight become more stable? Or is it more swaying? Letâ...
- Page 160 SunFounder RasPad 3 Click the green flag to try the effect! Calculate the score! Then we need to establish a scoring mechanism. Shooting different color circles will get different scores. The closer to the bullseye, the higher the score. For example, a shot in the red area can score 200 points. Letâ ˘ A ´ Zs use the ã ˘ A ˇ NTouching Colorã ˘ A block to judge.
- Page 161 SunFounder RasPad 3 Use the same method to set corresponding scores for different color circles. 7.7. Scratch Projects...
- Page 162 SunFounder RasPad 3 Chapter 7. RASPAD PROJECTS AND ACTIVITIES...
-
Page 163: Hit The Magic Fish
Click on the green flag to Start. Press the space bar to launch the Starfish. Or click Hit the magic fish, and then learn online tutorial on the Scratch official website. Required Components • A RasPad 3 • Scratch 3 (either¢ a online¢ a or¢ a offline) You Will Learn •... - Page 164 SunFounder RasPad 3 Let the Fish appear at the coordinates (-240,120), and then let it swim left and right. Use the ã ˘ A ˇ Nif on edge, bounceã ˘ A block to make the Fish sprite fold back from the edge. When it hits the wall, it will fold back in the opposite direction to the original.
- Page 165 SunFounder RasPad 3 This Star is rising. Let the Star appear at (0,-120). If we press the â ˛ E ˇ R or key on the keyboard, it will go left and right. We use the ã ˘ A ˇ Nkey â ˘ A˛ e pressedã ˘ A block to determine the keyboard, and use ã ˘ A ˇ Nchange x by â ˘ A˛ e ã ˘ A to move the sprite.
- Page 166 SunFounder RasPad 3 Next, launch the Star. If the space bar is pressed, the y coordinate value of the Star sprite will increase, and the Star sprite will rise. Chapter 7. RASPAD PROJECTS AND ACTIVITIES...
- Page 167 SunFounder RasPad 3 Something is wrong. The Star sprite should continue to rise until it reaches the height of the Fish sprite (remember? 7.7. Scratch Projects...
- Page 168 SunFounder RasPad 3 The y coordinate we set for Fish is 120) and then return. Nowïij ˇ NIt looks better. Fish hit by a Star. After the Star rises, before returning to the bottom, you need to use a ã ˘ A ˇ Ntouchâ ˘ A˛ e ã ˘ A block to determine whether it hits the Fish.
- Page 169 SunFounder RasPad 3 Back to the programming interface of the Fish sprite, use a ã ˘ A ˇ Nwhen I receiveâ ˘ A˛ e ã ˘ A block to receive the â ˘ AIJHitâ ˘ A ˙ I broadcast, and then use ã ˘ A ˇ NNext costumeã ˘ A to change your form.
- Page 170 SunFounder RasPad 3 Calculate the score! To make the game more interesting! Add a scoring mechanism. When you click the green flag, the score will be reset to zero. When a â ˘ AIJhitâ ˘ A ˙ I event occurs, the score will increase by 1.
-
Page 171: Binary Game
SunFounder RasPad 3 Challenge I believe that you will be smart enough to program and implement this game soon. Next, we will add some challenges to enrich our game content. • Added several different magic fish. • One will get double points •... - Page 172 SunFounder RasPad 3 Or click Binary Game, and then learn online tutorial on the Scratch official website. Required Components • A RasPad 3 • Scratch 3 (either¢ a online¢ a or¢ a offline) You Will Learn • Understand binary numbers.
- Page 173 SunFounder RasPad 3 Set the default costume of the four sprites to Zero, record with the variables â ˘ AIJnum1â ˘ A ˙ I, â ˘ AIJnum2â ˘ A ˙ I, â ˘ AIJnum3â ˘ A ˙ I, and â ˘ AIJnum4â ˘ A ˙ I respectively, and initialize the positions of the four sprites.
- Page 174 SunFounder RasPad 3 When we click the â ´ LŽ sign in front of the variable, the variable will disappear from the stage. Chapter 7. RASPAD PROJECTS AND ACTIVITIES...
- Page 175 SunFounder RasPad 3 7.7. Scratch Projects...
- Page 176 SunFounder RasPad 3 Change the shape by clicking and record the binary value. If you click the Zero sprite, it will switch its costume to the next costume, and switch the value of the variable num1, if num1 = 0, change num1 to 1.
- Page 177 SunFounder RasPad 3 The decimal number is equal to the sum of binary digits (dn) times their power of 2 (2^n): decimal = d0Ã ˚ U 2^0 + d1Ã ˚ U 2^1 + d2Ã ˚ U 2^2 + ... If binary is 1000, the corresponding decimal should be 1x2^3+0x2^2+0x2^1+0x2^0=8 So, what is the decimal number of 1010? 1*2^3+0*2^2+1*2^1+0*2^0=10.
- Page 178 SunFounder RasPad 3 Programming the Enter Sprite After you understand the conversion of binary numbers and decimal numbers, letâ ˘ A ´ Zs program the Enter sprite. First, we create a result variable, when the Enter sprite is clicked, We convert the binary number composed of the num1 variable, num2 variable, num3 variable and num4 variable into a decimal number, and save the result in the result variable.
-
Page 179: Flappy Parrot
Click on the green flag to start. Or click Flappy Parrot, and then learn online tutorial on the Scratch official website. Required Components • A RasPad 3 • Scratch 3 (either¢ a online¢ a or¢ a offline) 7.7. Scratch Projects... - Page 180 SunFounder RasPad 3 You Will Learn • Add more costumes to sprites and let them change their appearance • Logical Operation • Determine if the sprites are touching each other Lesson Guide Arrange the parrot and background image First, we delete the default sprites and add Parrot sprites and Blue Sky backdrop. Change the size of the Parrot sprite to 20.
- Page 181 SunFounder RasPad 3 Copy out the second Trees. 7.7. Scratch Projects...
- Page 182 SunFounder RasPad 3 Chapter 7. RASPAD PROJECTS AND ACTIVITIES...
- Page 183 SunFounder RasPad 3 Let the Parrot sprite fly on the stage Parrot stayed still, and the Trees and Trees2 sprites kept moving to the left, so it looked like the Parrot sprites were flying on the stage! Set the initial position and movement of the Trees sprite so that it can reach the far left from the far right of the stage.
- Page 184 SunFounder RasPad 3 Now, click on the green flag to see the effect of this flightâ ˘ A˛ e Very good, the Parrot sprite seems to be flying to the right side of the stage. Chapter 7. RASPAD PROJECTS AND ACTIVITIES...
- Page 185 SunFounder RasPad 3 Let the space button control Parrot to fly When the game starts, Parrot will continue to drop down, that is, the y coordinate will continue to decrease. When we press the space button, the y coordinate of Parrot will increase.
- Page 186 SunFounder RasPad 3 Constantly increase the speed of Parrot falling through variables Parrot drop is a bit slow, we add flight variables to make Parrot drop more and more! Chapter 7. RASPAD PROJECTS AND ACTIVITIES...
- Page 187 SunFounder RasPad 3 Change the costume so that Parrot has flight animation When we press the Space button, Parrotâ ˘ A ´ Zs clothing switches to Parrot-b. 7.7. Scratch Projects...
- Page 188 SunFounder RasPad 3 Chapter 7. RASPAD PROJECTS AND ACTIVITIES...
- Page 189 SunFounder RasPad 3 Calculate the score! Create a new score variable. When the Trees and Trees2 sprites move to the right side of the Parrot sprite, it means that Parrot has crossed the Trees and Trees2. At this time, we will add score+1. In order to avoid always adding points, we need to add it after score+1 Wait 1 second for the code.
-
Page 190: Paint Box
SunFounder RasPad 3 Game failure mechanism When the Parrot sprite encounters a tree or falls to the ground during the flight, we judge the game is over, and then we stop all scripts. Challenge I believe that you will be smart enough to program and implement this game soon. Next, we will add some challenges to enrich our game content. - Page 191 SunFounder RasPad 3 Required Components First, you need to prepare the following components: • A RasPad 3 • Scratch 3 (either¢ a online¢ a or¢ a offline) You Will Learn • Use the Pen extension function to draw on scratch.
- Page 192 SunFounder RasPad 3 Then, we add the Pen extension function. Chapter 7. RASPAD PROJECTS AND ACTIVITIES...
- Page 193 SunFounder RasPad 3 Add drawing function to Pencil sprite Click on the Pencil sprite. First, we need to make the Pencil sprite move with the mouse. If the mouse button is pressed, we call the ã ˘ A ˇ Npen downã ˘ A block in the Pen extension function, which can draw along the track of the cursor.
- Page 194 SunFounder RasPad 3 Click on the green flag and try to control the Pencil sprite with the mouse to draw a smiley face. You will find that the image is not drawn from the tip of the Pencil. Chapter 7. RASPAD PROJECTS AND ACTIVITIES...
- Page 195 SunFounder RasPad 3 Note: Since the cursor is not on the Pencil tip, the line drawn is drawn from the middle of the Pencil sprite. We click on the Costumes, select the entire Pencil sprite and move it until the Pencil tip is aligned with the cross cursor.
- Page 196 SunFounder RasPad 3 Then we return the code of the Pencil sprite, and when it receives the â ˘ AIJredâ ˘ A ˙ I message, we change the color of the Pencil to red. In the same way, we also write code for the Blue sprite, and when it is clicked, we broadcast a new â ˘ AIJblueâ ˘ A ˙ I message.
- Page 197 SunFounder RasPad 3 Return the code of the Pencil sprite. When it receives the â ˘ AIJblueâ ˘ A ˙ I message, we change the color of the Pencil to blue. Before painting, we clear the scene on the stage and set the Pencil color to red. Zoom in on the stage area and try your brush again.
- Page 198 SunFounder RasPad 3 We started programming the Eraser sprite, and when it was clicked, we broadcast a new â ˘ AIJeraserâ ˘ A ˙ I message. Then continue to add code for the Pencil sprite. When it receives the â ˘ AIJeraserâ ˘ A ˙ I message, it will change to the Eraser costume, so that when we click on the Eraser sprite, we can change the Pencil spriteâ...
- Page 199 SunFounder RasPad 3 Toggle clothing and brush width tools. When the costume of the Pencil sprite is switched to Eraser, we need to switch the costume of the Pencil sprite to the Pencil-a costume by clicking the red and blue on the drawing board, so when we receive the â ˘ AIJredâ ˘ A ˙ I message and the â...
- Page 200 SunFounder RasPad 3 In order to make our painting function more fun, we need to be able to change the width of the Pencil at any time. Create a new variable named â ˘ AIJwidthâ ˘ A ˙ I, then right-click the â ˘ AIJwidthâ ˘ A ˙ I variable on the stage, select slider, and then you will see a slider on the stage that can change the value of the â...
- Page 201 SunFounder RasPad 3 Use the value of the variable â ˘ AIJwidthâ ˘ A ˙ I as the size of the Pencil. 7.7. Scratch Projects...
- Page 202 SunFounder RasPad 3 Chapter 7. RASPAD PROJECTS AND ACTIVITIES...
- Page 203 SunFounder RasPad 3 Limit the painting range of the Pencil. Only when the Pencil enters the drawing area, can painting be allowed. When the pen enters the toolbar, that is, when the y coordinate is less than or equal to -120, we need to call the ã ˘ A ˇ Npen upã...
- Page 204 SunFounder RasPad 3 Chapter 7. RASPAD PROJECTS AND ACTIVITIES...
-
Page 205: Eating Banana Game
SunFounder RasPad 3 Challenge I believe that you will be smart enough to program and implement this game soon. Next, we will add some challenges to enrich our game content. • Add more color brushes to make a Paint Box that belongs to you. - Page 206 SunFounder RasPad 3 Click the â ˘ AIJAdd Extensionâ ˘ A ˙ I icon at the bottom left of scratch and select the Video Sensing extension. At this point, you can see the camera shot on the Scratch stage. Chapter 7. RASPAD PROJECTS AND ACTIVITIES...
- Page 207 SunFounder RasPad 3 Arrange monkeys and bananas First, we delete the original sprite, then add Monkey sprite and Bananas sprite, and change their sizes to 50. Let Bananas appear randomly. Bananas disappears after encountering the Monkey, which means it was eaten by the Monkey and reappears randomly.
- Page 208 SunFounder RasPad 3 If the camera detects an object moving, let the Monkey move towards the object. Now, click on the green flag at the top of the stage area to start the game. Let the Monkey eat bananas, it is very hungry! Try to play this game on a white background to prevent interference from other objects.
-
Page 209: Create Musical Instrument
You can turn RasPad 3 into a game screen playing with your friends, a smart alarm showing the weather and time, a display monitoring your robotâ ˘ A ´ Zs action and many other things. This article will show you how to DIY a Musical Instrument with your RasPad 3. Letâ ˘ A ´ Zs take a look! 7.7. Scratch Projects... - Page 210 SunFounder RasPad 3 Required Components • A RasPad 3 • 8G+ SD Card • Scratch 3 (either¢ a online¢ a or¢ a offline) • Micro SD Card Reader • 40 Pin Ribbon Cable • T-Type GPIO Extension Board • Breadboard •...
- Page 211 SunFounder RasPad 3 • 10k Ohm Resistor • Several Jumper Wires You Will Learn • Use note functions on Scratch. • Input the button value from the GPIO pins. Lesson Guide Build the Circuit First connect the GPIO Extension Board, please read GPIO Extension Board for specific steps.
- Page 212 Programming with Scratch 3 Insert the SD card into the slot of RasPad 3ïij ˇ Nand then long press the power button to boot the RasPad 3. Warning: The card slot is set on the back cover and itâ ˘ A ´ Zs in snap style. Therefore before opening or closing the back cover, you need to take out the microSD card to avoid damaging your microSD card and the internal button board.
- Page 213 SunFounder RasPad 3 project, we need to add in other two functions: Music and Raspberry Pi GPIO. The Music function to play instruments and drums, and the Raspberry Pi GPIO function can be used to control the whole pins of Raspberry Pi.
- Page 214 SunFounder RasPad 3 Press these three buttons on the breadboard and there emits the tones â ˘ AIJDo, Re, Miâ ˘ A ˙ I. Chapter 7. RASPAD PROJECTS AND ACTIVITIES...
-
Page 215: Diy Raspad Monitor Device
˘ A ´ Zs action and many other things. This article will show you how to DIY a RasPad Monitor Device on your RasPad 3. Letâ ˘ A ´ Zs take a look! 7.7. Scratch Projects... - Page 216 SunFounder RasPad 3 Required Components • A RasPad 3 • 8G+ SD Card • Scratch 3 (either¢ a online¢ a or¢ a offline) • Micro SD Card Reader • 40P Ribbon Cable • T-Type GPIO Extension Board • Breadboard • PIR Module •...
- Page 217 SunFounder RasPad 3 You Will Learn • Use Raspberry Pi extensions on Scratch. • Use audio functions on Scratch. • Use PIR module. Lesson Guide Build the Circuit First connect the GPIO Extension Board, please read GPIO Extension Board for specific steps.
- Page 218 SunFounder RasPad 3 For the camera installation tutorial, please refer to Assemble the Camera Module. Chapter 7. RASPAD PROJECTS AND ACTIVITIES...
- Page 219 SunFounder RasPad 3 Programming with Scratch 3 In this step you will learn how to upload the prepared music to the Scratch. Tap the â ˘ AIJSoundsâ ˘ A ˙ Ioption on the left upper cornerïij ˇ Nthen tap the â ˘ AIJspeakerâ ˘ A ˙ I icon and choose â ˘ AIJUpload Soundâ ˘ A ˙ I icon to upload the prepared music file - hello, finally tapâ...
- Page 220 SunFounder RasPad 3 Back to the main page, drag a â ˘ AIJwhen gpio 0 is highâ ˘ A ˙ I from Raspberry Pi GPIO function and a â ˘ AIJplay sound (hello) until doneâ ˘ A ˙ Ito the coding area.
-
Page 221: Install Other Systems On Raspad
If you hate reading, see this video. In this article, we introduce how to use RasPad 3 to DIY a RasPad Monitor Device. Surely, you can also add a relay and a stepper motor to open the door when someone is detected at the door. - Page 222 SunFounder RasPad 3 Chapter 7. RASPAD PROJECTS AND ACTIVITIES...
-
Page 223: Appendix
Chapter 8 APPENDIX For new RasPad users, the following sections are essential operations that will need to be used for doing certain projects. Please read these sections carefully. 8.1 Assemble the Camera Module Open the back cover of the RasPad. Connect the FFC cable to the CSI interface of the Camera Module. Carefully pass the CSI interface cable through the slot on the back cover of the RasPad. - Page 224 SunFounder RasPad 3 Insert the micro-SD card with the Raspberry Pi OS image into the slot, and long-press the power button to boot the RasPad. Open Raspberry Pi Configuration. Chapter 8. APPENDIX...
- Page 225 SunFounder RasPad 3 In the Interfaces option, Enable the Camera, and then click OK. 8.1. Assemble the Camera Module...
- Page 226 SunFounder RasPad 3 In the pop-up prompt box, choose to restart now. After the restart is complete, use the following command line to check whether the camera is available. If the camera screen appears it means that the camera is installed successfully. Otherwise the FFC cable needs to be unplugged and plugged in again.
-
Page 227: Gpio Extension Board
SunFounder RasPad 3 8.2 GPIO Extension Board Before starting the project, you first need to know more about the pins of the Raspberry Pi, which is key to the build circuit. The pins of Raspberry Pi have three ways to name them. They are wiringPi, BCM and Board. Among these naming conventions, the 40-pin GPIO Extension board uses the naming convention BCM. - Page 228 SunFounder RasPad 3 Open the back cover of the RasPad and insert the 40 pin ribbon cable into the Raspberry Pi. Pass the ribbon cable through the available slot on the base of the RasPad, and connect the other end of the 40 pin ribbon cable to the GPIO extension board.
-
Page 229: Obtain The Ip Address Of The Raspberry Pi
SunFounder RasPad 3 cover, remove the micro-SD card to avoid damaging the micro-SD card and the RasPadâ ˘ A ´ Zs internal button board. 8.3 Obtain the IP Address of the Raspberry Pi 8.3.1 With a Screen If you have a screen, it will be easy for you to get the IP address of Raspberry Pi. -
Page 230: Without A Screen
SunFounder RasPad 3 4. Use the power adapter to power the Raspberry Pi. After a few seconds, the Raspberry Pi OS desktop will be displayed. 5. Hover the cursor over the WiFi icon, and the IP address of the Raspberry Pi will be displayed. -
Page 231: Use The Ssh Remote Control
SunFounder RasPad 3 8.4 Use the SSH Remote Control Bash is the standard default shell of Linux, and can be opened on the Raspberry Pi by using SSH. The Shell itself is a program written in C programming language that acts as a bridge linking the customers and Unix/Linux systems. - Page 232 SunFounder RasPad 3 Note: The characters do not display when typing in the password. Make sure to input the correct password. We now get the Raspberry Pi connected and are ready to go to the next step. For Windows Users Windows users can use SSH with the PuTTY application.
- Page 233 SunFounder RasPad 3 Click Open. Note: When first logging in to the Raspberry Pi with the IP address, there will be a security prompt. Click Yes to continue. When the PuTTY window prompts login as:, type in pi for the user name of the Raspberry Pi. The default password is raspberry.
- Page 234 SunFounder RasPad 3 Here, we get the Raspberry Pi connected and it is time to conduct the next steps. Chapter 8. APPENDIX...
-
Page 235: Faq
1. Check whether the power indicator is on, if it does not, you need to charge the RasPad or try a different power source. It is best to use the power supply provided by SunFounder. 2. You might be booting but not getting video output. First, check that your cables are connected properly. Take them all out and reconnect them. -
Page 236: About Sleep Problem
SunFounder RasPad 3 9.4 About sleep problem • If your RasPad screen is on but black, this is the Raspberry Pi going into sleep mode. You can wake up by tapping the touch screen, or by pressing the external keyboard or mouse. -
Page 237: About The Touch Problem
A. Touch does not work First of all, please check whether the internal cables connection are stable. For the old version of RasPad 3, because the touch will become very strange after an external display, so turn off the touch function. -
Page 238: About The Audio Problem
9.9 Fan is too noisy? This is because the fan speed is too high, which was originally done to enhance the cooling capacity of RasPad 3. You can reduce the noise by setting the fan switch on the upper left corner of the mainboard to â ˘ AŸsâ ˘ A ´ Z, but this will reduce the fan speed as well as the cooling capacity. -
Page 239: Copyright Notice
Chapter 10 Copyright Notice All contents including but not limited to texts, images, and code in this manual are owned by the SunFounder Company. You should only use it for personal study, investigation, enjoyment, or other non-commercial or nonprofit purposes, under therelated regulations and copyrights laws, without infringing the legal rights of the author and relevant right holders.
Need help?
Do you have a question about the RasPad 3 and is the answer not in the manual?
Questions and answers