Table of Contents
Advertisement
Available languages
Available languages
Quick Links
Advertisement
Chapters
Table of Contents

Related Manuals for AIDIAN QuikRead go

Summary of Contents for AIDIAN QuikRead go
- Page 1 QuikRead go ® Instrument 135936-7 • English • Deutsch • Français • Italiano...
- Page 2 Explanation of symbols Zeichenerklärung Explication des symboles Spiegazione dei simboli In vitro diagnostic medical Dispositif médical de diagnostic Dispositivo medico-diagnostico In-vitro-Diagnostikum device in vitro in vitro Produkt für patientennahe Dispositif de diagnostic près du Dispositivo per analisi Device for near-patient testing Tests patient decentrate (near-patient testing)
- Page 3 Cat. No. 133893 Cat. No. 149915 Instructions for use • English Bedienungsanleitung • Deutsch Mode d’emploi • Français Istruzioni per l’uso • Italiano...
-
Page 4: Table Of Contents
Use of the touch screen ......11 Revision history ........33 Creating a profile ........ 28 Set-up wizard ..........12 QuikRead go Instrument user levels and ..Applying a profile ........ 28 Language ..........13 rights when Security login is enabled ..34 Basic settings ........28 Date and time ........ -
Page 5: Introduction
Safety information Intended use strument and make sure that the plug is placed QuikRead go is an easy to use in vitro diagnostic For your own safety, comply with all warning and so that it is removable. test system. It has been designed to measure caution statements. -
Page 6: Getting Started
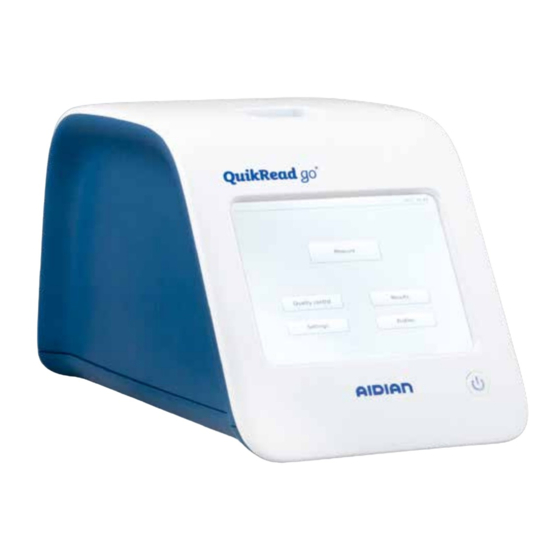
2 GETTING STARTED QuikRead go Instrument parts WLAN adapter For a wireless network connection. Use only an The components of QuikRead go Instrument are Unpacking adapter supplied by Aidian. Insert the adapter to shown in Picture 1 (instrument from above), Pic- any free USB port. - Page 7 Picture 2 Picture 3 1. USB-port 2 (Type A) 1. Accumulator unit cover 2. USB-port 3 (type A) 2. Instrument label with serial number 3. USB-port 4 (Type B) 3. Warranty seal 4. RJ-45 port 5. Connector for power supply GETTING STARTED...
-
Page 8: Lifting/Transporting The Instrument
Lifting/transporting Location and environment When lifting or transporting QuikRead go Instru- ment, always handle it carefully. In the back of the the instrument instrument there is a handle to enable lifting it by During use one hand (Picture 4). The instrument should be placed on a flat clean,... -
Page 9: Power Supply Cable & Accumulator
(see Picture 7). Plug the power supply QuikRead go Instrument can be used either by the One USB connector is placed on the right side into a power outlet. power supply cable or the accumulator unit. -
Page 10: Inserting The Accumulator
Inserting the accumulator Please follow carefully the steps below for inserting the accumulator to QuikRead go Instrument (see Picture 8) Turn off the instrument (if on). Unplug the power supply cable. Turn the instrument onto its side on a table. -
Page 11: Power (On, Off, Sleep Mode)
Use of the touch screen Sleep mode The purpose of the sleep mode is to save accu- QuikRead go Instrument can be in three modes: QuikRead go Instrument has a colour touch mulator charge in accumulator usage. The sleep on, off or sleep mode. -
Page 12: Set-Up Wizard
The default language is English. The language can be changed on the first step on Set-up wizard. Start Set-up wizard by choosing Start (see Picture Welcome to QuikRead go! 10). Note: Set-up wizard can be started also manually To start using the instrument we kindly ask you to complete from Settings →... -
Page 13: Language
Language 10:30 Choose the language you wish to use on the in- strument. If you cannot see the desired language Set-up LANGUAGE on the list, choose More languages for more options. Select the language by touching the cor- responding button ( see Picture 11). You will then be asked to confirm your language choice. You will see the confirmation request both in English and in the chosen language. -
Page 14: Date And Time
Date and time 10:30 The second step in Set-up wizard is to adjust the date and time (see Picture 12). To do this follow Set-up DATE & TIME the instructions below: Choose Edit on the Time row. Time: Adjust time with the arrow buttons. Choose between a 12-hour and 24-hour 10:30 am Edit... -
Page 15: Audio Volume
Measurement flow where you can adjust The sound volume can be tested using Test Choose the time after which QuikRead go laboratory- or work-routine oriented settings. button. Instrument will enter sleep mode (hibernate). -
Page 16: User Interface In General
User interface in general 10:30 PROFILE QuikRead go Instrument is used via a graphical user interface. In this section the main principles of the user interface are explained. Measure Main menu All the features of the user interface can be accessed via the main menu (see Picture 15). -
Page 17: Layout
Status area Standard buttons for navigation can be found needed and red indicates an error. Indicates the status of QuikRead go Instru- at the bottom of the screen. ment via symbols. Content area The actual data is at the centre of the screen. -
Page 18: Structure Of The User Interface
Structure of the user interface User interface structure without Security login User interface structure with Security login feature: enabled: The structure is different depending on whether the Security login is enabled in Settings → Meas- Measurement Measurement urement flow → Maintenance → Admin settings Quality control Quality control →... -
Page 19: Usage
(see Picture 19). Quality control Results Only QuikRead go reagent kits can be used to perform an assay. Read the instructions for use of the corresponding QuikRead go reagent kit be- fore use. The instructions provide more detailed... -
Page 20: Basic Measuring Mode
After the test is completed, the result is shown on the screen and the cuvette lifted up for re- in basic measuring mode QuikRead go Instrument has a separate result his- moval. Choose Result info to see additional tory file for quality control samples. Quality control In the basic measuring mode QuikRead go Instru- information of the test (see Picture 17b). -
Page 21: Results
After completion of the LIS offline results are results stored in the memory ment will ask for confirmation before deletion. transfer a message “Transferring completed. You of QuikRead go Instrument which is normally con- can now safely remove the USB storage.” will be nected to an LIS but has temporarily been in LIS Printing results shown. -
Page 22: Settings
Power save by choosing Language and selecting desired lan- guage. Accept by YES or reject by NO. The time after which QuikRead go Instrument QuikRead go Instrument settings can be config- closes the lid – without entering sleep mode – can ured through the touch screen. -
Page 23: Measurement Flow
mode into sleep mode if it has not been used for Quality control (QC) checking strument suggests a previous ID to be used, the amount of time indicated. Entering the sleep but it can also be changed. These settings are for quality controls. Quality mode closes any active LIS/HIS connection. - Page 24 To turn QC checking on, choose / QC and en- Select the unit from Units list. Printing ter the ADMIN password, QRGOSET (see Picture Set Warning range limits. • Printing OFF: The instrument does not suggest 24). Note: Decimals must be marked with a decimal printing.
-
Page 25: Maintenance Settings
Choose Back to return to Maintenance menu. needs to be restarted to complete software up- The instrument specific settings can be configured Delete Error log button deletes all error codes from date.” Press Restart. QuikRead go will restart and in the Maintenance menu: Settings → Measure- the memory. Before deleting a confirmation text is returns to the Main menu. -
Page 26: Admin Settings
QC lots locally when doing a used as a confirmatory step to ensure that the ways log in to QuikRead go with Operator ID and Quality control measurement. QC checking user does not access this page inadvertently. -
Page 27: Manufacturer Settings
• Select Security login ON. • LIS delay. When set ON, there will be a short Use only an adapter supplied by Aidian. You can • Define access to old results. delay between consecutive results sent to LIS. insert the adapter to any free USB port. -
Page 28: Profiles
Profiles 4 MAINTENANCE Software update User adjusted settings can be saved as profiles for QuikRead go Instrument has been designed to New software can be uploaded to the instrument later use. Four different user profiles can be saved be as user-friendly as possible with no need for with a USB storage, see page 25. Ask your local to the instrument’s memory. Profiles are not in use,... -
Page 29: Troubleshooting
Set volume according to the procedure de- Volume is set at a low level. scribed in the Section “Personal settings”. Instrument alarm sounds cannot be heard. Restart QuikRead go Instrument. If the problem Instrument sound system has a malfunction. persists, please contact customer service. TROUBLESHOOTING... - Page 30 Section “Inserting accumulator”. “Accumulator level is low. Please connect to Connect the power unit into QuikRead go Instru- the mains cable in order to continue operation” Charge in accumulator unit is low. ment power connector.
- Page 31 Error message / Troubleshooting Possible cause Corrective action Remove cuvette when the instrument has lifted Remnants of cuvette sealing foil is left on it up. Make sure that all remnants are removed the cuvette collar. when doing the next measurement. “Cuvette position not correct.
-
Page 32: Instrument Specification
Photometer Memory SPECIFICATION QuikRead go Instrument photometer consists of QuikRead go Instrument has an internal memory a measurement well, three LEDs and light de- for results history. See the Section “Results”. Declaration of conformity tectors. The photometer has been designed and... -
Page 33: Service
Service Disposal QuikRead go Instrument is designed to be free QuikRead go Instrument is a low-voltage electron- of regular maintenance with build-in self-check ic device. A used QuikRead go Instrument must operations. In case of instrument malfunction or a be treated as potentially biohazardous waste. The... -
Page 34: Rights When Security Login Is Enabled
QuikRead go Instrument user levels and rights when Security login is enabled Action Normal user Supervisor Administrator Patient measurement QC measurement See all QC results Add new QC lot See old patient results – / x* See LIS offline results Transfer old results to USB –... - Page 36 Andere Messmodi ....... 52 Technische Spezifikation ......65 Zubehör ............ 38 Ergebnisse ..........52 Fotometer ........... 65 QuikRead go Instrument Teile ....39 Ergebnisse betrachten ......53 Touchscreen-Display ......65 Heben/Transport des Geräts ....40 Ergebnisprotokoll löschen ....53 Abmessungen & Stromversorgung ..65 Standort und Umgebung ......
-
Page 37: Einleitung
Achten Sie bitte darauf, dass keine Flüssigkeit Therapiekontrolle eingesetzt werden können. Das Die Tests werden gemäß den Benutzerhinweisen oder Gegenstände in oder auf das Gerät gelan- QuikRead go Instrument ist für den Einsatz durch gen. durchgeführt, die jedem QuikRead go-Reagenzkit medizinisches Personal im Gesundheitswesen be- beiliegen. -
Page 38: Inbetriebnahme
QuikRead go Instrument anschließen. Eine Liste • Stecken Sie während der Messung keine Fin- stellen, dass beim Transport keine Schäden ent- mit kompatiblen Strichcodelesern finden Sie unter ger oder externen Geräte in das QuikRead go standen sind. Sollten Schäden aufgetreten sein www.quikread.com. Instrument. oder Teile fehlen, benachrichtigen Sie umgehend •... -
Page 39: Quikread Go Instrument Teile
QuikRead go Instrument WLAN adapter -Teile Für eine kabellose Netzwerkverbindung. Verwen- den Sie ausschließlich einen von Aidian zur Verfü- Die Komponenten des QuikRead go Instrument gung gestellten Adapter. Stecken Sie den Adapter werden in Bild 1 (Gerät von oben), Bild 2 (Gerät in einen freien USB-Port am Gerät. -
Page 40: Heben/Transport Des Geräts
Standort und Umgebung • Maximale relative Luftfeuchtigkeit 80 % bis 31°C, abfallend auf 67 % bei 35°C (nicht kon- Während des Gebrauchs QuikRead go Instrument bitte sorgfältig heben oder densierend). transportieren. Auf der Rückseite des Geräts befin- Das Gerät muss auf einer sauberen, ebenen und •... -
Page 41: Netzteilkabel & Akku
Netzteilkabel & Akku Anschlüsse und Kabel Einstecken des Netzteilkabels Das QuikRead go Instrument kann entweder mit Auf der Rückseite des Geräts befinden sich fünf Stecken Sie das Netzteilkabel in die Rückseite des Netzteil oder Akku betrieben werden. Der Akku wird Anschlüsse. -
Page 42: Einsetzen Des Akkus
Einsetzen des Akkus Befolgen Sie bitte sorgfältig die nachfolgenden Schritte, um den Akku in das QuikRead go Instru- ment einzusetzen (siehe Bild 8). Schalten Sie das Gerät aus (falls eingeschal- tet). Ziehen Sie das Netzteilkabel. Legen Sie das Gerät auf die Seite. -
Page 43: Strom (An, Aus, Ruhezustand)
Das Gerät durchläuft einen Selbsttest. Nach dem des Tastenbereichs drücken, wird kein Befehl aus- erfolgreichen Selbsttest wird das Hauptmenü an- gelöst. gezeigt. Beim ersten Start des QuikRead go Inst- rument erscheint der Einrichtungsassistent (siehe Abschnitt “Einrichtungsassistent“). Ausschalten Um das Gerät auszuschalten, halten Sie den Ein-/ Ausschalter für ca. -
Page 44: Einrichtungsassistent
Starten Sie den Einrichtungsassistenten, indem Sie Please choose Start below to start the set-up. Start wählen (siehe Bild 10). (Ihr QuikRead go heißt Sie herzlich willkommen! Hinweis: Der Einrichtungsassistent kann auch ma- Um das Gerät zu starten, bitten wir Sie die folgenden Einstellungen nuell gestartet werden: Einstellungen →... -
Page 45: Sprache
Sie No. Hinweis: Die gewählte Sprache kann später jeder- zeit geändert werden: Einstellungen → Messablauf → Geräte-Einstellungen → Grundeinstellungen. Zurück Weitere Sprachen Bild 11 Der erste Schritt beim Einrichtungsassistenten ist die Auswahl der Sprache für QuikRead go Instrument. INBETRIEBNAHME... -
Page 46: Datum Und Zeit
Datum und Zeit 10:30 Der zweite Schritt beim Einrichtungsassistenten ist Set-up das Einstellen von Datum und Zeit (siehe Bild 12). DATUM & UHRZEIT Hierzu befolgen Sie bitte die folgenden Schritte: Wählen Sie Bearbeiten in der Zeitzeile. Zeit: Stellen Sie die Zeit mit den Pfeiltasten ein. 10:30 am Ändern Wählen Sie zwischen der 12-Stunden- bzw. -
Page 47: Lautstärke
Einstellungen vornehmen. werden. aus. Im vollständigen Standby wechselt das Von dort aus gelangen Sie zum Messablauf, wo Bestätigen mit Weiter. QuikRead go Instrument in den Ruhezustand Sie die Einstellungen hinsichtlich der Labor- oder Arbeitsroutine anpassen können. 13:59 12:20 Setup LAUTSTÄRKE... -
Page 48: Benutzeroberfläche (Allgemein)
Benutzeroberfläche 10:30 PROFIL (allgemein) Das QuikRead go Instrument wird über eine gra- fische Benutzeroberfläche gesteuert. Dieser Ab- Messen schnitt wird die Hauptmerkmale der Benutzerober- fläche erklärt. Hauptmenü Alle Funktionen der Benutzeroberfläche kön- Qualitätskontrolle Ergebnisse nen über das Hauptmenü erreicht werden (siehe Bild 15). -
Page 49: Layout (Messergebnis)
Eingreifen des Benutzers, und Navigationsbereich Statusbereich und rot zeigt eine Störung an. Standardtasten zur Navigation finden Sie un- Zeigt den Status des QuikRead go Instrument ten auf dem Display. mittels Symbolen an. Inhaltsbereich Die tatsächlichen Daten befinden sich in der Mitte des Displays. -
Page 50: Struktur Der Benutzeroberfläche
Struktur der Benutzeroberfläche Aufbau der Benutzeroberfläche ohne die Funktion Aufbau der Benutzeroberfläche mit aktiviertem Der Aufbau unterscheidet sich abhängig von der Sicherheits-Login: Sicherheits-Login: Aktivierung des Sicherheits-Logins in Einstellun- gen → Messablauf → Geräte-Einstellungen → 1. Messung 1. Messung 2. Qualitätskontrolle 2. Qualitätskontrolle Admin-Einstellungen → Sicherheitseinstellungen. (siehe Bild 18a und 18b): 3. -
Page 51: Verwendung
3 VERWENDUNG PROFILE LIS ON 10:30 Die Nutzung des QuikRead go Instrument kann in drei Bereiche unterteilt werden: • Durchführen eines Tests • Betrachten der Ergebnisse • Ändern der Geräteeinstellung Messen Durchführen eines Tests Das Gerät kann je nach Bedarf in verschiedenen Messmodi verwendet werden. -
Page 52: Basismessmodus
Protokolle beinhalten die Verwendung von Messmodus Qualitätskontrolle einschließlich Reagenzdaten auf dem Display. Patienten-ID, Benutzer-ID, Drucken der Ergebnisse QuikRead go Instrument hat ein separates Er- oder Übertragung der Ergebnisse an LIS (Labor-In- Beachten Sie folgende Schritte, um eine Messung gebnisprotokoll für Proben zur Qualitätskontrolle. -
Page 53: Ergebnisse Betrachten
Das Anwählen einer Ergebniszeile auf das gewünschte Sortierkriterium und dann auf im Speicher des QuikRead go Instrument gespei- gibt genaue Informationen über die einzelne Mes- Drucken. Wählen Sie die zu druckenden Ergebnis- chert werden, der normalerweise mit einem LIS ver- sung. -
Page 54: Einstellungen
Energiesparmodus Änderungen speichern Sie als Profil unter Persön- Sprache selektieren. Bestätigen Sie mit Ja, oder Die Zeit, nach der das QuikRead go Instrument lehnen Sie mit Nein ab. den Deckel schließt – ohne in den Sleep-Modus zu liche Einstellungen und Messablauf. Diese können später genutzt werden, wenn Sie nach dem Start... -
Page 55: Messablauf
Modus unterbricht keine LIS/HIS-Verbindungen. cken, LIS-Übertragung und einige testspezifische Bediener-ID OFF: Die Bedienung des Geräts • Die Zeit, nach der das QuikRead go Instrument in Parameter. Diese Einstellungen können vorüber- erfordert keine Bediener-ID. den Sleep-Modus wechselt, kann unter Energie- gehend gespeichert werden, indem Sie Speichern •... - Page 56 Patienten-ID Qualitätskontroll-Messung ten (OFF) und wieder Einschalten (ON) der QC- Dient zur Identifikation der Patientenprobe. Diese Einstellungen sind für die Qualitätskontroll- Prüfung setzt die QC-Sperrung zurück und aktiviert • Patienten-ID OFF: Das Gerät erfordert keine Messungen bestimmt. Die Chargennummer der die Patientenmessungen wieder. Patienten-ID. Qualitätskontrolle kann hier manuell eingegeben Die QC-Prüfung kann durch Auswahl von / QC...
-
Page 57: Geräte-Einstellungen
10. Geben Sie das Verfallsdatum ein. aktiviert, fragt das Gerät: “Ergebnis an LIS sen- lungen vornehmen möchten, werden diese über 11. Akzeptieren Sie zweimal durch Drücken auf den?” Bestätigen Sie die Übertragung mit Be- Grundeinstellungen vorgenommen. Die Grundein- stätigen. Mit Ablehnen findet keine Übertragung stellungen enthalten alle dieselben Einstellungen 12. -
Page 58: Administratoreinstellungen
QuikRead go Feeder- Software-Update das Touch-Display kalibriert werden. Starten Sie Einstellungen anzupassen. Hierüber kann auch auf Die Software auf dem QuikRead go Instrument das Kalibrieren, indem Sie Display kalibrieren wäh- die Werkseinstellungen zurückgesetzt werden. steuert die Gerätefunktionen. Die Software kann len. - Page 59 Nutzer vor Benutzung des tokollen. Geräts immer mit einer Bediener-ID und einem Routineanwender: Interne Uhr Passwort bei QuikRead go Instrument anmelden. • darf benutzerdefinierte Einstellungen vornehmen • Datum und Zeit sind werkseitig auf GMT einge- Nur Notfallmessungen sind ohne Passwort, unter •...
- Page 60 Patienten oder die Arzt-ID. WLAN-Einstellungen werden, um das Gerät auf Werkseinstellung zu- Die zusätzliche ID kann auch von QuikRead go In- rückzusetzen. strument verwendet werden, die nicht mit LIS ver- Suchen oder Manuelle Konfiguration. Verwenden bunden sind.
-
Page 61: Herstellereinstellungen
® Sicherheitsprotokolle. Nach der Rücksetzung auf abgewischt werden. Zur Sicherheit sollten Sie che- Werkseinstellungen müssen alle Benutzerkonten QuikRead go Instrument wurde möglichst bedie- mikalienbeständige Handschuhe tragen. Hierbei neu angelegt werden. nerfreundlich entwickelt und erfordert keine regel- eingesetztes Material, einschließlich Handschuhe, mäßige Wartung. -
Page 62: Fehlerdiagnose
→ Geräte-Einstellungen → Datum und Zeit). 5 FEHLERDIAGNOSE QuikRead go Instrument zeigt Fehlermeldungen an folgen Sie den Hinweisen im QuikRead go-Kit. und gibt Ihnen Hinweise für den Fall, dass ein Feh- Nehmen Sie mit Ihrem Fachhändler Kontakt auf, ler auftritt. Folgen Sie den angezeigten Hinweisen, falls Sie Unterstützung brauchen oder wenn eine... - Page 63 An den optischen Oberflächen hat sich Stellen Sie das Gerät in einen trockenen Raum Feuchtigkeit abgelagert. und starten Sie erneut. “Fehlercode xxx. QuikRead go Instrument bitte neu starten” wird angezeigt. Starten Sie das Gerät erneut. Wenn die Fehler- Zeitweilige Störung des Geräts. meldung häufiger auftritt, wenden Sie sich bitte an den Kundenservice.
- Page 64 Fehlermeldung / Fehlerdiagnose Mögliche Ursache Korrekturmaßnahme Entfernen Sie die Küvette, wenn das Gerät sie Es befinden sich Rückstände von Folie an der herausbefördert hat. Stellen Sie sicher, dass Küvette. alle Folienreste entfernt sind. Die Meldung “Position der Küvette falsch. Prüfen Sie alle oben angegebenen Punkte und Entfernen Sie die Küvette” wird angezeigt. starten Sie das Gerät erneut.
-
Page 65: Gerätespezifikation
6 GERÄTESPEZIFIKATION Fotometer Geräteidentifikation QuikRead go Instrument besteht aus einem Mess- Jedes QuikRead go Instrument hat eine Serien- Konformitätserklärung loch, drei LEDs und Lichtdetektoren. Das Fotome- nummer, die sich auf einem Etikett auf dem Unter- Das QuikRead go Instrument entspricht der Ver- ter wurde sowohl für fotometrische als auch tur-... -
Page 66: Usb-Anschluss
COM-Port mit einem PC Recycling oder Computer mittels Typ-B-USB-Anschluss ver- bunden werden. Der QuikRead go Instrument ist ein Gerät mit Niederspannung. Ein gebrauchter QuikRead go Service Instrument muss als potentiell biogefährdend ein- Das QuikRead go Instrument wurde so entwickelt, gestuft werden. -
Page 67: Benutzerebenen Und -Rechte Bei Aktiviertem Sicherheits-Login In Quikread Go Instrument
Benutzerebenen und -rechte bei aktiviertem Sicherheits-Login in QuikRead go Instrument Aktion Normaler Benutzer Supervisor Administrator Patientenmessung QC-Messung Alle QC-Ergebnisse anzeigen Eine neue QC-Charge hinzufügen Alte Patientenergebnisse anzeigen – / x* LIS-Offline-Ergebnisse anzeigen Alte Ergebnisse auf USB übertragen – Persönliche Einstellungen (Sprache, Energiesparmodus) –... - Page 70 Déclaration de conformité ....... 100 Contrôle qualité ........87 Les accessoires ........72 Spécifications techniques ....... 100 Autres modes de mesure ....87 Eléments de QuikRead go Instrument ..73 Photomètre ........100 Résultats ........... 87 Soulever/transporter l’appareil ....74 Écran tactile ........100 Visualisation des résultats ....
-
Page 71: Introduction
être éliminé comme déchets biologiques Utilisation prévue QuikRead go Instrument peut être relié à un Sys- dangereux. QuikRead go Instrument est un système de test tème d’Information de Laboratoire et d’Hôpital (LIS •... -
Page 72: Mise En Route
Un lecteur de code barre externe peut être connec- de sorte qu’elle puisse être retirée. qu’il n’a pas été endommagé pendant le transport. té à QuikRead go Instrument. Une liste des lecteurs • Utiliser uniquement l’accumulateur QuikRead Si un dommage s’est produit ou des pièces sont de code barre compatibles peut être trouvée sur... -
Page 73: Eléments De Quikread Go Instrument
Eléments du QuikRead go Instrument Les composants de QuikRead go Instrument sont indiqués dans l’image 1 (appareil vu du dessus), l’image 2 (appareil vu de l’arrière) et de l’image 3 (appareil vu du dessous). Image 2 Image 3 1. Port USB 2 (Type A) 1. -
Page 74: Soulever/Transporter L'appareil
• La température ambiante doit être comprise l’appareil entre 15°C et 35°C. Pendant l’utilisation Lors du levage ou du transport de QuikRead go Ins- • Humidité relative 80% pour des températures trument, toujours le manipuler avec soin. À l’arrière L’appareil devrait être placé sur une surface plane allant jusqu’à... -
Page 75: Câble D'alimentation Et Accumulateur
À l’arrière de l’appareil se trouvent cinq connec- Brancher le câble d’alimentation à l’arrière de l’ap- QuikRead go Instrument peut être utilisé avec le teurs avec des symboles décrivant leur utilisation. pareil (voir Image 7). Brancher l’alimentation sur câble d’alimentation ou l’accumulateur. -
Page 76: Insérer L'accumulateur
Insérer l’accumulateur Veuillez suivre attentivement les étapes ci-dessous pour l’insertion de l’accumulateur à QuikRead go Instrument (voir Image 8). Eteindre l’appareil (s’il est allumé). Débrancher le câble d’alimentation. Faire pivoter l’appareil sur le côté sur une table. Enlever le couvercle de l’accumulateur. -
Page 77: Mode De Fonctionnement (Marche, Arrêt, Veille)
En cas de réussite, le menu principal apparaît. La mise en marche de QuikRead go Instrument pour la première fois démarrera l’assistant de confi- guration (voir section “Assistant de configuration). Arrêt Pour éteindre l’appareil, appuyer sur le bouton de démarrage pendant environ deux secondes. -
Page 78: Assistant De Configuration
Assistant de configuration 10:30 Lors du démarrage de QuikRead go Instrument Set-up pour la première fois, vous serez invités à remplir WELCOME un assistant de configuration. Au cours de la confi- guration avec l’assistant, il vous sera demandé de Welcome to QuikRead go! sélectionner, par exemple, la langue et de définir la To start using the instrument we kindly ask you to complete date et l’heure. -
Page 79: Langue
Langue 10:30 Choisissez la langue que vous souhaitez utili- Set-up ser sur l’appareil. Si vous ne voyez pas la langue LANGUAGE désirée dans la liste proposée, choisissez More languages pour plus d’options. Sélectionnez la langue en appuyant sur le bouton correspondant (voir Image 11). -
Page 80: Date Et Heure
Date et heure 10:30 La deuxième étape de l’assistant de configuration Configuration est d’ajuster la date et l’heure (voir Image 12). Pour DATE ET HEURE ce faire, suivez les instructions ci-dessous: Choisir Modifier sur la ligne Temps. Heure: 2. Régler l’heure avec les touches fléchées. 10:30 am Éditer Choisir entre le format 12-heures ou 24-heures. Accepter en cliquant sur OK. -
Page 81: Volume Sonore
Choisissez la fonctionnalité du mode de veille. mètres de mesure grâce auxquels vous pouvez Accepter en choisissant Suivant. En Veille totale, le QuikRead go Instrument en- ajuster les paramètres de laboratoire ou de travail tre en mode de veille et éteint le rétroéclairage de routine. -
Page 82: Interface Utilisateur En Général
Interface utilisateur 10:30 PROFIL en général QuikRead go Instrument est utilisé via une interface utilisateur graphique. Dans cette section, vous trou- Mesure verez expliqué les principes majeurs de l’interface utilisateur. Menu principal Toutes les fonctionnalités de l’interface utilisateur Contrôle qualité... -
Page 83: Disposition En Page
Zone de navigation Zone d’état qu’une action de l’utilisateur est nécessaire Des boutons standards pour la navigation sont Indique l’état de QuikRead go Instrument par alors que la couleur rouge indique une erreur. situés au bas de l’écran. des symboles. -
Page 84: Structure De L'interface Utilisateur
Structure de l’interface utilisateur Structure de l’interface utilisateur sans la fonction- Structure de l’interface utilisateur avec la La structure varie en fonction de l’activation ou non nalité Connexion de sécurité : fonctionnalité Connexion de sécurité activée : de la Connexion de sécurité dans Paramètres → Paramètres de mesure →... -
Page 85: Utilisation
Contrôle qualité Résultats sation (voir Image 19). Seuls les kits de réactifs QuikRead go peuvent être utilisés pour effectuer un test. Lire les instruc- tions pour l’utilisation des kits de réactifs QuikRead Paramètres Profils go avant utilisation. -
Page 86: Mode De Mesure De Base
QuikRead go Instrument conserve l’historique des L’appareil peut être utilisé sous différents modes En mode de mesure de base, QuikRead go Instru- résultats des échantillons de contrôle qualité dans de mesure en plus du mode de mesure de base. -
Page 87: Contrôle Qualité
Résultats Visualisation des résultats Suppression de l’historique des résultats Les résultats sont stockés dans le fichier Résultats, Pour afficher les résultats, choisir Résultats dans le où ils peuvent être visualisés, imprimés ou transfé- menu principal. Vous pouvez sélectionner Derniers Choisir Supprimer l’historique résultats rés à une clé de stockage USB. Le fichier Résultats résultats, Derniers résultats de contrôle qualité ou supprime définitivement tous les résultats de l’his- est constitué... -
Page 88: Envoi Des Résultats Hors Ligne Au Sil/Sih
être enregis- ment l’envoi des résultats hors ligne au SIL. PROFIL Paramètres 10:30 PARAMETRES PERSONNELS Paramètres Les paramètres QuikRead go Instrument peuvent être configurés via l’écran tactile. Les paramètres Langue sont divisés en 4 catégories principales. • Paramètres personnels Ecran •... -
Page 89: Paramètres De Mesure
être enregistrés dans un profil. Pour une utilisation continue, les paramètres doivent être Economie d’énergie configurés avec l’assistant de configuration: Para- L’intervalle au bout duquel QuikRead go Instrument mètres → Cadence de mesure → Entretien → ferme le couvercle, sans entrer en mode de veille, Paramètres de base. - Page 90 Identifiant de l’opérateur Identifiant du patient Vérification du contrôle qualité C’est l’identifiant de l’utilisateur. C’est l’identifiant de l’échantillon du patient. Ces paramètres sont destinés aux contrôles qua- • Identifiant de l’opérateur OFF: L’appareil ne • Identifiant Patient OFF: L’appareil ne demande lité. Les lots de contrôle qualité peuvent être utilisés demande pas l’identifiant de l’utilisateur.
-
Page 91: Paramètres D'entretien
Paramètres d’entretien Sélectionnez Nouveau lot. • Impression ON + Automatique: L’appareil im- Sélectionnez le test dans la liste Test. prime chaque résultat de mesure automatique- Les réglages spécifiques de l’appareil peuvent être Entrez l’ID de lot de QC. ment. configurés dans le menu Entretien: Paramètres → Sélectionnez l’unité dans la liste Unités. Cadence de mesure →... -
Page 92: Paramètres D'administration
SIL, de valeur GMT, de paramètres autodiagnostic en cliquant sur OK. Retourner au sation des boutons. Démarrer la calibration en choi- de sécurité et de paramètres de QuikRead go Fee- menu Entretien en choisissant OK. sissant Calibrage de l’écran tactile. Calibrer l’écran der. - Page 93 du dernier enregistrement. Donner une date identifiant, un nom complet et un mot de passe. Les GMT est un temps universel sur lequel l’instrument trop lointaine génèrera un message d’erreur “Le droits d’utilisateurs sont : est réglé. GMT n’est pas visible pour l’utilisateur, réglage de la date a échoué. La date est dans Administrateur : mais est une horloge interne pour l’appareil.
- Page 94 être utilisé qu’une seule fois pour réinitia- L’ID supplémentaire peut également être pris Utiliser uniquement l’adaptateur fourni par Aidian. L’adaptateur peut être inséré dans n’importe quel liser l’instrument aux paramètres d’usine. en compte avec les appareils QuikRead go non connectés au SIL. UTILISATION...
-
Page 95: Paramètres Du Fabricant
USB libre. Note : Utiliser uniquement le niveau de sécurité le plus haut. Les paramètres choisis par l’utilisateur peuvent être enregistrés en tant que profils pour une utilisation QuikRead go Instrument a été conçu pour être Codage de caractère ultérieure. Quatre différents profils d’utilisateurs aussi convivial que possible et sans besoin d’entre- Sélectionner le type de codage de caractère utilisé... -
Page 96: Mise À Jour Du Logiciel
de Desicton (Kiilto), de l’hypochlorite de sodium Si un accumulateur est utilisé, brancher le à 5 % ou à l’aide d’une lingette jetable germicide connecteur de l’accumulateur à l’accumu- Super Sani-Cloth . Pour votre sécurité, utiliser des lateur, mettre l’accumulateur en place et ®... -
Page 97: Depannage
Cause possible Mesure corrective L’unité d’alimentation n’est pas Connecter l’unité d’alimentation et réessayer. branchée. QuikRead go Instrument ne démarre pas. L’instrument a une défaillance Contacter le service clients. électronique. Le calibrage de l’écran tactile n’est pas correct, Calibrer l’écran tactile selon la procédure à... - Page 98 L’humidité s’est accumulée sur les surfaces Transférer l’appareil à un environnement sec optiques. et le redémarrer. Le message d’erreur ”Code d’erreur XXX. Redémarrez QuikRead go Instrument.” est Redémarrer l’appareil. Si ce message d’erreur affiché. Dysfonctionnement temporaire de s’affiche fréquemment, contacter le service l’instrument.
- Page 99 Message d’erreur / Dépannage Cause possible Mesure corrective Vérifier que le réactif a un couvercle et Le couvercle du réactif est manquant ou s’assurer que la partie interne colorée du la cuvette est usagée. couvercle n’est pas enfoncée. La lecture des données à l’aide du code barre Essayer à...
-
Page 100: Specifications De L'appareil
6 SPECIFICATIONS Photomètre Identifiant de l’appareil DE L’APPAREIL Le photomètre QuikRead go Instrument se com- Chaque QuikRead go Instrument possède un pose d’une cellule de mesure, de trois LED et de numéro de série unique qui se trouve sur l’étiquette Déclaration de conformité... -
Page 101: Connexion Usb
USB de type B. Dispositif Service QuikRead go Instrument est un appareil électro- QuikRead go Instrument est destiné à être libre nique à basse tension. Un QuikRead go Instrument d’entretien régulier avec des opérations d’auto- usagé doit être traité comme un déchet potentielle- contrôle régulièrement effectuées. -
Page 102: Niveaux Et Droits D'utilisateur Dans Quikread Go Instrument Lorsque La Connexion De Sécurité Est Activée
Niveaux et droits d’utilisateur dans QuikRead go Instrument lorsque la Connexion de sécurité est activée Action Utilisateur normal Superviseur Administrateur Mesure patient Mesure du CQ Afficher tous les résultats du CQ Ajouter un nouveau lot de CQ Afficher les anciens résultats du patient – / x* Voir les résultats hors ligne du SIL Transférer les anciens résultats sur un périphérique de stockage USB... - Page 104 Controllo di qualità ......120 Fotometro ........133 Accessori ..........106 Altre modalità di misura ....120 Display Touch Screen ...... 133 Componenti QuikRead go Instrument ..107 Risultati ..........121 Dimensioni e requisiti Sollevamento/trasporto dello strumento 108 Visualizzazione dei risultati ....121 di alimentazione .......
-
Page 105: Introduzione
è destinato alla determinazione quantitativa e qua- mente durante la misurazione. con carta assorbente e le aree contaminate do- litativa di vari analiti dei kit reagenti QuikRead go I test vengono eseguiti secondo le istruzioni che ac- vranno essere pulite con un disinfettante o alcool ®... -
Page 106: Operazioni Preliminari
QuikRead go durante la mi- diatamente il vostro fornitore locale. Un lettore di codici a barre esterno può essere colle- surazione. gato al QuikRead go Instrument. Un elenco di lettori Accessori • L’ambiente elettromagnetico deve essere valu- di codici a barre compatibili è... -
Page 107: Componenti Quikread Go Instrument
Componenti QuikRead go Instrument I componenti del QuikRead go Instrument sono mostrati in Figura 1 (strumento dall’alto), Figura 2 (strumento da dietro) e Figura 3 (strumento dal basso). Figura 2 Figura 3 1. Porta 2 USB di tipo A 1. Coperchio vano alimentatore 2. -
Page 108: Sollevamento/Trasporto Dello Strumento
Sollevamento/trasporto Posizionamento • La temperatura ambientale deve essere com- dello strumento presa tra 15°C e 35°C. Durante l’uso • Massima umidità relativa tollerata: 80% per Nel trasportare o spostare lo strumento, maneg- Lo strumento deve essere collocato su una super- temperature fino a 31°C. che passa al 67% di giarlo sempre con cura. -
Page 109: Cavo Di Alimentazione E Accumulatore
Nella parte posteriore dello strumento ci sono cin- Collegare il cavo di alimentazione nella parte po- Il QuikRead go Instrument può essere utilizzato que connettori con i simboli che descrivono il loro steriore dello strumento (vedi Figura 7). Collegare sia con il cavo di alimentazione di rete che con uso. -
Page 110: Inserire L'accumulatore
Inserire l’accumulatore Si prega di seguire attentamente le istruzioni riportate di seguito per inserire l’accumulatore al QuikRead go Instrument (vedi Figura 8). Spegnere lo strumento (se acceso). Scollegare il cavo di alimentazione. Girare lo strumento su un lato su un tavolo. -
Page 111: Accensione
Modalità risparmio energetico (acceso, spento, sleep mode) Lo scopo della modalità risparmio energetico Il QuikRead go Instrument ha un touch screen a Il QuikRead go Instrument ha tre modalità: acceso, è quello di salvare la carica dell’accumulatore. colori. Si devono usare i tasti virtuali, toccandoli spento o in modalità... -
Page 112: Procedura Guidata Di Setup
Set-up wizard vi verrà chiesto diselezionare, ad esempio, la lingua, e di impostare la data e l’ora. Welcome to QuikRead go! La lingua di default è l’inglese. La lingua può essere To start using the instrument we kindly ask you to complete cambiata al primo passo della procedura guidata di the following setup. -
Page 113: Lingua
Impostazioni → Flusso di misurazione → Manutenzione → Impostazioni di base Indietro Altre lingue Figura 11 Il primo passo della procedura guidata di settaggio è quello di scegliere la lingua di funzionamento per il QuikRead go Instrument. OPERAZIONI PRELIMINARI... -
Page 114: Data E Ora
Data e ora 10:30 Il secondo passo della procedura guidata Set-up Configurazione è quello di regolare la data e l’ora (vedi Figura DATA & ORA 12). Per fare questo, seguire le istruzioni riportate di seguito: Ora: Scegliere Modifica sulla riga Ora. 10:30 am Modifica Regolare l’orario con le frecce. -
Page 115: Volume Audio
Selezionare il tempo oltre il quale lo strumen- Avete ora completato la procedura guidata di pulsante di Prova. to QuikRead go Instrument entra in modalità impostazione. È possibile iniziare a utilizzare lo Regolare il volume del tono di allarme con le sospensione (ibernazione). -
Page 116: Interfaccia Utente In Generale
Interfaccia utente in generale 10:30 PROFILO Il QuikRead go Instrument viene usato tramite un’interfaccia utente grafica. In questa sezione vengono spiegati i principi fondamentali dell’inter- Mesure faccia utente. Menu principale A tutte le funzionalità dell’interfaccia utente si ac- cede tramite il menu principale (vedi Figura 15). -
Page 117: Layout
ID addizionale: ID operatore: mg/l 12345 ID misura: HS04 30/A17044I01234 HS47 ID Paziente: Ora misura: QuikRead go: xxxxxxxxxx 2017-05-03 12:19 A17044I01234 2019-03-05 Test: Test: Info risultato Risultato Selezionare Risultato per visualizzare il risultato della misurazione. Scegliere Info risultato per visualizzare il risultato. -
Page 118: Struttura Dell'interfaccia Utente
Struttura dell’interfaccia utente Struttura dell’interfaccia utente senza la funzione Struttura dell’interfaccia utente con la funzione di La struttura varia a seconda che l’accesso di si- di accesso di sicurezza: accesso di sicurezza abilitata: curezza sia o non sia abilitato in Impostazioni → 1. -
Page 119: Uso
Risultati no modificate (vedi Figura 19). Solo i kit di reagenti QuikRead go possono essere utilizzati per eseguire un test. Leggere le istruzioni per l’uso dei kit di reagenti QuikRead go prima di Impostazione Profili utilizzarli. Le istruzioni forniscono informazioni più dettagliate sull’esecuzione delle analisi e la mani- polazione dei campioni. -
Page 120: Esecuzione Di Un Test
Info Risultato per visualizzare le informazioni go Instrument esegue una misurazione del test e supplementari del test (vedi Figura 17b). QuikRead go Instrument ha una parte dedicata a mostra il risultato sul display con i dati del lotto Rimuovere la cuvetta. Il risultato scompare memorizzare i risultati per i campioni di controllo utilizzato. -
Page 121: Risultati
I risultati non in linea LIS sono i risultati surazione. Trasferimento dei risultati e loro memorizzati nella memoria di un QuikRead go In- Eliminazione risultati archiviazione mediante USB strument che di solito è collegato a un LIS ma è sta- to temporaneamente scollegato in modalità offline... -
Page 122: Impostazioni
Accettare con OK o Annulla per cancellare. continuato le impostazioni potrebbero essere Impostazioni Volume configurate con la procedura guidata di set-up: Le impostazioni del QuikRead go Instrument pos- Il volume può essere regolato scegliendo Volume. Impostazioni → Flusso delle misure → Manuten- sono essere configurate tramite il display. Le im- zione → Impostazioni di base. -
Page 123: Misurazione Del Flusso
ID precedente da nessione LIS/HIS. dopo aver apportato le modifiche. Per ulteriori esi- utilizzare, ma può anche essere cambiato. Per regolare il tempo oltre il quale lo QuikRead go genze le impostazioni devono essere salvate in un ID Paziente Instrument entra in modalità sospensione, acce- profilo. Per un utilizzo continuo le impostazioni de-... - Page 124 password dell’amministratore, che è QRGOSET. paziente se la misurazione del controllo di qualità Per impostare un nuovo campione di controllo della Selezionare / Parametri di test e il Test corri- è oltre i limiti critici. La riuscita di una misurazione qualità, seguire le istruzioni riportate di seguito: spondente.
-
Page 125: Modifica Delle Impostazioni
vetta lo strumento chiede “Stampare risultato no essere configurate nel menu di manutenzione: memoria USB. corretto?” Accettare la stampa scegliendo Sì. Impostazioni → Flusso misure → Manutenzione. Scegliere il trasferimento USB. Annullare la stampa scegliendo No. Collegare una memoria USB a una porta Impostazioni di base •... -
Page 126: Impostazioni Admin
GMT. Il touch screen può essere regolato per ottimiz- Feeder di QuikRead go Instrument. Da questo pun- • Quando si cambia la pila dell’orologio, regolare zare l’utilizzo dei pulsanti. Avviare la regolazione to, è... - Page 127 Quando le impostazioni di sicurezza sono attivate, il percorso Impostazioni → Flusso misurazione → quando QuikRead go Instrument entra in mo- l’utente deve sempre accedere a QuikRead go In- Manutenzione → Impostazioni Amministratore → dalità sospensione l’utente viene disconnesso. strument con un ID operatore e una password pri- Impostazioni di sicurezza (vedi Figura 25).
-
Page 128: Impostazioni Del Produttore
LIS (Impostazioni → Flusso misure tutti gli utenti devono sempre effettuare l’acces- → Manutenzione → Impostazioni amministratore). so prima di iniziare a utilizzare QuikRead go In- Factory reset I dati vengono trasferiti tramite una connessione strument. Le informazioni utente devono essere L’interfaccia utente può... -
Page 129: Applicazione Di Un Profilo
Se l’accumulatore viene utilizzato, collegare il Il QuikRead go Instrument è stato progettato per minate devono essere tamponate con alcool etilico connettore per accumulatore e premere il con- essere il più... -
Page 130: Risoluzione Dei Problemi
Messaggio di errore Cause possibili Azione correttiva Lo strumento non è collegato. Collegare lo strumento. QuikRead go Instrument non si accende. Lo strumento ha problemi elettronici. Contattare il servizio clienti. La pressione non è regolata, Regolare la pressione dei tasti dello schermo es: la zona sensibile del tasto non funziona. - Page 131 Accumulo di umidità sulle ottiche dello Trasferire lo strumento in un ambiente asciutto e strumento. riavviare dopo qualche minuto. “Errore codice XXX. Riavviare QuikRead go Instrument” e leggere il messaggio. Riavviare lo strumento. Se questo messaggio Malfunzionamento temporaneo dello di errore viene visualizzato di frequente, strumento.
- Page 132 Messaggio di errore Cause possibili Azione correttiva Rimuovere la cuvetta quando lo strumento ha Resti di cuvetta o residui di foglio lasciato sulla espulso. Assicurarsi che tutti i residui vengono cuvetta. rimossi prima di fare la “Posizione Cuvetta non corretta – letturasuccessiva.
-
Page 133: Specifiche Dello Strumento
STRUMENTO dello strumento e calibrato sia per misure fotometriche che turbidi- metriche. Ogni QuikRead go Instrument ha un numero seria- Dichiarazione di conformità le unico che si trova sull’etichetta sul fondo dello Display Touch screen QuikRead go Instrument è conforme al regolamen- strumento. -
Page 134: Connessione Usb
Cronologia delle revisioni WLAN USB-stick. • L’alimentazione da Ethernet (PoE) non è sup- La garanzia del costruttore per il QuikRead go In- La cronologia delle revisioni può essere visionata portata. strument copre difetti di materiale o di fabbricazione su www.aidian.eu. -
Page 135: Livelli E Diritti Utente Di Quikread Go Instrument Quando È Abilitata La Funzione Di Accesso Di Sicurezza
Livelli e diritti utente di QuikRead go Instrument quando è abilitata la funzione di accesso di sicurezza Azione Utente normale Supervisore Amministratore Misurazione paziente Misurazione QC Visualizzazione di tutti i risultati QC Aggiunta di un nuovo lotto QC Visualizzazione dei risultati del paziente precedenti –... - Page 136 QuikRead go is a registered trademark of Aidian Oy. ® Aidian Oy Koivu-Mankkaan tie 6 B, FI-02200 Espoo, Finland P.O. Box 83, FI-02101 Espoo, Finland +358 10 309 3000, www.aidian.eu, www.quikread.com 03/2022...
Need help?
Do you have a question about the QuikRead go and is the answer not in the manual?
Questions and answers