Table of Contents

Summary of Contents for SoftdB Mezzo Sound Intensity Probe
- Page 1 Mezzo Sound Intensity Probe with Mezzo Intensity Analyzer Module User Guide – 2022-02-17 Soft dB Inc. 1040, Belvedere Avenue, Suite 215 Quebec (Quebec) Canada G1S 3G3 Toll free: 1-866-686-0993 (USA and Canada) E-mail: info@softdb.com...
-
Page 2: Table Of Contents
Installing the windscreen ........................5 Setting up the Mezzo Intensity Analyzer Module ..............6 Input Setup .............................. 6 4.1.1 Retrieving Microphone Set Information from Mezzo Sound Intensity Probe ..6 4.1.2 Calibrating each microphone....................7 4.1.3 Selecting the Microphone Spacer ..................10 Selecting Data Type .......................... -
Page 3: Introduction
Introduction Congratulations on your purchase of the Mezzo Sound Intensity Probe. This instrument provides an innovative and cost-effective solution for sound intensity measurements. More than just a DAQ system, the DSP embedded in each MEZZO Intensity Probe ensures real-time signal processing. -
Page 4: Specifications
USB Powered (Max 0.35W) Included Accessories Component Description Intensity Probe Mezzo Sound Intensity Probe with 40GK-26CB mic-set (12.5 mV/Pa, IEC 61043 (1993) Class 1) USB Cable 3 m USB 2.0 cable with Mini B connector Windscreen 190 x 100 mm elliptical windscreen Case Plastic transport case Dimension: 450x395x115mm (17.75x15.5x4.5”) -
Page 5: Mezzo Intensity Analyzer Module
Mezzo Intensity Analyzer Module Module Specifications Parameter Value Global levels and Spectrums (1/1 octave, 1/3 octave, 1/24 octave or FFT) Available Data Frequency weighting : A,C and Z Sound Intensity Level (Li), 1/1 octave: 16 Hz to 16 kHz 1/3 octave: 12.5 Hz to 20 kHz Bandwidth 1/24 octave: 11.4 Hz to 22.1 kHz FFT: 0 to 22 kHz... -
Page 6: Setting Up The Mezzo Sound Intensity Probe
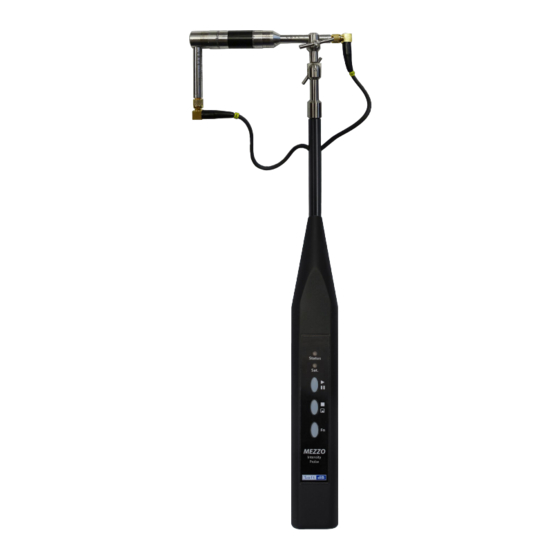
Setting up the Mezzo Sound Intensity Probe Mounting the microphones 1) Identify microphone 1 and 2 by looking at the serial numbers from the calibration certificate; 2) Assemble the microphone 1 by using the right-angle preamplifier adapter; 3) Connect the microphone 1 to the cable labeled “1”;... -
Page 7: Installing The Windscreen
Installing the windscreen It is recommended to use the windscreen on the probe to limit effect of wind noise and also to protect the probe. -
Page 8: Setting Up The Mezzo Intensity Analyzer Module
“Setup” tab to enter the input setup: 4.1.1 Retrieving Microphone Set Information from Mezzo Sound Intensity Probe Click on the “Mic Set” button: Click on the “Load Info From Mezzo” to load the calibration information from the Mezzo Sound... -
Page 9: Calibrating Each Microphone
4.1.2 Calibrating each microphone Click on the “Calibrate Mic A” button: Enter the calibrator level and frequency. Insert the microphone in the calibrator:... - Page 10 Turn ON the calibrator and click on “Run” Click on “Stop” when level is stable...
- Page 11 The calibration function will adjust the sensitivity according to the measured level and the calibrator level at the calibrator frequency. Click OK to accept. Repeat for the second microphone. Note: The calibration level can be checked by clicking “Check” instead of “Run”. This allows to measure the calibration level without changing the sensitivity.
-
Page 12: Selecting The Microphone Spacer
4.1.3 Selecting the Microphone Spacer Click on the “Mic Spacer” button. The microphone spacer is an important part of the sound intensity measuring technique using a pair of microphones. Separated by a distance, the two microphones can measure the sound particle velocity by using the pressure gradient. -
Page 13: Selecting Data Type
Selecting Data Type Click on the button to select the spectrum type: Use the spectrum drop-down list to select from the available spectrum types (1/1, 1/3, 1/24 Octave and FFT). The numbers on the right show the resulting bandwidth. Note that the available bandwidth is affected by the microphone spacer bandwidth. -
Page 14: Selecting The Record Directory
Selecting the record directory Click the button from the “Setup” tab: Select the “Automatic” save mode in the drop-down list. The manual mode requires to click the save button once the measurement has ended, whereas the automatic mode records the file automatically at the end of the measurement. -
Page 15: Performing A Quick Field Check
Performing a quick field check Click on the “Compass” button from the “Tools” tab: Locate the sound intensity towards the sound source and check the compass indicator: Mic 2 Mic 1 The compass indicator should be in the red region indicating a PI index inferior to 3 dB and positive intensity. -
Page 16: Performing A Measurement
Performing a measurement Method of measurement Sound intensity measurements are performed on an integrating box around the device under test (DUT). Each surface is measured using a scanning technique to measure the average sound intensity of this surface. The sound intensity level can then be converted to sound power level using the area of the measuring surface. -
Page 17: Step-By-Step Operation
Step-by-Step Operation 10) Position the probe perpendicularly to the measurement surface at the starting point of the scanning path. 11) Back to the main interface, click the button on the interface or press the button on the probe to start the measurement. 12) As soon as the measurement is started, move the probe at constant speed along the scanning path. -
Page 18: Analyzing Data
Analyzing Data Theory 7.1.1 Sound Intensity vs Sound Pressure Sound Intensity is a vector quantity with a magnitude and a direction. It represents the rate of sound energy flow through a unit area. A sound intensity probe using a pair of pressure sensing microphones will pick-up only the vector component which is in-line with the reference axis of the probe. -
Page 19: Pi Index
On the other hand, the sound pressure level indicates the sound pressure energy regardless of the direction of the flow of energy. Thus, with the energy flow vector in the reference axis, both sound intensity level will give the same result. However, with the energy flow vector perpendicular to the reference axis, the sound pressure remains unchanged but the sound intensity will be null. -
Page 20: Advanced Indicators
7.1.3 Advanced Indicators Extraneous Sources The extraneous sources index (Called F in ISO 9614-1 and F in ISO 9614-2) indicates the difference between the average sound intensity level and the average of absolute sound intensity levels. ������. ������. = �� | �� | − ���� When the extraneous sources indicator is close to zero (<... -
Page 21: Using The Mezzo Intensity Analyzer Module To Analyze Data
Using the Mezzo Intensity Analyzer Module to analyze data The “Display” tab contains all the different controls to select the appropriate data to display. buttons allow to view the live data (instantaneous data) and overall average. The “Live” setting is only available during the measurement. Once the measurement has ended, only the “Overall”... -
Page 22: Exporting Data
Exporting Data Click on the buttons to export data from the Mezzo Intensity Analyzer to a tab delimited file to import in Excel. Viewing Measurement info A measurement file contains all the setup information. It’s also possible to add a comment to a measurement file to document the measurement.
Need help?
Do you have a question about the Mezzo Sound Intensity Probe and is the answer not in the manual?
Questions and answers