Advertisement
Quick Links
Advertisement

Related Manuals for Dojo PAX A920


Summary of Contents for Dojo PAX A920
- Page 1 PAX A920 Install/ Integration...
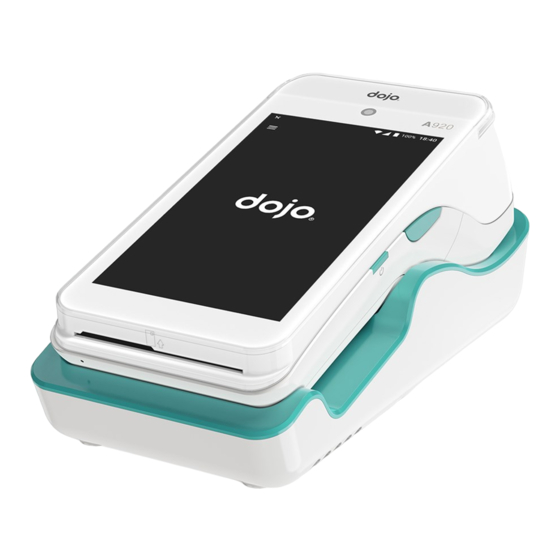
- Page 2 Our card machine A920...
- Page 3 Unpack the card machine Next working day delivery if ordered before 8pm A920 machine Quick start guide ● ● Charging base Schemes window sticker ● ● Power adaptor with UK plug ‘Card only’ sticker ● ● USB to Micro USB cable Back of machine support sticker ●...
- Page 4 Order confirmation and activation code Sent when order is placed Insights/feedback/current compliance rate...
- Page 5 Card Machine Installation The following will show you how to install the A920...
- Page 16 Terminal Installation: Happy Path...
- Page 21 Integrated Payments...
- Page 22 After selecting the 3 lines at top left, you will see these options >...
- Page 23 Please note Integrated Payments refers to both PAC and PAT and these can both be enabled at Select Settings- This the same time if the will navigate you to terminal is on 1.13 the screen where you software or higher are able to enable Integrated and non integrated payments as...
- Page 24 Once all the functions have been enabled, select the 3 lines on top left again Then selected Integrated Payments The screen will look as opposite...
- Page 25 PAC transactions are actioned the usual way If gratuity is enabled this will come up as an option as can be seen opposite Then finalize the sale by inserting or swiping card...
- Page 26 If the merchant has approved CNP on account this can be done integrated On the tap/ insert screen, select the 3 dots at top left, CNP then follow on screen instructions...
- Page 27 To complete a Pay a Table integrated payment, select Settle Table then enter Waiter ID if applicable...
- Page 28 Select Table Number from the list of available open tables on the list If a POS receipt is required, select print bill Once the table is selected then you are offered the options to pay in full/ Equal or Custom Split Please note once the sale is finalised and balance paid in full, this will close the table...
- Page 29 If the bill is split the opposite screen will show after each transaction until the final balance is paid...
- Page 30 At the end of each transaction, you are presented with the option to print whichever receipt you wish...
- Page 31 Non- Integrated Payments...
- Page 32 From the home screen select the three lines at top left Select Non Integrated Payments Type amount and confirm Then follow the onscreen instructions to finalise the payment...
-
Page 33: Tips And Hints
Tips and Hints... - Page 34 Terminal ID/ Serial Number ● From the home screen, select the three lines at top left ● Select Summary ● Enter Password ● Select Print- The TID and serial numbers are on top of the receipt...
- Page 35 If a transaction fails, the screen always shows Red and will remain on this for a few seconds...
- Page 36 Connections ● You can have more than one wifi connection saved and the terminal will swap between them ● Integration can be set up on wifi, 3/4G or both ● Avoid connecting the ethernet cable as the Bluetooth functionality is not available General Tips ●...
-
Page 37: Useful Contacts
● Customer Services- 08000443550 ● Customer Services email- support@dojo.tech ● Useful contacts...
Need help?
Do you have a question about the PAX A920 and is the answer not in the manual?
Questions and answers