Table of Contents
Advertisement
Quick Links
ASSEMBLY INSTRUCTIONS
& OWNER'S MANUAL
FOR YOUR SAFETY - Ensure that the water level in your pool is maintained at the correct level for safe operation
of the filtration system. Never leave your pool empty. This can result in severe damage to your pool liner.
Never dive or jump into a modular pool and never walk or sit on the top deck as it is very dangerous and
serious injuries may occur. Failure to adhere to instructions concerning maintenance, safety, assembly, start-
up and use could pose serious health risks, especially to children. Your pool is designed to provide years of
enjoyment, as long as it is carefully and correctly installed and maintained. Read and make sure you understand
the instructions before you start. Work step by step, and take your time.
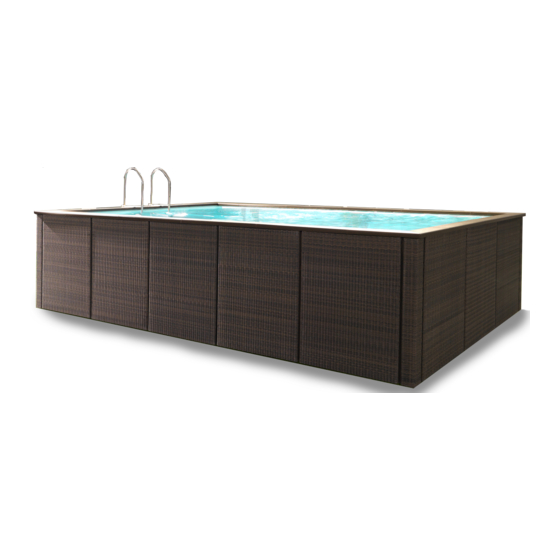
above ground pool
ATTENTION
|
RATTAN
Advertisement
Table of Contents

Subscribe to Our Youtube Channel
Summary of Contents for Laghetto Dolce Vita RATTAN
- Page 1 ASSEMBLY INSTRUCTIONS & OWNER’S MANUAL RATTAN above ground pool ATTENTION FOR YOUR SAFETY - Ensure that the water level in your pool is maintained at the correct level for safe operation of the filtration system. Never leave your pool empty. This can result in severe damage to your pool liner. Never dive or jump into a modular pool and never walk or sit on the top deck as it is very dangerous and serious injuries may occur.
-
Page 2: Table Of Contents
Dolce Vita | RATTAN above ground pool & Assembly Instructions Owner’s Manual Table of Contents Section 1. Important Safety Instructions ..3 Section 7. Liner Installation ......26 Prepare the Liner ..............26 Section 2. Assembly on a Concrete Slab ..5 Fitting the Liner.............. -
Page 3: Section 1. Important Safety Instructions
Dolce Vita | RATTAN above ground pool & Assembly Instructions Owner’s Manual Section 1. Important Safety Instructions READ AND FOLLOW ALL INSTRUCTIONS WARNING BEFORE ASSEMBLING AND USING THIS PRODUCT, CAREFULLY READ THE INSTRUCTION MANUAL AND KEEP IT FOR FUTURE REFERENCE. •... - Page 4 Dolce Vita | RATTAN above ground pool & Assembly Instructions Owner’s Manual WARNING Read carefully and follow all the information in this user manual before install ing and using the pool. These safety warnings, instructions, and guidelines address some common risks linked to aquatic recreational activities, but they cannot account for all risks and hazards.
-
Page 5: Section 2. Assembly On A Concrete Slab
Dolce Vita | RATTAN above ground pool & Assembly Instructions Owner’s Manual Section 2. Assembly on a Concrete Slab Concrete Slab 50 cm 120 cm Max water level water Basement Reinforcement Concrete cover WARNING Ensure reinforcing bars are located in the bottom of the slab for maximum strength. -
Page 6: Slab Requirements
Dolce Vita | RATTAN above ground pool & Assembly Instructions Owner’s Manual Slab Requirements • +100mm to the overall dimensions of the Dolce Vita pool • Dolce Vita 4 x 2 minimum required slab size is (B) 4.35M x (A) 2.35M. Total area = 10.2M2 •... -
Page 7: Package Contents
Dolce Vita | RATTAN above ground pool & Assembly Instructions Owner’s Manual Package Contents DVCBOLR100 Plastic Wood Finish Side Wall Trim (4 x 2 POOL) - 8 pcs (5 x 3 POOL) - 12 pcs DVCBOLRANG Plastic Wood Finish Corner Wall Trim (ALL POOLS) - 4 pcs PDVC4M Leg and Wall Assembly... - Page 8 Dolce Vita | RATTAN above ground pool & Assembly Instructions Owner’s Manual ASP3P9M Manual Cleaning Kit (ALL POOLS) - 1 bx DVPAFIA Corner Rattan Pieces (ALL POOLS) - 4 pcs PDV11SP4M Rattan Panel Supports (4 x 2 POOL) - 4 pcs (5 x 3 POOL) - 8 pcs PDV11SP6M Rattan Panel Supports...
- Page 9 Dolce Vita | RATTAN above ground pool & Assembly Instructions Owner’s Manual DVPAFI100 Rattan Panels (4 x 2 POOL) - 12 pcs (5 x 3 POOL) - 16 pcs VADVC35BIT Pool Liner (ALL POOLS) - 1 pc DVCKITFFLA - DVCKITFFL6M Corner Hardware Kit (ALL POOLS) - 1 bx DEKI1DV...
- Page 10 Dolce Vita | RATTAN above ground pool & Assembly Instructions Owner’s Manual ACFLPBUP Lighting Kit (contents may vary slightly from image) (ALL POOLS) - 1 bx DVCSTP Overflow Assembly (ALL POOLS) - 1 bx SCDVCBC Ladder Platform Kit (ALL POOLS) - 1 bx SCDVC17SB Ladder Rails Kit (ALL POOLS) - 1 bx...
-
Page 11: Section 3. Pool Parts Assembly
Dolce Vita | RATTAN above ground pool & Assembly Instructions Owner’s Manual Section 3. Pool Parts Assembly The following section of the manual will show how to construct the major sections of the pool. It is advisable to set up an area on the ground or on a large table to make all the necessary pieces. Build one piece and use it as a template guide for the others, ie., build one of the leg supports and use as a guide to build the other leg supports etc. -
Page 12: Fastening And Alignment Kit Assembly
Dolce Vita | RATTAN above ground pool & Assembly Instructions Owner’s Manual STEP 3: Assemble the cross brace using the Legend hardware outlined. These bolts can be tightened at this stage. Remove the screwdriver used as a stopper. Fastening and Alignment Kit Assembly The fastening and alignment kit allows you to vertically adjust the height of the crossbar between each support leg assembly. - Page 13 Dolce Vita | RATTAN above ground pool & Assembly Instructions Owner’s Manual Legend Legend ATTENTION Tighten the circled screws only. Use 2 wrenches to tighten. STEP 4: The completed Leg Support should look like this, build all required for your size pool. For the 4 x 2 there will be 8 x Leg Supports, for the 5 x 3 there will be 12 x Leg Supports.
-
Page 14: Corner Pieces Assembly
Dolce Vita | RATTAN above ground pool & Assembly Instructions Owner’s Manual Corner Pieces Assembly This step is explaining how to assemble the fastening and alignment kit for the corner posts. The height of the crossbar assembly will be vertically adjusted and aligned between the leg assembly and the corner. Legend Legend ATTENTION... - Page 15 Dolce Vita | RATTAN above ground pool & Assembly Instructions Owner’s Manual 3.3 (cont.) Reinforcing Cross Beam Piece For the 4 x 2 pool, there will be 12 pcs of Crossbeam assemblies and for the 5 x 3 pool there will be 16 pcs. Legend Use 2 wrenches to tighten.
-
Page 16: Section 4. Ground Marking
Dolce Vita | RATTAN above ground pool & Assembly Instructions Owner’s Manual Section 4. Ground Marking NOTE: We recommend that you mark out the slab as accurately as possible to avoid assembly problems in the subsequent stages of assembly. All dimensions are in millimeters. Marking for 4 x 2 Pool... -
Page 17: Marking For 5 X 3 Pool
Dolce Vita | RATTAN above ground pool & Assembly Instructions Owner’s Manual Marking for 5 x 3 Pool Check Dimensions • Check the dimensions of the concrete slab, the surface finish and the level of the slab (maximum difference ±1 cm). -
Page 18: Mark Square Outline On Slab
Dolce Vita | RATTAN above ground pool & Assembly Instructions Owner’s Manual Mark Square Outline on Slab • Draw the first line and the start and end points (dimension B) of the drawing rectangle centred on the dimensions of the slab. •... -
Page 19: Outline Marking On Slab
Dolce Vita | RATTAN above ground pool & Assembly Instructions Owner’s Manual Outline Marking on Slab • After tracing the rectangle, mark the centre point of each foot on the rectangle using the dimen sions given in the examples of dimensions according to pool size, Sections 4.1 and 4.2. NOTE: We recommend that you always take your measurements from a corner of the tracing rectangle to minimise any errors. -
Page 20: Section 5. Install The Anchors
Dolce Vita | RATTAN above ground pool & Assembly Instructions Owner’s Manual Section 5. Install the Anchors Mark Anchor Position on Slab • Mark the position of the anchoring dowels on the Dolce Vita using the template. • Position the template so that the pre viously marked centre of the foot is inside the Dolce Vita centring hole and the tips of the notches are perfectly aligned with the marking rectangle. -
Page 21: Attach Anchors To Slab
Dolce Vita | RATTAN above ground pool & Assembly Instructions Owner’s Manual Attach Anchors to Slab • Drill the slab according to the anchoring dowels so that at least 2 of these points that are offset. • Fix the feet to the concrete slab using the anchoring dowels provided. Legend ATTENTION Use only anchors... -
Page 22: Assemble Corner Legs (4)
Dolce Vita | RATTAN above ground pool & Assembly Instructions Owner’s Manual Assemble Corner Legs (4) Legend Use 2 wrenches to tighten... -
Page 23: Connect Corner Crossbeams To Leg Supports
Dolce Vita | RATTAN above ground pool & Assembly Instructions Owner’s Manual Connect Corner Crossbeams to Leg Supports Legend WARNING Don’t tighten now. • Fix the corner piece to the slab with the bottom plate inside corner point (in line with the corner slab markings from Section 4.1, 4.2). -
Page 24: Structure Alignment
Dolce Vita | RATTAN above ground pool & Assembly Instructions Owner’s Manual Structure Alignment • Adjust the level of the upper cross beams and fasten the M8x20 bolts • Use the level alignment bolts to keep the cross beams firm. Use a self drilling screw to fix the beams in place Legend... -
Page 25: Level And Plumb The Leg Supports
Dolce Vita | RATTAN above ground pool & Assembly Instructions Owner’s Manual Level and Plumb the Leg supports • Loosen screw “A” to align the upper perimeter of the pool. • Once all your leg supports, corner pieces and cross beams are installed you are now ready to install your liner. Ensure all bolts are tightened and that all parts of the frame kit are plumb and level. -
Page 26: Section 7. Liner Installation
Dolce Vita | RATTAN above ground pool & Assembly Instructions Owner’s Manual Section 7. Liner Installation Prepare the Liner • Carefully clean the concrete bed of the pool and check that there are no bumps or sharp edges. • Place the rolled liner inside the pool frame. •... - Page 27 Dolce Vita | RATTAN above ground pool & Assembly Instructions Owner’s Manual • Insert the PVC cord (as shown below) along the entire perimeter of the pool. • Use a rubber mallet to punch the cord all the way into the channel, it may be necessary to use a thin wooden block to push it all the way into the channel.
-
Page 28: Section 8. Install Skimmer, Fittings, Filtration And Overflow
Dolce Vita | RATTAN above ground pool & Assembly Instructions Owner’s Manual Section 8. Install Skimmer, Fittings, Filtration and Overflow Assemble skimmer fittings and lights, and connect the filtration system NOTE: Ensure all pipe and flexible fittings have the provided grommet/washers in place prior to fixing in place. Install the Return water Return fittings assembly... - Page 29 Dolce Vita | RATTAN above ground pool & Assembly Instructions Owner’s Manual Overflow System water Flexible pipe suction line to filtration system connects here. This line connects to the inlet of the pump.
-
Page 30: Overflow Assembly
Dolce Vita | RATTAN above ground pool & Assembly Instructions Owner’s Manual Overflow Assembly Legend WARNING The overflow discharge pipe needs to be directed to suitable waste (stormwater or sewer). -
Page 31: Filtration System Installation
Dolce Vita | RATTAN above ground pool & Assembly Instructions Owner’s Manual Filtration System Installation • Use the provided 40 mm screw to attach unions to the flexible pipe. Ensure the gaskets are in place for a firm seal. • Cut at least 4 x short lengths of 40 mm pipe (minimum 100 mm each). -
Page 32: Section 9. Assemble The Top
Dolce Vita | RATTAN above ground pool & Assembly Instructions Owner’s Manual Section 9. Assemble the Top Plastic Wood Finish Top Assembly water Legend water ATTENTION Enter the spindles in the shown guide. Legend... -
Page 33: Corner Panel Support Assembly
Dolce Vita | RATTAN above ground pool & Assembly Instructions Owner’s Manual Corner Panel Support Assembly Legend 6 cm Central Panel Support to the Structure • With the technique of wire stretched align the central panels supports, to the corner panels supports. Legend... -
Page 34: Section 10. Assemble And Attach Ladder
Dolce Vita | RATTAN above ground pool & Assembly Instructions Owner’s Manual Section 10. Assemble and Attach Ladder 10.1 Ladder Assembly Legend... - Page 35 Dolce Vita | RATTAN above ground pool & Assembly Instructions Owner’s Manual Legend Legend...
-
Page 36: Assembling Of The Ladder To The Structure
Dolce Vita | RATTAN above ground pool & Assembly Instructions Owner’s Manual 10.2 Assembling of the Ladder to the Structure Insert the piece diagonally inside the structure then turn toward the ground by placing the point of attachment. Legend Use 2 wrenches to tighten... - Page 37 Dolce Vita | RATTAN above ground pool & Assembly Instructions Owner’s Manual Drill in the plastic wood board by inserting the drill bit (ø 8) in the slot of the support structure as in the drawing to the side.
- Page 38 Dolce Vita | RATTAN above ground pool & Assembly Instructions Owner’s Manual Legend...
-
Page 39: Panel Assembly
Dolce Vita | RATTAN above ground pool & Assembly Instructions Owner’s Manual 10.3 Panel Assembly ATTENTION Legend Pre-drill with a drill bit ø 4 and screw the panel to support. Make sure to shift the fibers of the wicker before drilling. -
Page 40: Panels Supports Assembly
Dolce Vita | RATTAN above ground pool & Assembly Instructions Owner’s Manual 10.4 Panels Supports Assembly Legend (M5) (M6) ± 4.5 cm ± 6.5 cm... -
Page 41: Section 11. Filling The Pool
Dolce Vita | RATTAN above ground pool & Assembly Instructions Owner’s Manual Section 11. Filling The Pool: Once the pool has been signed off for occupation, you may fill the pool (use of tap water is preferable) and make any required final adjustments. 11.1 Fill with Water ATTENTION... -
Page 42: Final Assembled Pool
Dolce Vita | RATTAN above ground pool & Assembly Instructions Owner’s Manual 11.3 Final Assembled Pool Section 12. Use and Maintenance 12.1 Before First Use Before first using your pool: The pool must be filled with clean water. Chlorine must be always poured into the skimmer with the pump switched on (or a chlorine tab be placed in the skimmer basket). -
Page 43: Cleaning
Dolce Vita | RATTAN above ground pool & Assembly Instructions Owner’s Manual 12.2 Cleaning If any hard calcium deposits appear, use a decalcifier to remove any build up. Your pool shop will recommend certain products. Always rinse abundantly. ATTENTION Avoid the use of thinners during cleaning. 12.3 Water Chemistry Table Test and maintain correct water balance throughout the season, according to the table. - Page 44 For full warranty terms and conditions and to register your warranty, visit https://warranty.baracuda.com.au/ and complete your details. Or scan the QR code to go directly to the registration page Record your equipment details here for quick reference: Model No. : _______________________________________ Serial No.
Need help?
Do you have a question about the Dolce Vita RATTAN and is the answer not in the manual?
Questions and answers