
Related Manuals for Mami HOMEGUARD 32


Summary of Contents for Mami HOMEGUARD 32
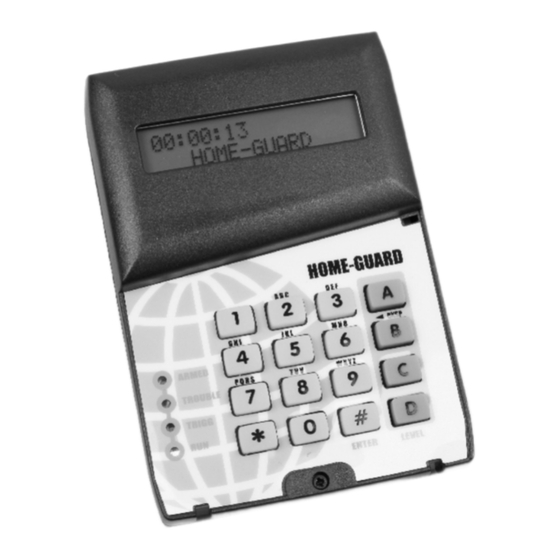
- Page 1 M A M I MANUFACTURING AND MINOR INVENTIONS HOMEGUARD 32 Wireless alarm system M000078...
-
Page 3: Table Of Contents
- HOW TO TRIGGER A 2 CHANNEL REMOTE CONTROL ..................P8 - HOW TO TRIGGER A cRED WIRELESS PIR DETECTOR..................P8 - HOW TO TRIGGER AN MAMI DOOR GUARD DETECTOR ..................P8 - HOW TO TRIGGER A SILENTRON OUTDOOR DETECTOR .................. P8 -- HOW TO TRIGGER OTHER OUTDOOR DETECTORS .................. - Page 4 GENERAL FEATURES: The Homeguard 32 is a compact portable 32 device/8 zone wireless alarm system. The set up of the Homeguard 32 is quick and easy with the self learning feature of wireless detectors The Homeguard 32 is compatible with a wide range of wireless detectors; these include indoor &...
-
Page 5: General Information
MAMI standard products namely: - The Gatto two channel (relay) receiver (16bits smartcode) - 16 bits smartcode receivers compatible with all MAMI alarm panels. (Tracer, Minitracer, M6 ). To adjust these parameters refer to Programing Options, Options, Transmitter interface. -
Page 6: Programming The Home Guard 32
Save Changes Set the Transmitter >Receiver Interface “Tracer mode” will be displayed. The user has the option of Tracer mode making the HOMEGUARD 32 compatible with either the Advisor mode Advisor (remote wireless alarm indicator) or with MAMI Tracer Alarm panels. -
Page 7: System Recommended Programmable Functions
Setting the radio transmitter Code NOTE: THE HOME GUARD WILL ONLY TRANSMIT MAMI SMART 16BIT ON 403.55 Enter the Transmitter code in decimal format. This code will be transmitted on trigger. To send a test code press the 4 and 6 button... -
Page 8: Give A Name To Each Zone
GIVE A NAME TO EACH ZONE Naming /renaming of Zones “Zone Naming” will be displayed. then the user is prompted to enter a zone number from 1 to 8. If the user enters an invalid Zone, it will be ignored. The user must now enter a name for that zone . -
Page 9: Program The Preset Arm Levels A,B,C And D
PROGRAM THE PRESET ARM LEVELS A,B,C and D Set the Arm Levels A,B,C and D Enter Zones (1-8) The user must key in the user code followed by ‘0' then the level A, B, C or D. the user must select active zones ( zones 1 to 8). If the user enters an invalid Zone, it will be ignored. -
Page 10: How To Trigger Different Devices For Zone Allocation
2 - Detector and Remote control ID codes may be “learned” by the HomeGuard 32 by activating them while HOME GUARD 32 is in “ learning” mode . It is highly recommended that the detectors do not have identical codes if programmed manually. -
Page 11: Arming The Home Guard 32
ARMING THE HOME GUARD 32 The unit can be armed in any of the following ways: - Remote Arm- In this mode the unit Arms to level A or B only. - Schedule Arm when the unit reaches the scheduled time it will arm automatically. Arms to Level A only. - Keypad Arm The user can choose to Arm at a particular level by holding down any of keys A - D. -
Page 12: Alarms
ALARMS Alarms on the unit will occur when any of the 8 zones are triggered, the panic on the remote was triggered or the panic on the keypad was triggered. When the unit goes into alarm, the unit will beep continuously for 1 minute and every 30 seconds thereafter. -
Page 13: Warning Mode On The Home Guard 32
WARNING MODE ON THE HOME-GUARD Programming Options The Home Guard can be put into a WARN or Chime mode. In this mode the unit will not trigger an alarm but sound a chime when any detector in the selected level has been triggered. To set the warn Level (A-D) the user simply holds down the * and one of the level buttons (A-D) simultaneously for approx 2 seconds until the Beep. - Page 14 Layout: M000078...
- Page 15 HOME-GUARD POWER / CHARGER CONNECTIONS indoor passive infrared detector arm/disarm/panic remote control Figure 1 12V DC jack Monitor any contact such as door, smoke 220ac to 12dc detector, temp sensor etc .5A charger outdoor detectors M000011 M000078...
-
Page 16: Summary Of All Keypad Entries
Summary of ALL Key-Pad entries PROGRAMMING THE OPTION REGISTERS (ONLY THROUGH TO THE USER CODE ) 1000 # 0 0 = SYSTEM POWER OFF 1000 # 1 1 = CHANGE USER CODE 1000 # 0 1 = SET SCHEDULES OF THE SYSTEM 1000 # 1 A = SELF LEARN DETECTORS 1000 # 0 2 = SET OPTIONS OF THE SYSTEM 1000 # 1 B = SELF LEARN REMOTE’S...
Need help?
Do you have a question about the HOMEGUARD 32 and is the answer not in the manual?
Questions and answers