Table of Contents
Advertisement
Advertisement
Table of Contents

Related Manuals for Provision ISR PR-DVR-C10

Summary of Contents for Provision ISR PR-DVR-C10
- Page 1 PR-DVR-C10 Quick Installation Guide...
-
Page 2: Table Of Contents
CONTENTS 1. About this User Manual Page 1 2. Warnings! Page 1 3. Package Contains Page 2 4. Camera Controls Introduction Page 3-4 5. Recorder Installation Page 5-7 6. Initial Settings Page 8 Page 8 7. Video Recording Mode Operation 8. -
Page 3: About This User Manual
About this User Manual This user manual is specially designed to detail the camera’s functions and features. - Please read this manual before using the camera to ensure safe and proper use. - Descriptions are based on the camera’s factory default settings. - PROVISION-ISR continuously strives to improve its products. -
Page 4: Package Contains
Package Contains Strip Holder Dual Channel HD Car Dash Camera Trim Removal Tool USB Cable PR-DVR-C10 Quick Installation Guide Manual Book Car Charger... -
Page 5: Camera Controls Introduction
Camera Controls Introduction 3 6 2 4 5 1... - Page 6 Icon Name Operating Instructions - Under Video mode, press to Stop/Start recording. - Under Photo mode, press to capture a picture. - Under Playback mode, press to Play/Stop video files. Press to switch among Video mode, Photo mode and Playback mode. MODE (Notice: You must stop video recording before mode switching) Long press to Turn On/Off the camera / Short press to go to screen saver.
-
Page 7: Recorder Installation
Recorder Installation 1. Before starting video recording, please insert a Micro SD card (not included) into the slot until it locks in place. Please pay attention: - The micro SD card (TF card) can be up to 32GB (class 10 and above is recommended) - The micro SD card needs to be formatted. - Page 8 3. Lay the "car charger" cable provided in the box between the camera to car’s cigarette lighter socket to car (see suggested diagram). 4. Plug-in “Mini USB” side to camera and Car Charger side to the car's cigarette lighter socket. Mini USB side Car Charger side...
- Page 9 5. Start the engine, the dash camera will automatically turn on, Go to systems settings find the "Format" Option. Press "OK" to format the TF card. 22:51 22:51 22:51 Resolution > Park mode Park mode Tips Photo quality > G-sensor Close >...
-
Page 10: Initial Settings
Initial Settings Set the Date and Time: 1. Press the “OK” button to stop the video recording. 2. Then press the “Menu” button, by pressing to select the “Date / Time” option, then press the “OK” button to enter. 3. Press the buttons to adjust the values, press the “OK”... -
Page 11: Photo Mode Operation
Photo Mode Operation 1. Press “OK” button to stop recording, then press “Mode” button to switch to camera mode. The camera icon will appear on the screen’s upper left corner. 2. Press the “OK” button to take a picture. The screen will freeze to indicate picture was taken. Playback Mode Operation 1. -
Page 12: Special Features
Special Features: 1. Loop Recording The camera will keep recording until the storage is full. When this happens, the camera will overwrite the earliest recording with new footage. This feature enables the camera to record non-stop with limited storage space. 2. - Page 13 5. USB mode This camera can function in two different modes while connected to a computer. - Mass Storage - USB Flash Drive Allows you to access and download all recorded video files, just like it was a normal USB Flash Drive. - PC camera - USB Webcam Allows you to use the camera as a chat webcam or USB camera.
- Page 14 6. Battery Indicator Battery level indicator, refer to the diagram: Slightly low battery low battery battery empty Full battery After switching on the car power, the red charging indicator lights up to indicate charging is in progress. Fully recharge time is approximately 180 minutes. The red charging indicator light will automatically turn off after charging is completed.
-
Page 15: Main Screen
Main Screen Press power button to turn on the device. You will enter preview mode, and get below screen: 3 6 8 9 00:58 22:51 2017/03/02 22:51:06 :Video Recording Mode :Photo Mode :Playback Mode :Time change indicates that video recording is working (on the upper left corner). 00:58 :Current video file is locked (Overwrite protected). - Page 16 : White font- indicates remaining recording time on storage (on the upper right corner). 4. 22:51 :Motion detection is ON :Audio recoding function is ON :Audio Recording function is OFF :Parking Guard function is ON :TF card inserted :Battery level :Current Date &...
-
Page 17: Menu Setting
Menu Settings Explanation Available options Options Resolution Set the video resolution 1080FHD, 1080P , 720P , WVGA, VGA, QVGA This feature enables the DVR to record 1 minute, 3 minutes, 5 minutes, Off; if you choose to Off, the Loop Recording non-stop with limited storage space card will not automatically cycle full coverage. -
Page 18: Product Specifications
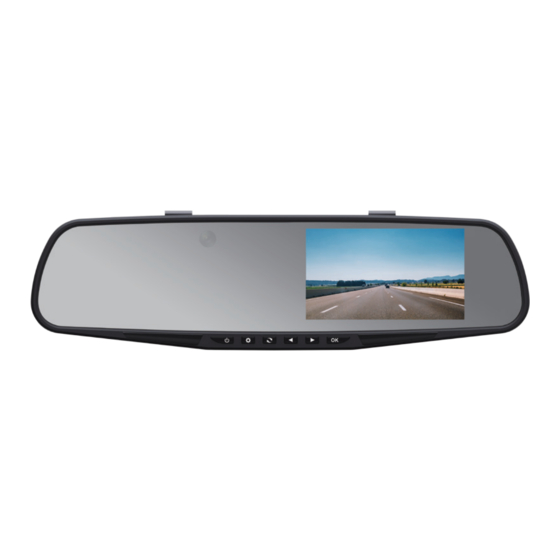
Product Specifications Lens Front: 170° / Back: 120° Built-in (under the car accident or emergency case, the video file not to G-sensor be deleted) LCD screen size 4.3-inch high definition LCD screen Traditional Chinese, Simplified Chinese, French, English, German, Language Russian, and more File Format Video Resolution... -
Page 19: Troubleshooting
Troubleshooting Problem: Cannot take photo or record. Solution: Check if Micro SD card has enough space or it is locked. Problem: Automatic stop while recording. Solution: Use a compatible high-speed Micro SD card. (Class 10 and above) Problem: “File error” appears when replaying video or photo. Solution: Micro SD card storage error, please format your Micro SD card. - Page 20 VIDEO QR CODE...
Need help?
Do you have a question about the PR-DVR-C10 and is the answer not in the manual?
Questions and answers