Advertisement
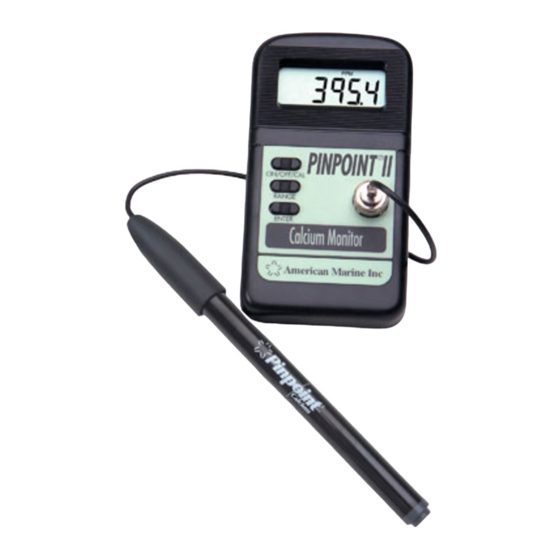
American Marine is proud to introduce the PINPOINT® Calcium
Monitor. The only truly affordable and accurate digital Calcium
measurement instrument designed exclusively for marine saltwater.
Powered by a 9-volt battery (not included). PINPOINT® Calcium
Monitor will operate for approximately 150 total hours before battery
replacement is indicated on the display.
NOTE: The Calcium Monitor unit is NOT waterproof and must be
operated on a dry surface. Liquid contact on the printed circuit board will
cause corrosion and void warranty.
•Probe Set-up
1)This probe is a solid state single piece, permanently filled model Ver III.
2)Remove the storage bottle that protects the probe tip by unscrewing
the bottle from the bottle cap. When not in use, probe should be stored in
the protective bottle without any fluid added to the bottle.
3) Be careful not to damage the flat PVC membrane on the probe tip.
This membrane should be kept as clean; free from algae, etc.
•Meter Set-up
1)All calibration fluids and tank water sample should be room
temperature for greatest accuracy.
2)Pour the 100 ppm Ca++ calibration fluid into a clean cup or storage
bottle.
3)Pour the 1,000 ppm Ca++ calibration fluid into a 2
4)Install a new 9-volt battery or the PINPOINT AC Adapter to the battery
compartment wires on the back of the meter.
5)Attach the BNC connector from the probe cable to the front of the
meter. Lock it into place with a 1/4 turn to the right.
•Calibration and Measurement
1)Activate meter on by pressing the ON/OFF/CAL button for 1 second.
2)Now press the ON/OFF/CAL button continuously for 3-4 seconds (you
will hear a beep) when "CAL" appears on the display.
3)The number 100 should appear on the display. If not; then press the
Range button to change the calibration value to 100.
4)Put the probe tip into the 100 ppm Ca++ Calibration Fluid. Wait until
the number 100 begins to flash on the display. This may take a minute or
so for a new probe. Let the flashing continue at least 3-5 minutes is
advised. Then press the Enter button to register the 100 ppm Ca++
calibration. The LCD should display the word "good"
5)Shake the probe dry. Press the Range button until 1000 is displayed.
6)Put the probe tip into the 1000 ppm Ca++ Calibration Fluid. Wait until
the number 1000 begins to flash on the display. This may take a minute
or two. Let the flashing continue for at least 3-5 minutes. Longer "flashing
time" will yield the most stable readings. Then press the Enter button to
register the 1000 ppm Ca++ calibration. The LCD should display the
word "good".
7)Now press the ON/OFF/CAL button to read Calcium ppm.
8)Test your sample. Take a sample of water away from your system in a
clean cup and insert the probe to take a precision measurement. Allow
enough time for the reading to settle down.
9)Rinse the probe in RO or DI water, shake the probe dry and store it in
the protective bottle.
10)The meter will store the calibration even when the power is off.
•Calcium Monitoring
The accuracy of this and other electronic instruments is the greatest
immediately following a calibration process. Measure the calcium
frequently, if the value drifts, calibration should be performed to verify the
reading. The probe should not be totally submerged. Only the bottom
1 –2 inches of the probe tip should be in the water.
Troubleshooting and Important Points to Remember on back
clean cup
nd
PINPOINT
Calcium
Monitor
User's Guide
American Marine Inc.
54 Danbury Road, Suite 172
Ridgefield, CT 06877 U.S.A.
Phone/FAX 914-763-5367
www.americanmarineusa.com
©Copyright 2007
American Marine Inc.
American Marine Inc
The world's finest selection of electronic measurement and
control instruments designed and optimized for the
professional aquaculture industry.
PH
ORP/REDOX
Oxygen
Calcium (Marine)
Conductivity Freshwater Hardness
Wireless Temperature
Nitrate (Marine)
Salinity (Marine and Koi)
Complete line of all calibration materials and accessories
II
®
ver. 1.03
Advertisement
Table of Contents

Summary of Contents for American Marine PINPOINT II
- Page 1 American Marine is proud to introduce the PINPOINT® Calcium Monitor. The only truly affordable and accurate digital Calcium PINPOINT measurement instrument designed exclusively for marine saltwater. ® Powered by a 9-volt battery (not included). PINPOINT® Calcium Monitor will operate for approximately 150 total hours before battery replacement is indicated on the display.
- Page 2 Positive proof of purchase is required for warranty claim. American Marine Inc. will not be liable for any costs of removal, installation, transportation charges, or any other charges, which may result in connection with a warranty claim.
Need help?
Do you have a question about the PINPOINT II and is the answer not in the manual?
Questions and answers