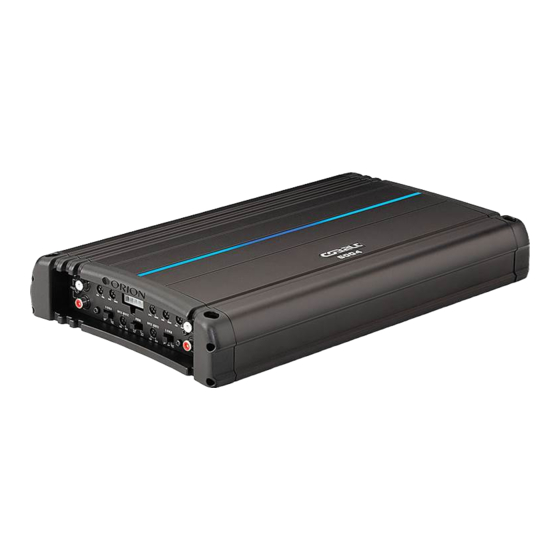
Orion Cobalt CO6004 Owner's Manual
Orion car audio amplifier owner's manual
Hide thumbs
Also See for Cobalt CO6004:
- Brochure (2 pages) ,
- Owner's manual (18 pages) ,
- Owner's manual (12 pages)
Table of Contents
Advertisement
Available languages
Available languages
Advertisement
Table of Contents
Troubleshooting

Related Manuals for Orion Cobalt CO6004


Summary of Contents for Orion Cobalt CO6004
- Page 1 Amplifier M O DE L CO6004 OWNER'S MANUAL...
-
Page 2: Table Of Contents
Amplifier Wiring ............6 Power Connections for the Orion Cobalt CO6004 ......6 Speaker Connections . -
Page 3: Introduction
● CO6004 - 250 Watt - four-channel Class A/B amplifier with built-in fully variable low-pass crossover. Equipped with remote gain, the CO6004 is capable of two-channel operation with a maximum power of 600 W when both the front and rear bridged channels are driven into 4 ohm speaker loads. -
Page 4: Tools Of The Trade
TOOLS OF THE TRADE Listed next are the majority of the tools required to perform an installation. Having the proper tools will make the installation that much easier. Some of these tools are necessities; some will just make the job easier. ●... -
Page 5: Cea Specifications
REM Remote Turn-on Input - turns on the amplifier when fed 12 V+. Ground Connection - accepts up to 4 AWG ground cable. CEA SPECIFICATIONS CO6004 Power Output: 60 Watts RMS x 4 at 4 ohms and < 1% THD+N Signal to Noise Ratio: -70 dBA (reference 1 Watt into 4 ohms) Addition Power: 75 Watts RMS x 4 at 2 ohms and <... -
Page 6: High Level Harnesses
Input Gain The Orion Cobalt CO6004 amplifiers have level adjustments to allow for easy integration with any source unit. The input sensitivity can be adjusted from 250mV to 5V. Refer to Testing the System and Adjusting the Sound of the System sections of this guide for detailed instructions on setting the gain. -
Page 7: High Pass Crossover
Add extra ground wire between the negative terminal of the battery and the chassis. Speaker Wiring Diagram CO6004 The Orion Cobalt CO6004 amplifier offers two sets (front and rear) of two positive and two negative output terminals for ease of connecting the speakers to the amplifier. Each amplifier is stable to 2Ω... -
Page 8: Tri-Mode
2 ohms and the low frequency (bridged) speaker should be no less than 4 ohms. Bridging For bridging into a single speaker load, the Orion Cobalt CO6004 has the ability to bridge the front or rear channels together. The impedance of the speaker must not be less than 4Ω... -
Page 9: Speaker Connections
ing possible. When mounting your amplifier under a seat or similar area, keep a minimum of 1" of clearance around the amplifier for adequate cooling. Trunk Compartment Mounting your amplifier in the trunk provides excellent performance as long as you do not restrict the airflow around the heatsink of the amplifier. -
Page 10: Set Up And Troubleshooting
potential for induced system noise. Step 4 Pre-drill amplifier mounting holes. Be sure to "think before you drill". Gas tanks, fuel lines, and other obstructions have a nasty way of hiding themselves. For best results use a marking pen to mark the mounting holes and pre-drill these holes with a standard 1/8"... -
Page 11: Adjusting The Sound Of The System
the Internal Crossover Configuration section of this manual and take corrective action. Step 7 If the output is clear and undistorted, continue to the Adjusting the Sound of the System section of this manual. Adjusting the Sound of the System Once you have checked the system's operation, adjust the sound of the system. -
Page 12: Troubleshooting Tips
Troubleshooting Tips Symptom Probable Cause No output Low or no remote turn-on Fuse blown Power wires not connected Audio input not connected. Speaker wires not connected Speaker are blown Audio cycles on and off Thermal protection engages when amplifi er heat sink tem- perature exceeds 50º... - Page 13 Symptom Probable Cause Poor bass response Crossover set incorrectly Impedance load at amplifi er is too low. Battery fuse blowing Short in power wire or incor- rect wiring. Fuse used is smaller than rec- ommended. Actual current exceeds fuse rating. Amplifi...
-
Page 14: Specifications
Low Pass and Hi-Pass Crossover Low Pass Frequency Range Continuous 2Ω load 20Hz to 200Hz, < 0.1% THD, with input voltage at 13.8VDC. © 2008 directed electronics—all rights reserved CO6004 60 x 4 75 x 4 < 0.9% THD+N 20Hz to 30kHz +/- 0.5 dB... - Page 15 © 2008 directed electronics—all rights reserved...
-
Page 16: Français
AGENCEMENT DES PANNEAUX D'EXTRÉMITÉ Panneau d'entrée ( DEL d'alimentation - when lit indicates that the amplifier is on. Entrées RCA avant - Acceptent entrées RCA des canaux avant d'une source. Contrôle de gain avant - Ajuste continuellement de 250 mV à 5 V pour une sortie avant à... - Page 17 Réglage sonore du système du présent guide pour des instructions détaillées sur le réglage du gain. Répartiteur interne La répartition de l'amplificateur Orion Cobalt CO6004 offre une variation continue et est extrêmement flexible. RACCORDS À HAUT NIVEAU RACCORD D'ENTRÉE Mise à...
- Page 18 Câblage des haut-parleurs CO6004 ( L'amplificateur Orion Cobalt CO6004 dispose de deux jeux (avant et arrière) de deux bornes posi- tives et deux bornes négatives de sortie pour le raccord des haut-parleurs à l'amplificateur. Chaque amplificateur est stable à 2 Ω par canal, ou 4 Ω par paire de canaux raccordée en pont.
- Page 19 Branchement en pont Pour le branchement en pont en une seule charge de haut-parleur, l'Orion Cobalt CO6004 peut brancher en pont les canaux avant ou arrière. L'impédance du haut-parleur doit être d'au moins 4 ohms. INSTALLATION DE L'AMPLIFICATEUR Choix de l'emplacement du montage L'emplacement de votre amplificateur dépend de plusieurs facteurs importants.
- Page 20 même calibre de fusible ATC / MAXI que celui que vous remplacez. Si vous n'êtes pas sûr de la valeur correcte, Consultez la section Raccords d'alimentation pour plus de détails. Un fusible de calibre plus élevé peut causer à l'amplificateur des dégâts non couverts par la garantie. NOTE: Assurez-vous que tout l'équipement du système est éteint avant de faire ou défaire des raccords aux bornes d'entrée RCA ou de haut-parleur.
- Page 21 du présent manuel pour des instructions détaillées. Étape 12 Après avoir bien vérifié tous les raccords et réglages, installez le fusible près de la batterie du véhicule et passez à la section Essai du système du présent manuel. ATTENTION! Ne dépassez jamais le calibre recommandé du fusible de l'amplificateur. Cela annulerait votre garantie et pourrait causer des dommages à...
- Page 22 Étape 4 Montez le volume de la source au niveau exempt de distorsion le plus élevé. Si vous n'avez pas d'équipement de test, et dépendant de la qualité de la source, ce sera entre ¾ et plein volume. Écoutez pour déceler toute distorsion. Si vous la détectez, baissez le volume de la source jusqu'à...
- Page 23 Conseils de dépannage Symptôme Cause probable Aucun son Allumage à distance faible ou absent Fusible sauté Câbles d'alimentation non rac- cordés Entrée audio non raccordée Câbles de haut-parleurs non raccordés Haut-parleurs défectueux Le son est intermittent La protection thermique se déclenche quand le dissipateur thermique de l'amplifi...
- Page 24 Répartiteur mal réglé Charge d'impédance à l'amplifi cateur trop basse Fusible de la batterie sauté Court-circuit d'alimentation ou mauvais câblage Calibre du fusible plus petit que recommandé Courant réel supérieur à la capacité du fusible Fusible de l'amplifi cateur sauté Calibre du fusible plus petit que recommandé...
- Page 25 Dimensions Poids Section répartiteur Répartiteur passe-bas Gamme de fréquences passe-bas Charge continue 2Ω, 20 Hz à 200Hz, DHT < 0.1%, voltage d'entrée 13,8 VCC CO6004 60 x 4 75 x 4 < 0.9% THD+N 20Hz à 30kHz +/- 0.5 dB 20Hz à...
-
Page 26: Español
DISPOSICIONES DEL PANEL DE EXTREMO Placa de entrada ( figura 1 Luz indicadora LED de alimentación. Cuando está iluminada, indica que el amplificador está encendido. Entradas RCA delanteras. Aceptan entradas RCA de los canales delanteros de una uni- dad fuente. Control de amplificación delantero. - Page 27 Amplificación de entrada El amplificador Orion Cobalt CO6004 tiene niveles de ajuste para facilitar la integración con cualquier unidad fuente. La sensibilidad de entrada se puede ajustar de 250 mV a 5 V. Consulte las secciones Prueba del sistema y Ajuste de sonido del sistema de esta guía para ver instrucciones...
- Page 28 50 Hz a 500 Hz. CABLEADO DEL AMPLIFICADOR Conexiones de alimentación del amplificador Orion Cobalt CO6004 Valor nominal de los fusibles del Orion Cobalt CO6004: 2 ATC de 25 A c/u ● Las conexiones de alimentación aceptan cable de hasta calibre 4 AWG.
- Page 29 (en puente) no debe ser de menos de 4 Ωs. Conexión en puente Para conectar en puente una sola carga de altavoz, al amplificador Orion Cobalt CO6004, se le pueden conectar en puente los canales delanteros o traseros. La impedancia del altavoz no debe ser menos de 4Ω...
- Page 30 batería, idealmente a menos de 18 plg. de tal terminal. Utilice fusibles o interruptores automáti- cos del valor nominal recomendado en la sección Conexiones de alimentación de este manual. Si necesita cambiar el fusible enchufado en el costado del amplificador, cámbielo por un fusible tipo ATC/MAXI del valor nominal del que vino con el amplificador.
- Page 31 Paso 10. Vuelva a conectar la terminal de conexión a tierra de la batería después de hacer las conexiones RCA, de altavoz y de alimentación. Paso 11, Configure los crossovers. Consulte la sección Crossover interno de este manual para ver instrucciones detalladas. Paso 12.
- Page 32 Paso2. Gire los controles de nivel del amplificador hasta sus posiciones de mínimo. Paso 3. Escoja música con alto contenido dinámico que le guste, que le sea conocida y que vaya a reproducir con mayor frecuencia en el sistema. Paso 4. Gire el control de volumen de la unidad fuente hasta su mayor nivel de salida sin distorsión.
- Page 33 Sugerencias de detección y reparación de averías Síntoma Causa probable No hay salida El encendido a distancia está bajo o no funciona Fusible quemado Los cables de alimentación no están conectados La salida de sonido no está conectada Los cables de altavoz no están conectados El altavoz está...
- Page 34 Los altavoces están quemados Mala respuesta de bajos Los altavoces cableados con la polaridad equivocada causan cancelación a frecuencias bajas El crossover se ha confi gurado incorrectamente La carga de impedancia en el amplifi cador es demasiado baja El fusible de la batería se quema Cortocircuito en el cable de alimentación o cableado es incorrecto...
- Page 35 Crossover de pasabajas y pasaaltas Gama de frecuencias de pasabajas Carga continua de 2Ω de 20 Hz a 200 Hz, < 0.1% THD, con voltaje de entrada a 13.8 V CC CO6004 60 x 4 75 x 4 < 0.9% THD+N 20Hz a 30kHz +/- 0.5 dB...
-
Page 36: Deutsch
LAYOUTS DER ENDABDECKUNG Anschlussplatte ( abbildung 1 Netz-LED – Leuchtet auf, wenn der Verstärker eingeschaltet ist. Vordere RCA-Eingänge – Für RCA-Signale von den vorderen Kanälen des Autoradios. Vorderer Verstärkungsregler – Stufenlos von 250 mV bis 5 V für volle Leistung des vorderen Kanals einstellbar. - Page 37 Eingangsbereich erleichtert es, diesen Verstärker an die meisten Systemkonfigurationen anzus- chließen. Eingangs-Verstärkung Die Verstärker Orion Cobalt CO6004 besitzen Pegeleinstellungen, die die Integration mit jedem Autoradio erleichtern. Die Eingangsempfindlichkeit kann zwischen 250mV und 5V eingestellt werden. Detaillierte Anweisungen zur Einstellung des Verstärkungsfaktors finden Sie in den Abschnitten Systemtest und Systemsound einstellen in dieser Anleitung.
- Page 38 Erdungskabel ein. Lautsprecher-Anschlussdiagramm CO6004 ( Die Verstärker Cobalt CO6004 bieten zwei Gruppen (vorne und hinten) mit zwei positiven und zwei negativen Ausgangsterminals, die den Lautsprecheranschluss erleichtern. Jeder Verstärker ist an 2 Ohm pro Kanal oder 4 Ohm im paarweisen Brückenmodus stabil..
- Page 39 Brückenmodus Beim Anschluss an einen Lautsprecher im Brückenmodus kann der Orion Cobalt CO6004 die vorderen oder hinteren Kanäle zusammen überbrücken. Die Impedanz des Lautsprechers muss mindestens 4 Ohm betragen. VERSTÄRKERINSTALLATION Wahl der Einbaustelle Der Einbauort des Verstärkers hängt von mehreren wichtigen Faktoren ab. Aufgrund der geringen Größe der Orion Cobalt-Verstärker gibt es viele mögliche Einbauorte, die eine aus-...
- Page 40 Wenn Sie die Sicherung an der Seite des Verstärkers wechseln müssen, ist diese mit einer ATC / MAXI-Sicherung der gleichen Größe zu ersetzen. Wenn Sie die richtige Größe nicht kennen, sehen Sie bitte im Abschnitt Stromanschlüsse in dieser Anleitung nach. Die Verwendung einer Sicherung mit höherer Spannung kann den Verstärker beschädigen und wird durch die Garantie nicht abgedeckt.
- Page 41 12. Schritt. Wenn Sie sichergestellt haben, dass alle Verbindungen und Einstellungen kor- rekt sind, installieren Sie die Sicherung in der Nähe der Fahrzeugbatterie und fahren mit dem Abschnitt Systemtest fort. ACHTUNG! Überschreiten Sie nie die für den Verstärker empfohlene Sicherungsgröße. Ansonsten könnte die Garantie erlöschen und der Verstärker beschädigt werden.
- Page 42 5. Schritt. Während Sie Ihre gewählte dynamische Musik anhören, drehen Sie den Pegelregler für den Mitteltonbereich höher, bis Sie etwas Verzerrung hören, und senken ihn dann wieder etwas ab, so dass die Verzerrung verschwindet. Je nach System kön- nen sich der Mittel- und Hochtönerausgang auf den gleichen Ausgangskanälen befinden.
- Page 43 Problemlösungen Symptom Mögliche Ursache Kein Sound Schwache oder fehlende Fern- einschaltung Sicherung durchgebrannt Stromkabel nicht angeschlossen Prüfen Sie das Stromkabel und die Erdungsan- Audioeingang nicht ang- eschlossen Lautsprecherkabel nicht ang- eschlossen Lautsprecher defekt Audiosystem schaltet sich ein und aus Der Überhitzungsschutz wird aktiviert, wenn die Kühlkörper- temperatur 50°...
- Page 44 Schlechte Basswiedergabe Lautsprecher wurden falsch gepolt angeschlossen, was tiefe Frequenzen schwächt Schlechte Basswiedergabe Crossover falsch eingestellt Lastimpedanz zum Verstärker zu niedrig Batteriesicherung brennt durch Kurzschluss im Kabel oder falsche Verkabelung Sicherung ist kleiner als emp- fohlen. Iststrom überschreitet Sicher- ungsbelastbarkeit. Verstärkersicherung brennt durch.
- Page 45 Abmessungen Gewicht Crossover-Bereich Tiefpass- und Hochpass-Crossover Tiefpass-Frequenzbereich Kontinuierliche 2-Ohm-Last, 20 Hz bis 200 Hz, < 0,1 % Klirrfaktor, Eingangsspannung 13,8 V Gleichstrom CO6004 60 x 4 75 x 4 < 0.9% THD+N 20Hz bis 30kHz +/- 0.5 dB 20Hz bis 20kHz ±3dB...
-
Page 46: Italiano
LAYOUT DEI PANNELLI TERMINALI Pannello d’ingresso ( LED di alimentazione – Quando è acceso indica che l’amplificatore è acceso. Ingressi RCA anteriori – Accettano il segnale RCA applicato attraverso i canali anteriori di una sorgente audio. Comando del guadagno anteriore – È regolabile in continuo da un ingresso di 250mV a uno di 5V per ottenere la massima potenza di uscita dal canale anteriore. - Page 47 Guadagno d’ingresso Gli amplificatori Orion Cobalt CO6004 sono dotati di un circuito di regolazione del livello che consente di integrarli facilmente con qualsiasi sorgente audio. La sensibilità d’ingresso può essere regolata da 250 mV a 5 V. Consultare le sezioni Prova dell’impianto e Regolazione dell’audio dell’impianto per informazioni dettagliate sulla regolazione del guadagno.
- Page 48 ● Speaker Wiring Diagram CO6004 ( The Orion Cobalt CO6004 amplifier offers two sets (front and rear) of two positive and two negative output terminals for ease of connecting the speakers to the amplifier. Each amplifier is stable to 2Ω...
- Page 49 Cablaggio a ponte Ai fini del cablaggio a ponte su un carico costituito da un solo altoparlante, il modello Orion Cobalt CO6004 permette di collegare tra di loro i canali anteriori o posteriori. L’impedenza dell’altoparlante deve essere uguale ad almeno 4 ohm.
- Page 50 Cobalt CO500.1 e CO800.1. Se occorre sostituire il fusibile inserito nel pannello laterale dell’amplificatore, sostituirlo con uno di tipo ATC / MAXI di portata identica a quella del fusibile in dotazione. Se non si è sicuri del valore giusto, vedere la sezione Connessioni di alimentazione per i modelli Orion Cobalt CO500.1 e CO800.1.
- Page 51 Una volta completate le connessioni di alimentazione, degli altoparlanti e RCA, ricollegare il terminale di massa alla batteria. Impostare i crossover; per istruzioni dettagliate consultare la sezione Crossover interni. Una volta verificate tutte le connessioni e le impostazioni, installare il fusibile situ- ato accanto alla batteria del veicolo e passare alla sezione Prova dell’impianto.
- Page 52 questo punto fra i 3/4 e il massimo volume, secondo la qualità della sorgente audio. Controllare se ci sono distorsioni udibili e in caso positivo, ridurre il volume della sorgente audio finché l’uscita non è più distorta; lasciare il comando del vol- ume su questa posizione durante la messa a punto dell’impianto.
- Page 53 Soluzione dei problemi Sintomo Causa probabile Uscita assente Tensione di accensione a dis- tanza bassa o nulla Fusibile bruciato Cavi di alimentazione non col- legati Ingresso audio non collegato Cavi degli altoparlanti non collegati Altoparlanti guasti L’audio scompare ciclicamente Il circuito di protezione termica si inserisce in quanto la temper- atura del dissipatore termico dell’amplifi...
- Page 54 Altoparlanti guasti Risposta ai bassi scadente Altoparlanti cablati con la po- larità sbagliata e quindi cancel- lazione alle basse frequenze Crossover impostati in modo sbagliato Impedenza di carico dell’amplifi catore troppo bassa Fusibile della batteria bruciato Cortocircuito nel cavo di alimentazione o cablaggio sbagliato Fusibile di portata minore di...
-
Page 55: Dati Tecnici
Intervallo frequenze passa-basso Ω Carico di 2 continuo da 20 Hz a 200 Hz, < 0,1% di distorsione armonica totale, con tensione d’ingresso pari a 13,8 V c.c.. CO6004 60 x 4 75 x 4 < 0,9% di distorsione ar-... -
Page 56: Português
LAYOUTS DOS PAINÉIS Painel de entrada ( LED indicador de potência – Quando aceso, indica que o amplificador está ligado. Entradas RCA frontais – Aceitam entradas RCA dos canais frontais de uma unidade de origem do sinal. Controle de ganho frontal – Ajuste contínuo de 250 mV a 5 V para permitir potência de saída plena do canal frontal. - Page 57 à maioria das configurações do sistema. Ganho de entrada Os amplificadores Orion Cobalt CO6004 têm ajustes de nível que permitem sua fácil integração com qualquer unidade de origem de sinais. A sensibilidade da entrada pode ser ajustada de 250mV a 5 V.
- Page 58 Esquema de conexão dos alto-falantes ao CO6004 ( O amplificador Orion Cobalt CO6004 tem dois conjuntos (frontal e traseiro) de dois terminais de saída positivos e dois negativos para facilitar a conexão dos alto-falantes ao amplificador. Cada amplificador é estável a 2 Ω por canal ou 4 Ω por par de canais ligados em ponte.
- Page 59 Ligação em ponte Para ligação em ponte a uma única carga de alto-falante, o Orion Cobalt CO6004 tem capaci- dade de ligar em ponte os canais frontal e traseiro. A impedância do alto-falante não deve ser inferior a 4 ohms INSTALAÇÃO DO AMPLIFICADOR...
- Page 60 nal da bateria. A distância ideal é de, no máximo, 45 cm. Use um fusível ou disjuntor do tamanho recomendado na seção Conexões elétricas deste manual. Se for necessário trocar o fusível conectado ao lado do amplificador, troque-o por um fusível ATC / MAXI do mesmo tamanho que o fornecido com o amplificador.
- Page 61 tação elétrica, alto-falantes e RCA. Etapa 11 Ajuste os crossovers. Consulte as instruções detalhadas na seção Crossover interno deste manual. Etapa 12 Quando estiver certo de que todas as conexões e ajustes estão corretos, instale o fusível localizado próximo da bateria do veículo e leia a seção Como testar o sistema deste manual.
- Page 62 e que seja do tipo que será ouvido com mais freqüência no sistema. Etapa 4 Aumente o volume da unidade de origem do sinal até o nível de reprodução mais elevado que não apresente distorção. Caso não tenha equipamentos de teste, este ponto se situa a cerca de 3/4 do volume máximo, dependendo da qualidade da unidade de origem do sinal.
- Page 63 Sugestões para resolução de problemas Problema Provável causa Nenhum som Acionamento remoto baixo ou inexistente Fusível queimado Cabo de alimentação desco- nectado Entrada de áudio não co- nectada. Cabos dos alto-falantes desco- nectados Alto-falante danifi cado Áudio intermitente A proteção térmica é ativada quando a temperatura do tro- cador de calor ultrapassa 50º...
- Page 64 Alto-falantes danifi cados Reprodução de graves de baixa qualidade Alto-falantes conectados com polaridade incorreta, cau- sando cancelamento em baixas freqüências Crossovers ajustados incorreta- mente Carga de impedância muito baixa no amplifi cador. O fusível da bateria se queima Curto-circuito no cabo de ali- mentação ou conexão incorreta dos cabos.
- Page 65 Seção do crossover Crossover passa-baixa e passa-alta Faixa de freqüência do passa-baixa Carga contínua de 2 Ω, 20 Hz a 200 Hz, < 0,1% THD, com tensão de entrada a 13,8 VCC. CO6004 60 x 4 75 x 4 < 0.9% THD+N 20Hz a 30kHz +/- 0.5 dB...
- Page 66 WARRANTY LIMITED ONE-YEAR CONSUMER WARRANTY/*LIMITED TWO-YEAR CONSUMER WARRANTY FOR AUTHORIZED DIRECTED DEALER PURCHASE & INSTALLATION Directed Electronics (herein “Directed”) promises to the original purchaser of the subwoofer or amplifier, as applicable (herein “Unit” or “Product”), to repair or replace with a new or refurbished Unit (at Directed’s sole and absolute discretion) should the Unit prove to be defective in workmanship or material under normal use, for a period of *two-years from the date of purchase from the authorized Directed dealer PROVIDED the Unit was purchased and installed by an authorized Directed dealer.
Need help?
Do you have a question about the Cobalt CO6004 and is the answer not in the manual?
Questions and answers