
Subscribe to Our Youtube Channel
Related Manuals for IQ Scientific Instruments IQ160


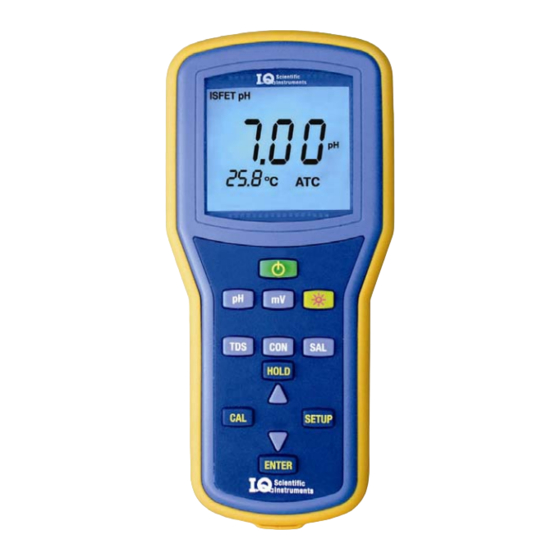
Summary of Contents for IQ Scientific Instruments IQ160
- Page 1 Waterproof Handheld Meters IQ160 pH Meter IQ170 pH/mV/Temperature/Conductivity TDS/Salinity Meter IQ340 Conductivity Meter IQ350 Conductivity/TDS/Salinity Meter...
- Page 2 Conductivity Calibration Quick Start Guide Model IQ170, IQ340 and IQ350 Put probe in first cali- Press ON/OFF to turn If necessary, press Connect probe to meter. on meter. CON until COND icon brating solution is seen on the display. Press CAL. The conductivity value Rinse probe in Press ENTER...
-
Page 3: Quick Start Guide - Ph Calibration
Calibration Quick Start Guide Model IQ160 and IQ170 Connect probe to me- Put probe in first Press ON/OFF to If necessary, press ter. calibrating buffer. turn on meter. pH until pH icon is seen on the display. Press CAL. -
Page 4: Introduction
IF THE SEAL ON THE BACK OF THE METER IS TAMPERED WITH, THE WARRANTY IS IMMEDIATELY VOIDED. The IQ160 pH meter and IQ170 multi-parameter meter accept both traditional style glass sensor electrodes with BNC connectors and non-glass pH probes with ISFET (Ion Sensitive Field Effect Transistor) silicon chip sensors. The IQ170 multi-parameter meter, and the IQ340 and IQ350 meters accept conductivity probes. -
Page 5: Table Of Contents
Section 6: Probe Cleaning........Section 7: pH Calibration (Model IQ160 and IQ170 Only)... . . -
Page 6: Section 1: Techniques And Tips For Best Performance
SECTION 1: Techniques and Tips for Best Performance DO: (ISFET non-glass probe ONLY) Soak the probe in pH 7.00 buffer for at least five minutes if the probe is new or has been stored dry for an ex- tended period. This will hydrate the sensor and dissolve any reference mate- rial, which may have crystallized on the sensor surface. - Page 7 DO NOT: take readings in direct sunlight. Direct sunlight may cause unsta- ble readings or difficulty in calibration. Call IQ Scientific Instruments or your Authorized Dealer for optional light shields. DO NOT: use the probe in an environment that will damage the sensor, such as hydrofluoric acid or abrasive samples.
-
Page 8: Section 2: Specifications
SECTION 2: Specifications... - Page 9 Sound: Sounds will occur as follows: • Three short beeps any time measurement stability is reached during calibration mode, regardless of the Stabilization Lock setting. • Three short beeps when stabilization is reached when in Stabilization Lock ON mode. The READY icon will illuminate.
- Page 10 Temperature Compensation: Glass pH Temperature Compensation If the meter is in the glass pH mode and a temperature probe is plugged in to the 3.5mm phono jack, the meter defaults to Automatic Temperature Compensation (ATC). If no temperature probe is detected it defaults to Manual Temperature Compensation at 25 °C.
- Page 11 The table below shows the pH values of buffers at various temperatures. Table 2: Temperature Compensation Tables Nominal Value 1.68 1.67 1.67 1.67 1.67 1.68 1.69 1.71 4.01 4.00 4.00 4.00 4.00 4.01 4.03 4.06 6.86 6.98 6.95 6.92 6.87 6.85 6.84 6.83...
-
Page 12: Section 3: Instrument Features
(Model IQ160, Model IQ170) • • Indicates that the meter is receiving input from the pH probe. Will be displayed in both pH and mV reading modes. (Model IQ160, Model IQ 170) • • • The meter is in the Conductivity reading mode (Model IQ170, IQ340, IQ350) •... - Page 13 IQ160 IQ170 IQ340 IQ350 Item Description The Conductivity value is in µ S • • • The Salinity value is in % • • • • • • The pH, Conductivity, TDS or Salinity value is automatically temperature compensated. •...
-
Page 14: Section 4: Keypad Functions
SECTION 4: Keypad Functions Model IQ170 shown... - Page 15 Table 4: Keypad Functions Action IQ160 IQ170 IQ340 IQ350 ON/OFF Turns on/off meter • • • • • • Displays pH Displays mV • • Light Turns on light for two minutes • • • • Displays estimated TDS. If no •...
-
Page 16: Section 5: Probes And Connections
3. Phono jack for glass pH elec- 2. BNC Connector for trode temperature sensor glass pH electrode 1. Conductivity 4. ISFET pH probe connector probe connector Connector dust caps IQ170 multi-parameter meter IQ160 pH Meter IQ340 and IQ350 Conductivity Meters... - Page 17 Probe connections Glass and ISFET pH probes The Model IQ160 and IQ170 meters accept two different types of pH sensing technologies, ISFET pH probes and glass electrodes (BNC probes). The meters automatically identify whether a BNC or ISFET pH probe is attached when the meter is first turned on.
- Page 18 Best solution is to invert the me- ter to allow any water to run out of the connector. Automatic pH Probe Detection (Model IQ160 and IQ170 only). If the instrument does not detect the presence of an ISFET probe, it defaults to glass pH electrode mode and reads pH from the BNC connector.
- Page 19 Temperature probe for use with glass pH (Model IQ160 and IQ170): IQ Scientific Instruments BNC probes have a built-in temperature sensor and the probe cable has a “Y” with a BNC connector and a 3.5mm phono jack. If the instrument detects the presence of a temperature probe plugged into the 3.5mm phono jack, the meter defaults to...
-
Page 20: Section 6: Probe Cleaning
SECTION 6: Probe Cleaning Cleaning and Reconditioning ISFET (non-glass) Probes Recommended cleaning solution for any probes used in samples containing protein: IQ Scientific Instruments pepsin- based cleaning solution, Part #PCS50. Cleaning with Detergent CAUTION: Do not use metal objects such pins paperclips to clean the sensor. - Page 21 Part #PCS50 Cleaning with Pepsin (Protein Deposit Removal) Digest proteins by soaking for 15 minutes to one hour in Probe Cleaning Solution, available from IQ Scientific Instruments as item #PCS50. Rinse well with deionized water. Cleaning with Sodium Hypochlorite (Bleach) If the ISFET probe has been exposed to fat or protein, the response time may begin to slow.
- Page 22 Cleaning and Reconditioning BNC (Glass Sensor) Electrodes Cleaning with Detergent Vigorously stir the BNC probe in a solution of warm water and detergent (a few drops of dish detergent in a cup of warm water) for 5 minutes. Rinse well with deionized water. Reconditioning with Warm Buffer Many glass sensor problems are related to the reference junction.
- Page 23 Cleaning with Pepsin (Protein Deposit Removal) Digest proteins by soaking for 15 minutes to one hour in Probe Cleaning Solution, available from IQ Scientific Instruments as item #PCS50. Rinse well with deionized water. Etching with Ammonium Biflouride (DO NOT ETCH ISFET PROBES) This is generally considered the method of last resort.
-
Page 24: Section 7: Ph Calibration Model Iq160 And Iq170 Only
Section 7: pH Calibration MODEL IQ160 and IQ170 only One, two or three point calibration procedure for pH. Press pH to put in pH mode. Place probe in first buffer solution. Press CAL. Cal 1 icon will begin flashing. - Page 25 If the buffer is correctly identified, press ENTER. CAL 1 will stop flashing and the pH buffer value will flash until calibration is complete. NOTE: Calibration can be aborted while the pH value is flash- ing by pressing the pH key. If pH buffer is incorrect, press the ▲...
- Page 26 Press Enter if OK, or ▲ or ▼ to change value, press pH to accept just a 1 point calibration and display pH measurement mode. If ENTER is selected, CAL 2 will stop flashing and the buffer value will start flashing until calibration is complete.
- Page 27 IF SETUP FOR 3 POINT CALIBRATION: Press Enter if OK, or ▲ or ▼ to change value, press pH to accept just a 2 point calibration and display pH measurement mode. If ENTER is selected, CAL 3 will stop flashing and the buffer value will start flashing until calibration is complete.
-
Page 28: Section 8: Conductivity And Tds Calibration
SECTION 8: Conductivity and TDS Calibration Model IQ340: Conductivity Model IQ170 and IQ 350: Conductivity and TDS. Salinity derived from conductivity. Conductivity and TDS Calibration The meter can be calibrated with up to five calibration points. If a calibration point is greater than 20% of a previously stored calibration point, the previously stored calibration point will be retained and a new calibration point will be saved. - Page 29 Press the ▲ or ▼ key to scroll to the value of the conductivity or TDS standard. 5. When the correct value is displayed, press ENTER to store the calibration. The meter is ready to begin reading the conductivity or TDS value of any solution. NOTE: At any time during the calibration you may exit the calibration mode by pressing the CON button.
-
Page 30: Section 9: Setup Functions
SECTION 9: Setup Functions General Navigation for setup options: Press SETUP to start or exit Setup mode. Press the ▲ or ▼ keys to scroll to the setup option you want to change. Press ENTER to indicate you want to change this setting. -
Page 31: Ph Resolution
TABLE 6: SETUP FUNCTIONS SETUP MODE OPTIONS IQ160 IQ170 IQ340 IQ350 pH Resolution — 0.1 or 0.01 • • Default: 0.01 pH Calibration— 2 or 3 point • • Default: 2 point pH stabilization ON or OFF • • lock... - Page 32 1. Setting pH Resolution: 0.1 pH or 0.01 pH pH can be displayed in two resolutions 0.1 pH or 0.01 pH Default mode is 0.01 To select resolution Press SETUP to put in the setup mode. Press the ▲ or ▼ until the pH resolution setup screen is displayed.
-
Page 33: Or 3 Point Ph Calibration
2. Setting Up for 2 point or 3 Point pH Calibration To select number of calibration points. Default is 2 point Press SETUP to put in the setup mode. Press the ▲ or ▼ until the pH calibration point setup screen is displayed. -
Page 34: Stabilization Lock
3. Setting Stabilization Lock ON or OFF pH, conductivity, and TDS can be displayed with a Stabilization Lock mode. When a stable reading is reached, the display locks on the value and the meter ignores very slight changes in the measurement. The “Ready”... - Page 35 Press ENTER. The display will show the Stabilization Lock status. Pressing the ▲ or ▼ keys will toggle stabilization lock ON or Use the ▲ or ▼ to set the Stabilization Lock mode Press Enter to save changes and return to SETUP MODE...
-
Page 36: C Or O F
4. Setting the Temperature Display to C or Temperature can be displayed in C or Default mode is To select temperature units Press SETUP to put in the setup mode. Press the ▲ or ▼ until the Temperature units setup screen is displayed. -
Page 37: Manual Temperature Compensation For Glass Electrodes
5. Manual Temperature Compensation for Glass Electrodes Glass electrodes are automatically temperature compensated if a temperature probe is detected in the 3.5mm phono jack. If no probe is detected, the system defaults to manual temperature compensation at 25.0 C. Manual temp compensation is always in C (No F conversion is necessary) - Page 38 Use the ▲ or ▼ to set the manual temp compensation Press Enter to save changes and return to SETUP MODE...
-
Page 39: Conductivity Temperature Compensation Coefficient
6. Conductivity Temperature Compensation Coefficient Conductivity is automatically temperature compensated. Default is 2% per C. The user selectable range is 0-10%. F conversion is required. Press SETUP to put in the setup mode. Press the ▲ or ▼ until the Conductivity Temperature Compensation Factor screen is displayed. -
Page 40: Reviewing Conductivity And Tds Calibration Points
7. Reviewing Conductivity and TDS Calibration Points The meter will show the calibration points of up to five calibration points. The display will indicate either “ppm” , “ppt” , “mg/l”, “µS” , or “mS” depending upon whether the meter was calibrated in the conductivity or TDS mode. Press SETUP to put in the setup mode. - Page 41 Press ENTER. The display will show the value each calibration point. If no calibration points are stored, this screen will be displayed Use the ▲ or ▼ to scroll through calibration points 1 thru 5 Press Enter to return to SETUP MODE...
-
Page 42: Conductivity Temperature Normalization
8. Conductivity Temperature Normalization Conductivity varies greatly with temperature. The conductivity Automatic Temperature Compensation (ATC) adjusts conductivity measurements to factor out the conductivity changes in the reading caused by temperature. The readings are referenced to or “normalized” at a standard temperature. - Page 43 Use the ▲ or ▼ to toggle 20.0 C and 25.0 Press Enter to return to SETUP MODE...
-
Page 44: Tds Conversion Factor
9. Setting the TDS Conversion factor TDS values are related to conductivity. The operator can calibrate using a TDS standard or calibrate using conductivity standards then program the meter with a conversion factor. The range is .40 to 1.00. The default is .50 To set the TDS conversion factor: Press SETUP to put in the setup mode. -
Page 45: Setting Tds Units
10. Setting TDS Units: mg/L (g/L) or ppm (ppt) TDS can be displayed in metric units mg/l (g/L) or ppm (ppt). Press SETUP to put in the setup mode. Press the ▲ or ▼ until the TDS units screen is displayed. -
Page 46: Setting Salinity Units
11. Setting Salinity Units: ppm (ppt) or % Press SETUP to put in the setup mode. Press the ▲ or ▼ until the Salinity units screen is displayed. Press ENTER. The display will show the Salinity units Pressing the ▲ or ▼... -
Page 47: Conductivity Probe Cell Constants
12. Conductivity Probe Cell Constant This screen displays the cell constant of an attached conductivity probe. If no conductivity probe is attached, the display will read .000. -
Page 48: Sound
13. Sound ON/OFF Press SETUP to put in the setup mode. Press the ▲ or ▼ until the Sound icon is displayed Press ENTER. The display will show the Sound status (“on” or “off”) Use the ▲ or ▼ to toggle ON or OFF. Press Enter to save changes and return to SETUP MODE... -
Page 49: 14. Meter Automatic Shutoff Time
14. Meter Automatic Shutoff Time The meter will shutoff automatically to conserve battery power after a predetermined period of time. Range 1 minute to always on. Default: 20 minutes. Press SETUP to put in the setup mode. Press the ▲ or ▼ until the Meter Automatic Shutoff Time screen is displayed. -
Page 50: Clear Glass Ph, Conductivity, And Tds Calibration Points
15. Clearing Glass pH, Conductivity, and TDS Calibration points Press SETUP to put in the setup mode. Press the ▲ or ▼ until the Clear All Calibration Points screen is displayed. The meter will prompt if you want to clear all calibration points. -
Page 51: Section 10: Troubleshooting Guide
SECTION 10: Troubleshooting Guide INDICATION CAUSE USER ACTION No Display. Auto Power Off has Press Power button. cleared display. No Power. Replace AA batteries in meter Unstable reading. Dirty probe. Follow the probe cleaning procedures described in this manual. Dirty probe/meter Clean probe contacts connectors. - Page 52 INDICATION CAUSE USER ACTION Trouble calibrating. Probe sensor Follow cleaning and Display does not surfaces are dirty or reconditioning stop flashing probe needs instructions. during calibration. reconditioning. Reference junction Follow warm buffer not flowing. cleaning procedure. Buffers may be Recalibrate with fresh contaminated or buffers.
- Page 53 INDICATION CAUSE USER ACTION Meter continually Presence of ISFET Turn on the meter. If displays 14.00 or probe not detected the ISFET icon is not 0.00 with electrode by meter or probe displayed, replace attached. ISFET probe. ISFET icon not displayed when ISFET probe is attached...
-
Page 54: Section 11: Error Codes
SECTION 11: Error Codes ERROR CODE CAUSE USER ACTION Glass electrode E03 is displayed if the mV reading in pH 7.00 offset error. buffer is greater 0.000 mV ±30 mV. An offset error indicates poor pH electrode condition. Follow cleaning instructions. - Page 55 ERROR CODE CAUSE USER ACTION ISFET electrode EO6 is displayed if slope error the ISFET slope is out of out of specification and indicates poor electrode condition or damaged probe. Follow cleaning instructions. If EO6 persists, replace electrode Too long to Calibration over 4 calibrate minutes.
- Page 56 Revision 1.32 Copyright © 2005 IQ Scientific Instruments, Inc. Technical Support On-line: www.pHmeters.com Toll Free (U.S.A. and Canada): 1-800-276-0723 Telephone: 760-930-6501 FAX: 760-930-0615 IQ Scientific Instruments, Inc. 2075-E Corte del Nogal Carlsbad, CA 92011 U.S.A.
Need help?
Do you have a question about the IQ160 and is the answer not in the manual?
Questions and answers