Table of Contents
Advertisement
Available languages
Available languages
Quick Links
Manual (PT)
Manual (EN)
© All rights reserved
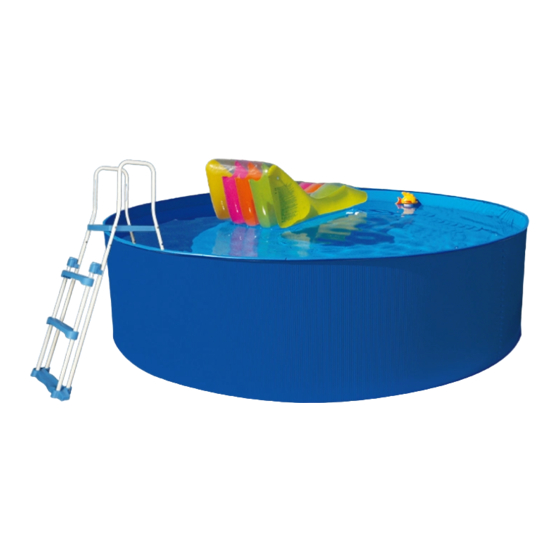
Model: ø 350 X 90 cm
Model: ø 360 X 120 cm
Model: ø 460 X 120 cm
NÃO instalar a piscina durante períodos ou locais ventosos!
Do NOT set up the pool at times or locations that are very windy!
Manual
IMPORTANT / E .........2
PORTUGUÊS .............3
ENGLISH ..................13
Advertisement
Chapters
Table of Contents

Summary of Contents for swimpool SP3509A
- Page 1 Manual (PT) Manual (EN) © All rights reserved Manual IMPORTANT / E ..2 PORTUGUÊS .....3 ENGLISH ....13 Model: ø 350 X 90 cm Model: ø 360 X 120 cm Model: ø 460 X 120 cm NÃO instalar a piscina durante períodos ou locais ventosos! Do NOT set up the pool at times or locations that are very windy!
-
Page 2: Informações Importantes
IMPORTANTE! NÃO instalar a piscina em períodos ou locais ventosos! A piscina foi desenhada para instalação ao nível do solo. A garantia do produto não será válida se a piscina não for instalada ao nível do solo. Não se esqueça! Antes que a piscina seja montada, deverá... -
Page 3: Table Of Contents
Índice Informações importantes ..........2 Não instale Ferramentas necessárias .......... 4 II. Encontrar o local certo para a piscina ....... 4 a piscina em III. Inspecionando os componentes da piscina....5 tempo ventoso! IV. Preparando o chão ............ 5 V. Montando a piscina ........... 6 VI. -
Page 4: Ferramentas Necessárias
Informação de Segurança • Não permita a utilização da piscina a menos que um adulto esteja presente. • Nunca mergulhe ou pule na água a partir da borda da piscina. Nunca se sente ou suba nas laterais da piscina. A cobertura na parte superior da parede da piscina não foi projetada para tais cargas. •... -
Page 5: Inspecionando Os Componentes Da Piscina
III. Inspecionando os componentes da piscina Recomendamos que verifique se tem o número certo de componentes antes de iniciar a montagem da piscina. IV. Preparando o chão Coloque um marcador no meio do local selecionado para a piscina. Amarre uma corda ao marcador. O comprimento da corda deve ser igual ao raio da piscina com a adição de 25 cm. -
Page 6: Montando A Piscina
V. Montando a piscina 1. Reunindo as calhas inferiores Na área da piscina, os perfis são conectados de maneira a formar uma estrutura circular no fundo (use 14 dos perfis). Fig. 1 Verifique se o círculo está redondo e corretamente posicionado relativamente ao pino de marcação usado na base. - Page 7 5. Verifique o trabalho concluído até agora Verifique mais uma vez que a base da piscina está completamente nivelada e que a parede da piscina forma um círculo perfeito para evitar problemas subsequentes na instalação do revestimento. O último pode ser feito medindo o diâmetro na piscina. Quaisquer erros devem ser corrigidos nesta étapa antes de continuar com a montagem.
-
Page 8: Instalando O Filtro-Skimmer Da Piscina
VI. Instalação do filtro-skimmer Importante: Este manual contém informações importantes de segurança sobre a instalação e uso do filtro-skimmer. Este manual deve então ser lido com cuidado pela pessoa que a instalar o filtro e por aqueles que irão manusear regularmente a piscina e o filtro. - Page 9 Como o Filtro Funciona O filtro usa uma bomba de superfície de 12V com baixa voltagem para circular a água através de um cartucho de filtro. Deve sempre haver água na bomba durante a operação. A bomba tem um interruptor de sobrecarga que impede estragos em caso de sobreaquecimento.
- Page 10 Nunca aplique produtos químicos diretamente ao skimmer. Em vez disso, deverá dissolvê-los num balde de água antes de espalhá-los ao longo da borda da piscina. Alternativamente, você poderá usar dispensadores de cloro líquido seguros para crianças. Dados Técnicos • Fluxo 1.7 m •...
-
Page 11: Preparando-Se Para O Inverno
VII. Preparando-se para o inverno Quando o verão ou a época balnear terminar terminar, siga estas instruções para preparar a piscina para o inverno. A invernação é normalmente realizada em outubro. Importante! Tenha em atenção que a piscina necessita de star sempre cheia de água - uma piscina vazia entrará... -
Page 12: Garantia
3. Certifique-se de que não há ferrugem. Pinte todas as áreas enferrujadas com tinta antiferrugem. 4. Verifique o revestimento. Certifique-se de que a parte superior do revestimento esteja bem presa à parede da piscina com a lista de plástico. Não remova o revestimento da piscina. Certifique-se de que não haja buracos no tecido. Repare todos os orifícios com um kit de reparação da piscina. -
Page 13: Important Information
IMPORTANT! Do NOT set up the pool at times or locations that are very windy! swimming pool is produced for above ground use. Product warranty is no longer valid if the pool is not used above ground. Don’t forget this! Before the pool is set up, you should lay out a ground cover under the pool. - Page 14 UK Table of Contents: Important information..............13 Do NOT set Necessary tools ..............15 Finding the right location for the pool ......15 up the pool in III. Inspecting the pool components ........16 windy weather! IV. Preparing the ground ............16 Assembling the pool ............17 VI.
-
Page 15: Necessary Tools
Safety Information • Do not allow anyone to use the pool unless an adult is present. • Never dive or jump into the water from the edge of the pool. Never sit or climb on the wall of the pool. The top seat cover on the uppermost part of the pool wall is not designed for such loads. -
Page 16: Inspecting The Pool Components
III. Inspecting the Pool Components We recommend that you ensure that you have the correct number of components before assembling the pool. See the separate checklist at the front of the manual. IV. Preparing the Ground Place a marking peg in the middle of the location selected for the pool. Tie a string to the peg. The length of the string must be equal to the radius of the pool, plus a recommended 25 cm. -
Page 17: Assembling The Pool
Assembling the Pool Collection of the bottom rails In the pool area, the profi les are connected into a round bottom frame (use 14 of the profi les). Fig. 1 Check that the circle is round and correctly placed in rela-tion to the marking peg used in the base. It is very import-ant to be certain that the pool liner will subsequently be correctly positioned (Fig 2). - Page 18 5. . Check the Work Completed So Far Check one more time that the base of the pool is completely level and that the pool wall forms a perfect circle in order to avoid prob- lems from arising in the subsequent installation of the liner. The latter can be done by mea-suring the diameter across the pool.
-
Page 19: Installing The Pool Skimmer Filter
VI. Installation of the Pool Skimmer Filter Important: This manual contains important safety information about the installation and use of the skimmer filter. This manual should therefore be carefully read by the person installing the filter and by those who regularly handle the pool and filter. Keep this manual so that it is available should there be any questions as to the function and operation of the filter at a later time. - Page 20 How the Filter Works The filter uses a 12V surface pump with a low voltage to circulate the water through a filter cartridge. There must always be water in the pump during operation. The pump has an overload switch which prevents da- ma-ge in the case of overheating.
- Page 21 Never apply chemicals directly to the skimmer. Rath- er, they must be dissolved in a bucket of water before spreading them along the edge of the pool. Alternative- ly, you can use child-safe liquid chlori-de dispensers. Technical Data • Flow rate 1.7 m3/h •...
-
Page 22: Preparing For Winter
VII. Winterizing When summer ends or bathing season is over, follow these instructions to make the pool ready for winter. This is normally done in October. Important! Pls note that the pool needs to be water filled at all times - an empty pool will collapse! If you do not follow the advice of winter preparation, it may void your warranty, and, at worst, your pool may be damaged during the winter. -
Page 23: Warranty
Make sure that there is no rust. Paint all rusted areas with anti-rust paint. 4. Check the liner. Make sure the top of the liner is securely attached to the pool wall with the plastic list. Do not remove the liner from the pool.
Need help?
Do you have a question about the SP3509A and is the answer not in the manual?
Questions and answers