Table of Contents
Advertisement
Quick Links
Advertisement
Table of Contents

Summary of Contents for Samwontech TEMI 880
- Page 1 TEMI880 INSTRUCTION MANUAL Temperature ∙ Pressure Programmable Controller...
-
Page 3: Table Of Contents
TEMI 880 Catalog 1. Notice for Use............................5 1.1. Limited Warranty........................5 1.2. Warranty Policy......................... 5 1.3. Install Location Require......................5 1.4. Install Notice..........................6 2. Appearance Dimension........................7 3. Installation..............................8 3.1. Body Terminal........................... 8 3.2. Applicable Tightening terminal....................8 3.3. I/O Relay Board.........................9 4. - Page 4 TEMI 880 9.4. File List............................. 31 9.4.1. Historical File Manage....................32 9.4.2. Table Show........................33 9.4.3. Historical Files’ Order....................34 9.5. Other Set..........................35 10. Assistant Screen..........................36 11. Program Set Screen........................38 11.1. Edit Segment......................... 39 11.1.1. Insert Method of Segment..................40 11.1.2.
- Page 5 TEMI 880 Attention Thank you for purchasing our controller, this manual explains situation effective way of using and installing this production. 1. Please keep the manual for the last user who can get easy access for the manual. 2. Make sure read this manual carefully and fully understand how to operate this product before operation.
- Page 6 TEMI 880...
-
Page 7: Notice For Use
TEMI 880 1. Notice for Use 1.1.Limited Warranty We make no warranties regarding the product except these mentioned in the Warranty. In cases where the use of this product results in damage or loss to the user or a third party, we will not be responsible for any incidental or consequential... -
Page 8: Install Notice
TEMI 880 No magnetic disturbances are caused. No wind blows against the terminal board. Also no dust or salt content. No flammable materials are around. 1.4.Install Notice There is little influence for electromagnetic fields and noise. No moisture can get into the system. -
Page 9: Appearance Dimension
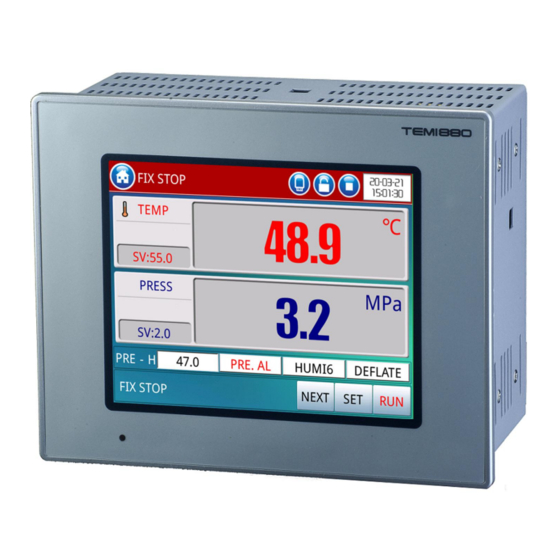
TEMI 880 2. Appearance Dimension TEMI880 Temperature ∙ Pressure Programmable Controller Figure 2 Appearance and Mounting dimension: Appearance dimension: 184×144×107.7(mm) (L×H×W). Mounting dimension: 173×133(mm) (L×H). CAUTION ► Before install & wiring, be sure to turn off the system or else you will get an electrical shock. -
Page 10: Installation
TEMI 880 3. Installation 3.1.Body Terminal TEMI880 Body Terminal Figure 3 3.2.Applicable Tightening terminal Please use-tightening terminal with insulating sleeve for M3.5 screws as following: Figure 4... -
Page 11: I/O Relay Board
TEMI 880 3.3.I/O Relay Board I/O Relay Board Terminal Figure 5... -
Page 12: Input Keyboard
TEMI 880 4. Input Keyboard Digital keyboard use for input setting value, alphabet keyboard use for edit the PROGRAM or DI name. 4.1.Digital keyboard Digital Keyboard ⑧ ① ⑦ ⑥ ⑨ ⑤ ③ ④ ② Figure 6 Figure 7 Data range: valid data range. -
Page 13: Alphabet Keyboard
TEMI 880 4.2.Alphabet keyboard Alphabet Keyboard ⑧ ⑨ ⑦ ① ⑥ ⑤ ② ③ ④ Figure 8 ABC: escape character (ABC / Chinese / Symbol, and so on). Space: space button. Next line: jump to next line. : delete all input data. -
Page 14: Block Diagram Of The Basic Processing
TEMI 880 5. Block Diagram of the Basic Processing Initial Screen Power ON Figure 9 Main Screen Oper. Screen Figure 11 Figure 10 Power ON will display Initial Screen and waiting for 15 seconds to enter Monitor Screen, click on the “MAIN” pattern can enter Main Screen as Figure 11. -
Page 15: Main Screen
TEMI 880 6. Main Screen Main screen is center of the other screen transfer; other screens can be entered through it. Click on this pattern in any screen to return to the main screen. Main screen ① ② ③ ④... -
Page 16: Operation Screen
TEMI 880 7. Operation Screen Click on “OPER. SCREEN” button in Figure 11 to enter Operation Screen 7.1.Stop Screen Fix Mode Stop Screen ⑤ ⑥ ⑦ ⑧ ① ④ ② ③ Figure 11 Program Mode Stop Screen ⑨ ⑩ ⑪... - Page 17 TEMI 880 Fix stop: display the test state and program’s NO. Time button: display controller current time. : test status warning button, Stop/Run. In other screen click on it once shift to Monitor Screen, twice for come back. : function 1, click on it to turn ON or OFF keyboard locked function directly;...
-
Page 18: Confirmation Window
TEMI 880 7.2.Confirmation Window Click on the button in Figure 10/12 it will pop up the Confirmation Window as Figure 13/14. Fix Mode Confirmation Window Program Mode Confirmation Window Figure 13 Figure 14 Pause: pause the test, click it again will keep running and recording time. -
Page 19: Run Screen
TEMI 880 7.3.Run Screen FIX Mode Run Screen ① ⑤ ④ ③ ② Figure 15 PROGRAM Mode Run Screen ⑥ ⑦ ② Figure 16 MV: display the Temp./Press. MVOUT. Run time: in Fix mode will display the current test total running time. -
Page 20: Test Status
TEMI 880 7.4.Test Status Click on button in Figure 10/12 shift to Test Status screen as Figure 17/18. FIX Mode Status Screen ① ④ ③ ② Figure 17 PROGRAM Mode Status Screen ⑦ ⑤ ⑥ Figure 18 PV: display the present test value of test. -
Page 21: Function Set Screen
TEMI 880 8. Function Set Screen Click on “FUNC. SET” button in Figure 11 to enter Function Set Screen. Function Set Screen Figure 19 ⑧ Figure 20 Mode set: selecting the test mode, FIX or PROG. mode. See 8.1 Mode Set Fix set: setting the FIX MODE detail. -
Page 22: Mode Set
TEMI 880 8.1.Mode Set Click on the “MODE SET”’s pattern in Figure 19 to enter Mode Set screen. Mode Set Screen ① ② ③ ④ Figure 21 ① ② Figure 22 Run mode: selecting the run mode of test, Fix or Program mode. -
Page 23: Fix Set
TEMI 880 Hot: after power off, restore to the segment which is current running when the power off, or the SV of Fix Mode. And test is auto-running. Fuzzy select: control over shoot by fuzzy select. 8.2.Fix Set Click on the “FIX SET”’s pattern in Figure 19 to enter Fix Set screen. -
Page 24: Slope Operation
TEMI 880 8.2.1. Slope Operation A case where temperature SP (TSP) is changed, SP value is changed gradually from PV to TSP. Slope Operation Figure 24... -
Page 25: Waiting Set
TEMI 880 8.3.Waiting Set Click on “WAITING SET”’s pattern in Figure 19 to enter Waiting Set screen. Waiting Set Screen ① ② ③ ④ Figure 25 Wait SW.: selecting turn ON or OFF the waiting function. Wait time: setting the waiting time. -
Page 26: Wait Function Operation
TEMI 880 8.3.1. Wait Function Operation The relation of the wait operation and wait time please read Figure 26. Wait Function Operation Figure 26... -
Page 27: Time & Reserve
TEMI 880 8.4.Time & Reserve Click on the “TIME & RESERVE”’s pattern in Figure 19 to enter Time & Reserve screen as Figure 27. Time & Reserve Screen ① ② Figure 27 Cur. time: adjustment current time. Reserve start: turn on or off the reserve function. Turn on this function will pop up time set window. -
Page 28: Reserve Method
TEMI 880 8.4.1. Reserve Method Selecting Reserve Set function in Figure 27 and selecting enable as Figure 28. Reserve Method ① ② ③ Figure 28 Figure 29 ④ Figure 31 Figure 30 Figure 32 Step 1: “ENABLE” (①) Reserve Set function in Figure 28, will pop up Time Set Window as Figure 29. -
Page 29: Normal Set
TEMI 880 8.5.Normal Set Click on the “NORMAL SET”’s pattern in Figure 21 to enter Normal Set screen as Figure 33. Normal Set Screen ① ② ③ Figure 33 Come back normal: selecting turn on or turn off the Normal Set function. -
Page 30: Graph Screen
TEMI 880 9. Graph Screen Click on “GRAPH” button in Figure 11 to enter Graph screen as Figure 34. Graph Screen ① ⑧ ⑦ ⑥ ⑤ ② ③ Figure 34 ④ Highest display point: click on first line number to select the highest display point of Curve Show screen. -
Page 31: Highest And Lowest Display Point
TEMI 880 9.1.Highest and Lowest Display Point Click on “FIRST/ LAST LINE NUMBER” in Figure 34. Highest Display Point Lowest Display Point Figure 35 Figure 36 9.2.Curve Select Click on any point in the Curve Show screen of curve in Figure 34. -
Page 32: Time Scale Zooming
TEMI 880 9.3.Time Scale Zooming Click on “MAGNIFYING” PATTERN in Figure 34 to enter Time Scale Display Select screen as Figure 38. Time Scale Display Select Screen Figure 38 ► Change time scale:... -
Page 33: File List
TEMI 880 9.4.File List Click on “CALENDAR” pattern in Figure 34 to enter File List screen as Figure 39. File List Screen ① ② Figure 39 Historical file: selecting a file, click on it can review its curve and table, or delete it. -
Page 34: Historical File Manage
TEMI 880 9.4.1. Historical File Manage Selecting a historical file in Figure 39 will display Historical File Manage screen as Figure 40. Historical File Manage Screen ① ⑤ ② ④ ③ Figure 40 Curve: click on it to review this historical file’s corresponding curve. - Page 35 TEMI 880 9.4.2. Table Show Click on the “TABLE” button in Figure 40 to enter Table Show screen as Figure 41. Table Show Screen ① Figure 41 ② ③ ④ ⑤ ⑥ Figure 42 Click on the “Ellipsis” pattern in Figure 41 will display as Figure 42.
-
Page 36: Historical Files' Order
TEMI 880 9.4.3. Historical Files’ Order Click on the “ELLIPSIS” pattern in Figure 39. will display Historical Files’ Order screen as Figure 43. Historical Files’ Order Screen ① ⑤ ② ④ ③ Figure 43 Order: click on it to setting the display order of historical files is order by the record time (clockwise). -
Page 37: Other Set
TEMI 880 9.5.Other Set Click on the “GEAR PATTERN” pattern in Figure 34 to enter Curve Set screen as Figure 44. Other Screen ① ② ③ Figure 44 Record interval: setting the curve record interval of test. Disk used: display the controller used storage. -
Page 38: Assistant Screen
TEMI 880 10. Assistant Screen Click on the “ASSISTANR” button in Figure 11 to enter Assistant screen as Figure 45 & 46. Assistant Screen Figure 45 Assistant Screen Figure 46 Light off: set time of controller backlight. Brightness: adjustment the LCD Brightness function. - Page 39 TEMI 880 Tuning key: selecting turn ON or OFF the Tuning Key function. See 7.2 Confirmation Window Beep: selecting turn ON or OFF the beep function. Deflate ON time:setting wait time for deflate time signal output. Deflate OFF time:setting run time for deflate time signal output.
-
Page 40: Program Set Screen
See 11.3 Other CAUTION ► TEMI 880 with 120 group programs and each program has 100 segments. ► If segment value is equaled initial value, you are not able to insert or delete. On the other hand, it is not able to insert or delete segment at the running status. -
Page 41: Edit Segment
TEMI 880 11.1. Edit Segment Click on the “SEG. NUM” column in Figure 47 to enter Segment Edit screen as Figure 48. Edit Segment Screen ⑦ ⑥ ⑤ ④ ③ ① ② Figure 48 Loop set: click on it shift to Loop Set screen. -
Page 42: Insert Method Of Segment
TEMI 880 11.1.1. Insert Method of Segment Select a segment in Figure 48 to insert segment as following Figure 49 & 50. Insert Segment Step 2 Step 1 Figure 49 Step 3 Figure 50 Step 1: selecting “002” segment, click on its number and its color change red. -
Page 43: Ts Set
TEMI 880 11.1.2. TS Set Select a Time Signal in Figure 48 to setting its operation as Figure 51. TS Set Screen ③ ① ② ④ ⑤ Figure 51 NO: totally 8 actions. OFF means always OFF, ON means always ON. AC1- AT6 need to set its value by user. -
Page 44: Ts Operation Within Segment
TEMI 880 11.1.3. TS Operation within Segment The Time Signal operation within segment please read Figure 52. TS Operation Figure 52... -
Page 45: Loop Set
TEMI 880 11.2. Loop Set Click on the “CYCLE” column in Figure 47 or “LOOP SET” in Figure 49 to enter Loop Set screen as Figure 53. Loop Set Screen ① ② Figure 53 ① is Segment cycle (segments in the same Program): Start: setting the segment cycle’s beginning segment number. -
Page 46: Segment Repeat Explanation
TEMI 880 11.2.1. Segment Repeat Explanation Segment repeat, please reading the table as following: Segment Repeat Process E.g. Set Value Repeat Process 1.01→02→03→04 2. →02→03→04 03→04→05 03→04→05→06→07→08 1.01→02→03→04→05 →03→04→05 3. →02→03→04 4. →02→03→04→05→06→07→08 1.01→02→03 2. →02→03 →05→06 →05→06→07→08 1.01→02→03→04→05→06 →05→06 3. -
Page 47: Program Repeat Explanation
TEMI 880 11.2.2. Program Repeat Explanation Program repeat, please reading the table as following: Program Repeat Process E.g. Set Value Repeat Process Subject: Program 1 RPT: Program 1→ Program 2 Subject: Program 2 RPT: Program 2→Program 2 →Program 3 Subject: Program 3 RPT: Program 3→Program 3... -
Page 48: Other Set
TEMI 880 11.3. Other Set Click on the “OTHER” column in Figure 47 to enter Other screen as Figure 54. Other screen ① ⑦ ② ⑥ ③ ⑤ ④ Figure 54 Edit: edit this program detail. Copy to: copy this program’s setting value to the target program (E.g. Select program 1, and click on ”COPY”...
Need help?
Do you have a question about the TEMI 880 and is the answer not in the manual?
Questions and answers
good afternoon colleagues. please tell me the password to enter the calibration menu on the controller tehm 880