
Related Manuals for DOTWORKZ COOLDOME Series

Summary of Contents for DOTWORKZ COOLDOME Series
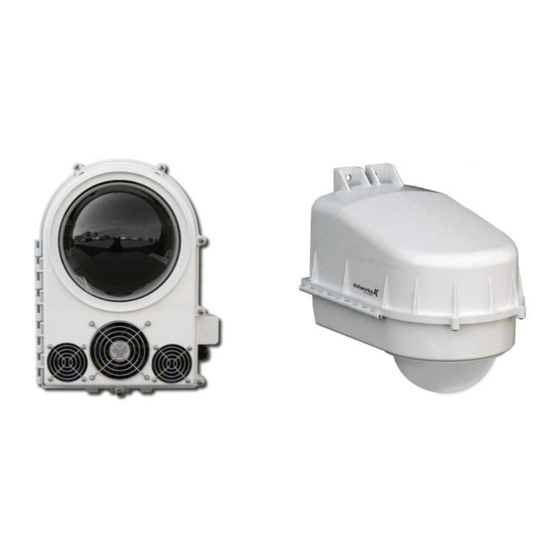
- Page 1 INSTALLATION GUIDE Mounting & Sealing of Housing & Electrical Details COOLDOME™ ENCLOSURE SERIES D2 COOLDOME™ D3 COOLDOME™ S-TYPE COOLDOME™...
- Page 2 2. These Installation and Operating Instructions. For technical questions or product returns – call Dotworkz Customer Service (866-575-4689) 7:30 AM to 4:30 PM (PST). The proper technician will contact you as soon as possible. ...
-
Page 3: Electrical Conduit Guidelines
Electrical Putty & Putty Tapes Dotworkz does not endorse, nor has it evaluated any of these products. Test products first, and follow all manufacturers’ instructions. Follow all applicable electrical and building codes and installation guidelines. End user assumes liability for applicability of these products and... - Page 4 VENT STOPPER PLUGS for Conduit Foam Conduit Feed Plugs for ½” I.D. (PG-13) Conduit Prevents Humid Air exchange from venting thru electrical conduit into Dotworkz sealed enclosures, Thus eliminating condensation issues within Dotworkz sealed enclosures. QUICK INSTALLATION GUIDE 4) Push plug into conduit mouth with finger 1) Pull wires to final installed length.
- Page 5 COOLDOME™ Accessories & Mount Options (some brackets only compatible with D-Series, consult Dotworkz Sales Representative for Details) Your COOLDOME is wall mount ready, but can be Installed with a number of Dotworkz Optional Mounts (sold separately) NM-CDPS KT-CDR2...
- Page 6 All Cable Ports, wire feeds, or Conduit must be fully sealed to eliminate moisture within Enclosure. All Dotworkz Enclosures are required to be fully sealed before placing into service, to protect integrated products, to eliminate any moisture driven shock hazard, to perform optimally as designed.
- Page 7 - Strapping / Banding Tools for user supplied Stainless Steel Pole Straps For other needed Mounting Styles: **See Dotworkz for Available Optional Mounting Brackets for a wide selection of Enclosure Mounting Styles @ www.dotworkz.com, or ask your favorite distributor or Sales Associate, or call Dotworkz Support (866) 575-4689 Dotworkz D2 COOLDOME accepts four (4) 3/8"...
- Page 8 Low Voltage Line Drop Wire Gauge Tables See 12 VDC & 24 VDC Low Voltage Wire Gage Selector – Appendix Chart...
- Page 10 Low Voltage Wire Gage Selector Charts- Per Conductor Pair, Per Cooler (D3 COOLDOME uses Dual Coolers – Requires Two Pair)
- Page 11 COOLDOME Input Power Configuration: D3-CD-12VDC Turn Off Power or leave power disconnected during Installation of All Wiring. Follow all local and relevant electrical codes & standards. Test all Wiring and confirm correct voltages before wiring up & powering up COOLDOME. Provided P/S: SP500 Site Power Available Must be Housed Indoors, or in...
- Page 12 P/S outputs, to power each cooler independently, to reduce the need for very heavy wire gages on low voltage wiring run, thus eliminating voltage drop issues. Dotworkz recommends to keep all low voltage wiring runs, as short as possible, by installing step down power supply near to COOLDOME.
- Page 13 COOLDOME™ Input Power Configuration: ST-CD-12VDC Provided P/S Must be Site Power Available Housed Indoors, or in a Nema Electrical Enclosure LOW VOLTAGE RUN 12 VDC Cable to COOLDOME 110 – 220 VAC Power Source 250 watt Step Down P/S Single Phase Only High Voltage to 12 VDC Turn Off Power or leave power disconnected during Installation of All Wiring.
- Page 14 COOLDOME™ Input Power Configuration: ST-CD-12VDC Warning!!!: COOLDOME Enclosure runs on 12 VDC only! If high voltage is applied directly to COOLDOME™ enclosure, you will damage housing, void warranty, and create electrocution hazard that can be harmful or fatal. Do not start wiring until you have fully read and understand these installation instructions. External Power Supply The output of the S-250-12 external power supply, can be adjusted up and down 10%.
- Page 15 D2 & D3 Mounting Detail...
- Page 16 S-Type Strong-Arm Mount Wall Mounting Pattern Not to Scale...
Need help?
Do you have a question about the COOLDOME Series and is the answer not in the manual?
Questions and answers