
Subscribe to Our Youtube Channel
Related Manuals for AML Oceanographic Micro SVP


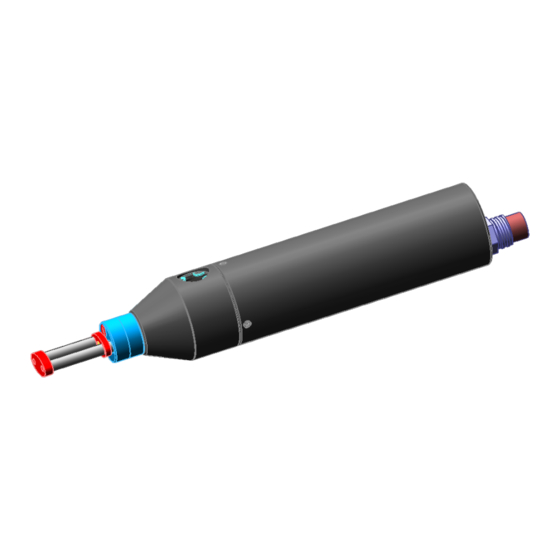
Summary of Contents for AML Oceanographic Micro SVP
- Page 1 User Manual for AML Oceanographic’s Micro SV & P Sensor Micro SV&P Sensor ______________ User's Manual Version 1.1 Oct. 2004...
-
Page 2: Table Of Contents
User Manual for AML Oceanographic’s Micro SV & P Sensor TABLE OF CONTENTS TABLE OF CONTENTS........................2 INTRODUCTION ........................4 The Instrument......................4 The User........................5 STANDARD SPECIFICATIONS ................... 6 DESCRIPTION......................... 8 Functional Description ....................8 PREPARATION FOR USE ..................... 9 Inspecting the Instrument ..................... - Page 3 7.2.5 Current Capacity ....................34 7.2.6 Maximum Current Sourcing Capabilities .............35 CALIBRATION........................36 Sound Velocity ......................36 Pressure........................36 WARRANTY .........................37 APPENDIX ‘A’: “ Drawings ” ......................38 APPENDIX ‘B’: “ Using Hyperterminal ”..................40 Using Hyperterminal ....................40 APPENDIX ‘C’: “ Micro SVP Quick Reference Guide ” ..............43...
-
Page 4: Introduction
INTRODUCTION This manual describes the AML Oceanographic Micro SVP Sensor. If additional items such as sensors or software are used in conjunction with the Micro SVP Sensor the manuals for these items should also be consulted. Examples of additional manuals... -
Page 5: The User
<ENTER> or <RET>. The data output may be configured to display either unprocessed integers, or computed engineering values. The Micro SVP Sensor has the option of sampling on command or monitoring continuously with programmable sampling rates. The latter is not available with the binary protocol. -
Page 6: Standard Specifications
User Manual for AML Oceanographic’s Micro SV & P Sensor STANDARD SPECIFICATIONS Sound Velocity: Time of Flight Range: 1375 - 1600 m/s Accuracy: 0.05 m/s from 1400 to 1550 m/s Resolution: 0.01 m/s Time constant: 40 ms Pressure Sensor: Semiconductor strain gauge... - Page 7 User Manual for AML Oceanographic’s Micro SV & P Sensor Weight: 398 g (0.88 pounds) in air for Acetal 0 g (0.0 pounds) in water for Acetal Environment: operating: -2 to 40ºC (28 to 104ºF) storage: -40 to 60ºC (-40 to 140ºF)
-
Page 8: Description
DESCRIPTION FUNCTIONAL DESCRIPTION The Micro SVP Sensor has two separate sensors, refer to Figure 3.1, each of which responds to a specific property of the water environment. The sound velocity sensor measures the transit time of an acoustic pulse across a fixed distance. The pressure sensor responds to pressure by monitoring the stress on a silicon chip exposed to the ambient pressure. -
Page 9: Preparation For Use
At AML we do our best to package our instrumentation to avoid damage during shipping, as should the user. However accidents do happen, so an inspection of the Micro SVP Sensor before each use will assist in spotting problems that could lead to inaccurate data or possible failure. -
Page 10: Micro Svp Logging Option
Power for the Micro SVP sensor is turned off if the there is no shorting plug or data/power cable plugged in to the battery pack. -
Page 11: Software Setup
2400 and 38400 baud. Apply power to the instrument and press the <enter> key. The standard Micro SVP Sensor will respond with its header information. Note that some units may be configured for custom outputs and may not respond with a header. -
Page 12: Communications
The standard data format is for RS-232C ASCII based sensors. Custom data outputs and formats are listed in appendix A. The Micro SVP Sensor can output data in Raw or Real modes. The mode can be changed by supplying the appropriate command. Refer to Section 5.1.2 for commands. -
Page 13: Raw Output Mode
User Manual for AML Oceanographic’s Micro SV & P Sensor 5.1.1.3 Raw Output Mode The Raw mode shows the outputs from the analog to digital converters for each sensor. No compensation or manipulation of the data is performed in Raw mode. Refer to section 8 and appendix B to convert the raw data values to engineering data. - Page 14 This sets the sample rate at the maximum of 25 scans per second. Command: SET INCREMENT [INC] This command sets the pressure increment that the Micro SVP uses when logging data. Units are in dBars. (Note: dBars are approximately equal to meters). Example:...
- Page 15 User Manual for AML Oceanographic’s Micro SV & P Sensor Example: DATE 03/14/03 (March 14, 2003) Command: VERSION [V] This command displays the current version of the firmware, instrument type and the serial number of the instrument Command: DIS S This command displays the current scan rate.
-
Page 16: Advanced Commands
User Manual for AML Oceanographic’s Micro SV & P Sensor 5.1.3 Advanced Commands 5.1.3.1 Display Commands Command: DIS SCAN [D SC] This command will display the current scan options. Example: >dis scan Scan delay is 100 Display time: yes Display date: no Command: DIS STARTUP [D ST] This command will display the current startup options. - Page 17 (when the enter key is pressed) before it defaults to the baud rate set by the value of ‘b’. If a = 0 the Micro SVP will not auto baud and will default to the baud rate specified by the value of ‘b” at each power up.
- Page 18 Micro SVP. On power up, the Micro SVP will wait for 200ms before entering into the RXOFF mode and during this time sending a carriage return will disable the RXOFF features.
-
Page 19: Set Scan Options
This command is used for sensors that have a slower power up response time. Example: >set scan delay 200 (sets the scan delay to 4 seconds) In the above example, the Micro SVP would power up the sensor boards, wait 4 seconds then take a scan of data. Micro... -
Page 20: Analog Board Commands
These channels may be used to incorporate additional sensors such as Ph, Do2 or any other sensor outputting a voltage. When the Micro SVP is equipped with an analog board, the following commands can be used to configure the extra channels. - Page 21 If the auto baud feature has not been disabled, the Micro SVP will wait for a carriage return before it outputs data. (See SET DETECT command). The following example set the Micro SVP to output data at power up with a baud rate of 9600.
-
Page 22: Accessing The Calibration Coefficients
This command instructs the Micro SVP to display a prompt at power on. If the auto baud feature has not been disabled, the Micro SVP will wait for a carriage return before it outputs a prompt. (See SET DETECT command). -
Page 23: Editing The Calibration Coefficients
DIS COEFFICIENTS or SET commands. The following describes the method to edit the Calibration coefficients for each parameter of the Micro SVP using the SET command. Refer to the TALK command for accessing the coefficients. - Page 24 User Manual for AML Oceanographic’s Micro SV & P Sensor Example: >talk 203 (enter talk mode with the sound velocity board) Entering talk mode Sound Velocity Micro Sensor V1.40 SN:0002-SV >set a=7.361894E-04 (set the a coefficient) >dis c (display the sound velocity sensor coefficients) Sound Velocity A=7.361894E-04 B=-7.438164E-056 C= 1.07834E-06 D=-5.791932E-07...
- Page 25 User Manual for AML Oceanographic’s Micro SV & P Sensor Analog Channel 2 Command: SET 2n=c Where n = coefficient letter a,b,c,d c = calibration coefficient Example: >talk 202 (enter the talk mode with the analog board) Entering talk mode Analog Micro Sensor V1.30 SN:0003-A...
-
Page 26: Logging Data
RS-232 equipped Micro SVP Sensors or with the Smart Network Controller to communicate with RS-485 Micro SVP Sensors. Connect the Micro SVP Sensor to a serial port on the computer (refer to section 4.2). Launch the terminal emulation program and select the communications port to which the... - Page 27 User Manual for AML Oceanographic’s Micro SV & P Sensor instrument is attached. Select 8 bits, no parity, 1 stop bit and the desired baud rate. Power the instrument and then press <enter>. The instrument will respond with an identification header and then a prompt. Commands can then be sent to the instrument as desired.
-
Page 28: Precautions And Troubleshooting Guide
Prior to storing the Micro SVP, the sound velocity sensor must be washed thoroughly in fresh water before the sensor is allowed to dry. This will prevent the build up of salt deposits on the sensor. -
Page 29: Sensor Interactions
Due to the small board size of the Micro sensors they are less susceptible to radio interference than many other instruments. However, they are not immune. Tests show the Micro SVP can withstand a 5 Watt, 144 MHz RF transmitter operating 2 metres away from the instrument without any degradation in performance. -
Page 30: Troubleshooting Guide
The following section outlines some of the most common problems encountered by users of the Micro SVP Sensors. A brief list of suggested solutions has been provided. If the difficulties persist, please do not hesitate to contact the AML Oceanographic service staff. - Page 31 User Manual for AML Oceanographic’s Micro SV & P Sensor Problem: The instrument communications are intermittent. Solutions: • The communications cable has been inserted incorrectly. Check the cable connections at the computer and the instrument. Examine the pins on the instrument connector for bent or corroded pins.
- Page 32 User Manual for AML Oceanographic’s Micro SV & P Sensor Problem: The pressure sensor readings are incorrect. Solutions: • The pressure range of the sensor may have been exceeded. The pressure sensor may require re-calibration or replacement. Contact the factory for support.
-
Page 33: Maintenance
User Manual for AML Oceanographic’s Micro SV & P Sensor MAINTENANCE GENERAL MAINTENANCE The Micro SVP Sensor has been designed to minimize user maintenance. To keep the instrument in top condition the following maintenance is required: After each deployment, the Micro SVP Sensor case should be washed thoroughly with distilled or fresh water. -
Page 34: Battery Considerations For The Micro Svp
7.2.1 Battery Considerations for the Micro SVP Care should be observed when choosing replacement lithium batteries for the Micro SVP. Battery characteristics such as physical size, current capacity, voltage capacity and maximum current sourcing capability should be considered. -
Page 35: Maximum Current Sourcing Capabilities
Maximum recommended continuous currents (below 800ma) may produce a sharp voltage drop when the Micro SVP demands a burst of current such as when it powers up or when an optional sensor or pump is turned on. If the voltage drops below the Micro SVP’s operational voltage, the... -
Page 36: Calibration
1 to 2 years, depending on the amount of use and other conditions occurring in the deployment environment. The sensor accuracies are also dependent upon proper care and maintenance by the user. AML Oceanographic recommends recalibrating the instrument annually, however some standards agencies specify semi-annually for all sensors used in bathymetry work. -
Page 37: Warranty
In no event will AML Oceanographic be liable for any direct, indirect, consequential or incidental damages resulting from any defects or failure of performance of any instrument supplied by AML Oceanographic. -
Page 38: Appendix 'A': " Drawings
User Manual for AML Oceanographic’s Micro SV & P Sensor APPENDIX ‘A’: “ Drawings ”... - Page 39 User Manual for AML Oceanographic’s Micro SV & P Sensor...
-
Page 40: Appendix 'B': " Using Hyperterminal
Sensor. USING HYPERTERMINAL Connect the Micro SVP Sensor to the data cable. Connect the data cable to the serial port of the computer. If the Micro SVP Sensor is externally powered connect the data cable power leads to a 12 volt DC supply. - Page 41 Copywrite 2003, AML Oceanographic > Once the prompt appears, the Micro SVP Sensor is ready to accept instructions. Refer to the RS-232 Command Summary, section 5.1.2. Caution: Some versions of Hyperterminal have a bug which does not allow the properties to be changed unless the disconnect command is selected under the Call menu before changing the properties.
- Page 42 User Manual for AML Oceanographic’s Micro SV & P Sensor...
-
Page 43: Appendix 'C': " Micro Svp Quick Reference Guide
Micro SVP and the RS-232 port of the computer. If the Micro SVP Sensor does not have a battery pack, connect the data cable wires to a DC power source (8 to 16 volts, 12 volts nominal). The red wire should be connected to the positive side of the supply and the black wire to the negative side of the supply.
Need help?
Do you have a question about the Micro SVP and is the answer not in the manual?
Questions and answers