Table of Contents

Summary of Contents for NTM EZ-Counter
- Page 1 O P E R A T I O N a n d MA I N T E N A N C E MA N U A L E Z - C o u n t e r C o n t r o l l e r F o r G u t t e r Ma c h i n e s a n d t h e S S R R o o f P a n e l Ma c h i n e w w w .
-
Page 2: Table Of Contents
Run: ............................. 6 Compensation: ......................6 Settings: ..........................7 Calibration: ......................... 7 Units: ........................... 8 Clear Jobs: ........................9 Screen:......................... 9 Totalizer: ........................10 Security: ........................10 Other: ........................11 Encoder Adjustment ......................12 EZ-Counter Screens ......................13 Notes: ..........................14... - Page 3 EZ-Counter Manual Table of Figures Figure 1: EZ-Counter on Mach II Machine ..............1 Figure 2: Home Screen (ft/in.) ..................3 Figure 3: Home Screen (in.) ..................... 3 Figure 4: Home Screen (cm) .................... 3 Figure 5: Error - Invalid Fraction ..................4 Figure 6: (1) 45°...
-
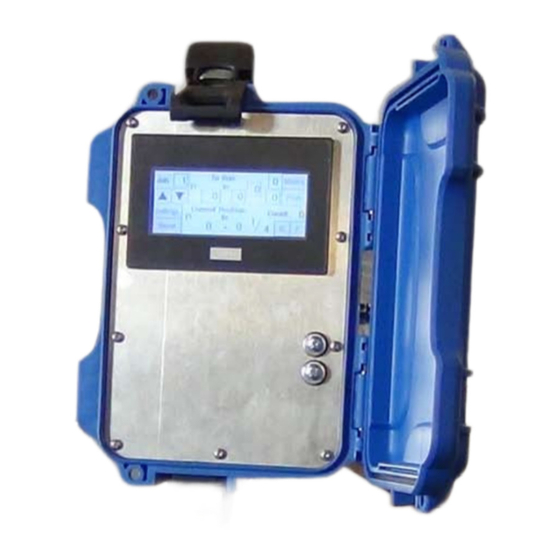
Page 4: Figure 1: Ez-Counter On Mach Ii Machine
EZ-Counter Manual Figure 1: EZ-Counter on Mach II Machine... -
Page 5: Features/Specifications
Easily view settings and operations at all times of the day; even before the sun is up! Program up to 50 Jobs or Lengths EZ-Counter enables user to input multiple jobs and material lengths Calibrate on the Fly Calibrate using a part run from a programmed job to save coil Track Material 2 Tracking functions: Master counter for lifetime of jobs;... -
Page 6: Home
EZ-Counter Manual Home When the controller is turned on, after going through the startup screens, it will automatically go to the home screen. Note: After 30 minutes of inactivity the controller will power itself down. Overview: The controller is able to store (50) different lengths, designated by “Job”. -
Page 7: Manual Operation
EZ-Counter Manual Manual Operation: The machine can be manually operated from the home screen by pressing the F and R buttons to make the machine jog Forward or Reverse. Reset: Press the Reset button to reset the length counter after shearing the material. -
Page 8: Figure 6: (1) 45° Miter
EZ-Counter Manual Figure 6: (1) 45° Miter Figure 7: (2) 45° Miters Figure 8: (1) 10° Miter Input the length “L” and press the Miters button to access the Miters screen. Figure 9: Miters Screen Press the 0, 1, or 2 buttons on the left to specify the number of miters on the part. -
Page 9: Run
EZ-Counter Manual Press the Default button to adjust the length of the default miter. For example, if the controller is on a 5 in. gutter machine, the default miter length should be less than the default length on a 6 in. gutter machine. -
Page 10: Settings
EZ-Counter Manual compensating, the controller will only adjust the coasting distance by small increments. When changing materials or switching to a new large coil it is recommended to produce (3) 12 in parts in order to allow the controller to adjust the coasting distance. -
Page 11: Units
EZ-Counter Manual 36 in. or more is recommended. Press the Run button to run the calibration part. The machine will run the part and automatically switch to a screen where the measured length can be input. Figure 14: Calibration Length Input Screen The controller will display the theoretical length of the part after it is produced as the Current Position. -
Page 12: Clear Jobs
EZ-Counter Manual Figure 15: Settings - Units Clear Jobs: From the Settings screen, press the Clear Jobs button to go to the clear jobs screen. Press the Clear button to clear all the programmed jobs. This will set all lengths back to 0 and clear all miters. Press Cancel to prevent clearing the jobs. -
Page 13: Totalizer
EZ-Counter Manual Totalizer: From the Settings screen, press the Totalizer button to view and reset the total length counter. This counter is not password protected and can be reset at any time. Figure 18: Settings – Totalizer Security: From the Settings screen, press the Security button to access the security settings and password protected length counter. -
Page 14: Other
EZ-Counter Manual Figure 20: Settings – Security Other: From the Settings screen, press the Other button to view miscellaneous values that are programmed into the Controller. These values are not adjustable from this screen. Counts: Encoder counts per revolution of the encoder wheel Circum: Encoder wheel circumference (this value changes when the controller is calibrated. -
Page 15: Encoder Adjustment
EZ-Counter Manual Encoder Adjustment The encoder should have tension on the material in order to track the material accurately. To check the tension on the encoder, gently lift up on the wheel. The encoder should be able to be lifted 1/8” – 1/4" from the surface of the material. -
Page 16: Ez-Counter Screens
EZ-Counter Manual EZ-Counter Screens Figure 22: Screen Flowchart... -
Page 17: Notes
EZ-Counter Manual Notes:... - Page 18 1 6 2 6 5 E . 3 3 r d D r . S t e 4 0 | A u r o r a , C O 8 0 0 1 1 EZC-MAN | Revision 2 | 01-28-2021...
Need help?
Do you have a question about the EZ-Counter and is the answer not in the manual?
Questions and answers