Sign In
Upload
Download
Table of Contents
Contents
Add to my manuals
Delete from my manuals
Share
URL of this page:
HTML Link:
Bookmark this page
Add
Manual will be automatically added to "My Manuals"
Print this page
×
Bookmark added
×
Added to my manuals
Manuals
Brands
Katanax Manuals
Industrial Equipment
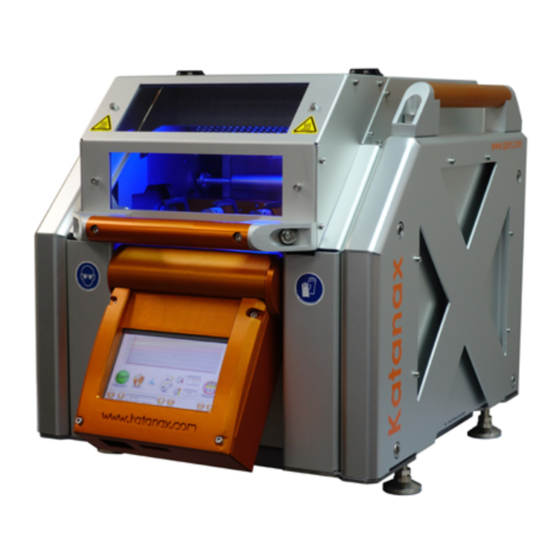
X-FLUXER
Manual
Katanax X-FLUXER Manual
Automatic fluxer
Hide thumbs
1
2
3
Table Of Contents
4
5
6
7
8
9
10
11
12
13
14
15
16
17
18
19
20
21
22
23
24
25
26
27
28
29
30
31
32
33
34
35
36
37
38
39
40
41
42
43
44
45
46
47
48
49
50
51
52
53
54
55
56
57
58
59
60
61
62
63
64
65
66
67
68
69
70
71
72
73
74
75
76
77
78
79
80
81
82
83
84
85
86
page
of
86
Go
/
86
Contents
Table of Contents
Troubleshooting
Bookmarks
Table of Contents
Table of Contents
Index
Installation
Box Contents
Location
Leveling
Connection
Mold Size
Crucible Holder Setup
Questions
Introduction
Fusion Basics
Automatic Fluxers
The X-300 Fluxer
Main Features of the Katanax X-300
Precautions
How the Unit Works
Heating
Multiple Configurations
Access to the Furnace
Agitation and Pouring of the Melt
Cooling
Solution Agitation
Using the X-300 (Basic)
Operation of the Safety Shield
The Main Running Screen
Loading a Program
During a Fusion
The Right Ingredients
Care of the Platinumware
Crucible Installation
Mold Installation
A General Fusion
Making Solutions
Description of the Fusion Steps
Programming the X-300 (Advanced)
Viewing the Fusion Parameters
Unlocking the Advanced Mode
Managing Fusion Methods
Preparing a Fusion Program
Heating Steps
Pouring Step
Cooling Steps
On-The-Fly Editing
Global Parameters
Language
Holding Temperature Offset
Startup Tolerance
End Beep
Automatic Shut-Off Delay
Safety Shield Protection
Fusion Counter
Special Parameters
Accessing the Special Parameters
Offsets
Loop Operation
Movement Testing
Fusion Troubleshooting
Disk Cracks
Disk Crystallizes
Incomplete Disk
Non-Homogenous Disk
Bubbles in Disk
Periodic Inspection
Warning
Inspection Schedule Table
Flux Spillage on Holders
Holders Alignment and Functionality
Air Filter for the Molds Cooling
Furnace Chimney Cleaning
Element Terminal Connections
Furnace Cleanliness
Thermocouple Junction
Swing Motion System
Service Operations
Warning
Crucible Holder Removal
Crucible Holder Installation
Mold Holder Removal
Mold Holder Configuration, Assembly and Alignment
Heating Element Replacement
Top/Back Panel Removal
Side Panel Removal
Bottom Panels Removal
Appendix A - Technical Specifications
Electrical
Physical
Appendix B - Warranty
Appendix C - Firmware and Program Transfers
Preset Programs
Backup or Restore by USB
Appendix D - Cplive : Data Logging
Introduction to Data Logging
Installing Easyconverter
Enable Data Logging
Sample Tracking
Copying Logs to a USB Drive
Accessing Logs through FTP
Structure of the Data Log Files
Error / Warning Codes Listing
Appendix E - Cplive : Networking
Connecting the Fluxer to Your LAN
Appendix F - Cplive : Remote Access
Controlling the Fluxer from a Remote Device
Allowing Katanax Support to Access Your Fluxer
Contacting Katanax
Advertisement
Quick Links
1
Table of Contents
2
Installation
3
The X-300 Fluxer
4
Heating
Download this manual
Automatic fluxer
Table of
Contents
Previous
Page
Next
Page
1
2
3
4
5
Advertisement
Table of Contents
Need help?
Do you have a question about the X-FLUXER and is the answer not in the manual?
Ask a question
Questions and answers
Related Manuals for Katanax X-FLUXER
Industrial Equipment Katanax X-300 Manual
Automatic fluxer (86 pages)
Industrial Equipment Katanax X-300T Manual
Automatic fluxer (86 pages)
Industrial Equipment Katanax Environmental express X-fluxer X-100 Operating Instructions Manual
(66 pages)
Industrial Equipment Katanax K2 Prime Manual
Automatic fluxer (93 pages)
This manual is also suitable for:
X-300
X-300m
X-300d
X-300t
Table of Contents
Save PDF
Print
Rename the bookmark
Delete bookmark?
Delete from my manuals?
Login
Sign In
OR
Sign in with Facebook
Sign in with Google
Upload manual
Upload from disk
Upload from URL


Need help?
Do you have a question about the X-FLUXER and is the answer not in the manual?
Questions and answers