Table of Contents
Advertisement
Quick Links
Advertisement
Table of Contents

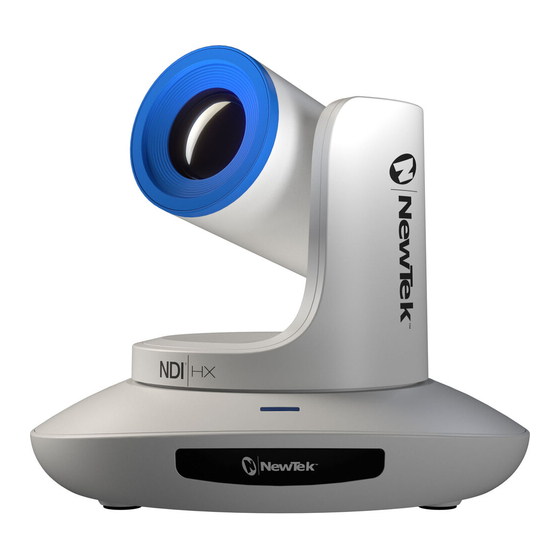
Summary of Contents for NewTek NDI HX PTZ3
- Page 1 NewTek |HX PTZ3 ® IP Video Camera Instructions Operating Page | i...
- Page 2 Trademarks: NDI, TriCaster, 3Play, TalkShow, Video Toaster, LightWave 3D, and Broadcast Minds are registered trademarks of NewTek, Inc. MediaDS, Connect Spark, LightWave, and ProTek are trademarks and/or service marks of NewTek, Inc. All other products or brand names mentioned are trademarks or registered trademarks of their respective holders.
-
Page 3: Table Of Contents
Table of Contents SECTION 1 INTRODUCTION AND SETUP ....................5 1.1 Overview ....................................5 1.2 Getting Ready ..................................5 1.3 Safety Guides ..................................6 1.4 Packing List..................................... 7 1.5 Quick Start Guide ................................... 7 1.6 Product Features ..................................8 1.7 Web Configuration ................................. 9 1.7.1 Studio Monitor ................................ - Page 4 3.1 Camera Interface ................................. 29 3.2 Camera Dimension (MM)..............................30 3.3 VISCA ....................................31 3.3.1 Visca In (RS232 Port) ..............................31 3.3.2 VISCA Network Construction ............................31 3.3.3 Serial Port Configuration .............................. 32 3.3.4 VISCA Protocol ................................32 3.3.5 Visca Pan Tilt Absolute Value ............................43 3.3.6 Visca Pan Tilt Speed Value ............................
-
Page 5: Section 1 Introduction And Setup
Section 1 INTRODUCTION AND SETUP This section explains how to connect and configure your NewTek NDI|HX-PTZ3 camera. It also explains how to update the device, and where you can find additional NDI software to ® extend your workflow. After completing this short section, you’ll be all set to begin using your new camera. -
Page 6: Safety Guides
SAFETY GUIDES 1. Before operation, please fully read and follow all instruction in this manual. For your safety, always keep this manual with the camera. 2. The camera power input range is 100~240V AC (50~60Hz), ensure the power supply input within this range before powering on. -
Page 7: Packing List
PACKING LIST To begin, let's review "what came in the box": • |HX PTZ3 Camera ® • Power Adapter • Power Cable • RS232 Control Cable • Remote Controller • User Manual • Double-sided Adhesive • QC Certification QUICK START GUIDE Check all cable connections before you power on. -
Page 8: Product Features
1080P60 video over NDI|HX, support H.264 and H.265 encoding. • Supports Line in and Mini XLR audio input for excellent sound quality. • Supports NewTek NDI video transmission and control. • NDI|HX, HDMI, 3G-SDI outputs for different applications. • White Balance, Exposure, Focus, and Iris automatic or manual control. -
Page 9: Web Configuration
WEB CONFIGURATION Your NewTek NDI|HX PTZ3 is very easy to configure. In many installations, all you need to do is supply power, connect a video source and your network, and you‘re ready to go. Sometimes though, you will want to access its settings, perhaps to configure login credentials, adjust color balance, and so on. - Page 10 FIGURE 3 – W ® OCATING AMERA ON THE ETWORK INDOWS 1. Having launched Studio Monitor, click the small menu gadget (‘hamburger’) at upper left to open the application menu. Among other things, this menu displays all NDI sources detected on your network. 2.
-
Page 11: Logging In
RESET UTTONS FIGURE 4 FIGURE 5 Once you have pulled up your NDI camera in Studio Monitor (or Video Monitor), position, zoom and focus tools will appear on the right of the screen. You can save and recall camera positionings using the nine preset buttons. -
Page 12: Video Source
VIDEO SOURCE After logging in, your camera’s options and controls are shown in your web browser. FIGURE 7 The first tab shown on this web page is labeled Video Source. Below this, you will see: • Video Format drop down menu •... -
Page 13: Video Bandwidth
VIDEO BANDWIDTH 1.8.1 FIGURE 8 Video Bandwidth controls allow you to select between Low, Medium, High and Ultra bandwidth options. The Ultra button will enable NDI|HX3 for better video with reduced latency. Choosing which option works best is dependent on your network throughput capabilities and other traffic. PAN, TILT AND ZOOM 1.8.2 FIGURE 9... -
Page 14: Audio Video Settings
AUDIO VIDEO SETTINGS VIDEO 1.9.1 FIGURE 10 Click the second webpage tab to reveal more advanced Audio/Video Settings (Figure 10). Expanding the Video Settings control group shows additional nested tabs with various Exposure, Picture, White Balance, Focus/PTZ options and Encoding options. Page | 14... -
Page 15: Exposure
EXPOSURE 1.9.2 FIGURE 11 Under the Exposure tab you can set parameters such as the video Mode, Iris, Gamma, WDR (Wide Dynamic Range), Gain, Shutter Speed, Anti-flicker and BLC (Black Light Compensation). PICTURE 1.9.3 FIGURE 12 Under the Picture tab, you can set parameters such as Brightness, Saturation, Contrast, Sharpness, 2D Noise Reduction, 3D Noise Reduction, Mirror and Flip. -
Page 16: White Balance
WHITE BALANCE 1.9.4 FIGURE 13 Under the White Balance tab, you can set parameters such as Mode, Manual Red and Manual Blue. Press the One Push Trigger button to calibrate the white balance of the room. FOCUS/PTZ 1.9.5 FIGURE 14 Under the Focus/PTZ tab you can select Auto or Manual focus. -
Page 17: Encoding
ENCODING 1.9.6 FIGURE 15 The Encoding tab allows you to set your Encode Mode to H.264 or HEVC and the ability to control the Bitrate with CBR or VBR. Note: CBR stands for constant bitrate and is an encoding method that keeps the bitrate the same. VBR, by contrast, is a variable bitrate. -
Page 18: Administration
ADMINISTRATION 1.11 FIGURE 17 The third tab on the configuration webpage is labeled Administration. Here you will find information and settings related to your camera, and its network connection. FIGURE 18 The uppermost section of this tab displays the Device Name, Group, and NDI Channel Name fields, which determine how your camera is identified on your NDI network. -
Page 19: Multicast
Controls in the Network Settings section will be familiar to anyone who has connected a computer or mobile device to a network, and thus require little explanation. Typically, your network will be configured to automatically supply IP addresses to devices you connect to it by means of a DHCP server. -
Page 20: Tally
ULTICAST OR NICAST Multicast can seem like a bandwidth-saving miracle. Unlike NDI’s default mode (unicast), multicast does not require a unique stream from the source to each receiver. When using unicast, each connection to the sender reduces the bandwidth available by a similar amount. By contrast, multicast connections do not add significantly to the bandwidth required as connections multiply. -
Page 21: Section 2 Remote Control & Osd
Section 2 REMOTE CONTROL & OSD Some of the more exotic settings and options available on your NDI|HX-PTZ3 are supported by means of the onscreen display, and accessed via the included remote control. This section first describes the features of the latter, then provides a full list of options and settings in the ‘OSD’. - Page 22 FOCUS KEYS (ON THE LEFT) Manual focus, only valid in manual focus model. ZOOM KEYS (ON THE RIGHT SIDE) Set the zoom rate. NAVIGATE KEY: UP/DOWN/LEFT/RIGHT Use navigate key to set the pan tilt, and select menu when using the OSD. OK /HOME KEY Short press OK to make the camera go back to the HOME position;...
-
Page 23: Osd Menu
OSD MENU 1. Press the MENU key on the IR remote controller, to enter the OSD menu as below: 2. After entering the main menu, use the navigate UP/DOWN key to select the main menu. Once selected, the main menu will change to blue background, and the right side will show all sub menu options. 3. - Page 24 EXPOSURE AUTO / MANUAL / IRIS / BRIGHT Default: AUTO MODE Shutter speed: 1/30 - 1/10000, only valid under SHUTTER Default: AUTO MANUAL mode Iris setting: CLOSE - F1.8, only valid under MANUAL IRIS Default: AUTO and IRIS mode Gain setting: 0dB - 30dB, only valid under MANUAL EXPOSURE GAIN Default: AUTO...
- Page 25 Speed By Zoom: proportional speed, the bigger SPEED BY ZOOM Default: ON the zoom is, the slower the speed is. FLIP Flip horizontal Default: OFF MIRROR Flip vertical Default: OFF PT SPEED Pan Tilt speed Default: 18 SETTINGS ZOOM SPEED Zoom speed Default: 5 PRESET FREEZE...
- Page 26 DHCP ON / OFF Using up / down / left / right navigation button to 192.168.001.188 IP SETTINGS select item to set, and using number button to set MASK 255.255.255.000 parameter. Press menu button to return. GATEWAY 192.168.001.001 SYSTEM RESET Reset communication parameter to default CAMERA RESET Reset camera parameter to default...
-
Page 27: Section 3 Camera Specs
Section 3 CAMERA SPECS 1920*1080P60/59.94/50/30/29.97/25/29.97/24 HDMI 1920*1080I60/59.94/50 1280*720P60/59.94/50/30/29.97/25 1920*1080P60/59.94/50/30/29.97/25/29.97/24 Video Format 1920*1080I60/59.94/50 1280*720P60/59.94/50/30/29.97/25 1920*1080P60/59.94/50/30/29.97/25/29.97/24 1280*720P60/59.94/50/30/29.97/25 Video Interface HDMI, SDI, NDI|HX Audio Interface Line in, Mini XLR Upgrade Interface Type-C Sensor 1/2.8”2.4MP CMOS sensor Zoom f 4.9~98mm(20X) Iris F1.5(Wide)~F3.0 (Tele) View Angle 60°(Far)-3.2°(Near) Rotation Angle Pan: -170°... - Page 28 HTTP, RTSP, DHCP, RTMP, HTML5, NDI, ONVIF, VISCA TCP, VISCA UDP, VISCA over Supported Protocol IP, VISCA Serial, Pelco-P, Pelco-D POE+ Supported Supported Daisy Chain Support RS232 serial daisy chain Minimum Lux 0.1lux White Balance ATW / Manual / Auto/ Indoor / Outdoor / Push Exposure Auto / Manual / Iris / Bright Focus...
-
Page 29: Camera Interface
CAMERA INTERFACE 1 Camera Lens 7 Installation Hole 13 HDMI Port 2 Camera Base 8 RS232 Control Port (input) 14 3G-SDI Port 3 IR Receiver Panel 9 RS232 Control Port (output) 15 NDI|HX Port 4 Power Indicator Light 10 Line In Port 16 DC12V Plug 5 Dial Switch 11 Upgrade Port... -
Page 30: Camera Dimension (Mm)
CAMERA DIMENSION (MM) Page | 30... -
Page 31: Visca
VISCA VISCA IN (RS232 PORT) 3.3.1 V_IN V_OUT VISCA IN RS485 A(+) IR OUT IR OUT B(-) VISCA IN &Mini DIN Connection VISCA IN & DB9 Connection Camera VISCA IN Mini DIN Camera VISCA IN Windows DB-9 A(+) A(+) IR OUT IR OUT B(-) B(-) -
Page 32: Serial Port Configuration
SERIAL PORT CONFIGURATION 3.3.3 Parameter Value Parameter Value Baud rate 2400/4800/9600/115200 Stop Bit 1bit Start Bit 1 bit Check Bit None Date Bit 8 bit VISCA PROTOCOL 3.3.4 1 - C AMERA ETURN OMMANDS Ack/Completion Message Command Packet Note z0 41 FF Returned when the command is accepted Completion z0 51 FF... - Page 33 Command type Function Command 8x 01 04 Tele (Variable) 07 2p FF p=0(low)~7(high) 8x 01 04 Wide (Variable) 07 3p FF 8x 01 04 Direct 47 0p 0q pqrs: Zoom Position (0(wide) ~0x4000(tele)) 0r 0s FF 8x 0A 04 47 0t 0p t: spd 0~7 Direct with speed 0q 0r 0s...
- Page 34 Command type Function Command 8x 01 04 35 04 FF 8x 01 04 Manual 35 05 FF 8x 01 04 Sodium lamp 35 08 FF 8x 01 04 fluorescent 35 09 FF 8x 01 04 One Push Trigger 10 05 FF 8x 01 04 Reset 03 00 FF...
- Page 35 Command type Function Command 8x 01 04 Direct 4A 00 00 pq: Shutter Position (0~0x15) 0p 0q FF 8x 01 04 Reset 0B 00 FF 8x 01 04 Iris Setting(0~0xD) 0B 02 FF CAM Iris 8x 01 04 Down 0B 03 FF 8x 01 04 Direct 4B 00 00...
- Page 36 Command type Function Command 8x 01 04 02 02 FF 8x 01 04 Down 02 03 FF 8x 01 04 Direct 42 00 00 pq: Aperture Gain (0~0x0F) 0p 0q FF 8x 01 04 Reset 3F 00 pp 8x 01 04 CAM Memory pp: Preset Number(=0 to 127) 3F 01 pp...
- Page 37 Command type Function Command 8x 01 06 C2 02 FF CAM Zoom Display 8x 01 06 C2 03 FF 8x 01 04 CAM Freeze Freeze p: Freeze switch 3=OFF, 2=ON 75 0p FF CAM Preset 8x 01 04 Preset Freeze Set p: Preset Freeze switch 3=OFF, 2=ON Freeze Set 76 0p FF...
- Page 38 Command type Function Command 0n 0x 0y 8x 01 04 AD 0p 0q Gateway set 0r 0s 0m Set gateway to: pq.rs.mn.xy 0n 0x 0y 8x 01 04 Color adjust OFF Color adjust off B6 00 FF 8x 01 04 Color adjust ON Color adjust on B6 01 FF...
- Page 39 Command type Function Command 8x 01 06 01 VV WW 03 01 8x 01 06 01 VV Down WW 03 02 8x 01 06 01 VV Left WW 01 03 8x 01 06 01 VV Right WW 02 03 8x 01 06 01 VV Up left WW 01 01...
- Page 40 Command type Function Command 8x 01 06 03 VV Relative Position 0Y 0Y 0Y 0Y 0Z 0Z 0Z 0Z FF 8x 01 06 Home 04 FF 8x 01 06 Reset 05 FF 8x 01 06 07 00 0W 0Y 0Y 0Y 0Y 0Z 0Z W:1 Up Right 0:Down Left 0Z 0Z FF...
- Page 41 (0~0x05) CAM_3D_Inq 8x 09 04 53 FF y0 50 03 FF p:0: off 1: auto 2~5: noise level y0 50 00 FF Auto y0 50 01 FF Indoor mode y0 50 02 FF Outdoor mode CAM_WB Mode Inq 8x 09 04 35 FF y0 50 03 FF OnePush mode y0 50 04 FF...
- Page 42 y0 50 03 FF y0 50 02 FF CAM Picture Flip Inq 8x 09 04 66 FF y0 50 03 FF y0 50 0p 0q CAM_ID Inq 8x 09 04 22 FF pqrs: Camera ID 0r 0s FF CAM_DHCP Inq 8x 09 04 AE FF y0 50 pp FF y0 50 0p 0p...
-
Page 43: Visca Pan Tilt Absolute Value
VISCA PAN TILT ABSOLUTE VALUE 3.3.5 Pan Angle VISCA Value Tilt Angle VISCA Value -170 0xF670 0xFE50 -135 0xF868 0x0000 0xFAF0 0x01B0 0xFD78 0x0360 0x0000 0x510 0x0288 0x0510 0x0798 0x0990 VISCA PAN TILT SPEED VALUE 3.3.6 Pan(Degree/Second) Pan(Degree/Second)) Page | 43... -
Page 44: Visca Over Ip
VISCA OVER IP VISCA over IP means VISCA protocol transmit via IP, to reduce RS232/RS485 cable layout (the controller must support IP communication function). Communication port spec: • Control port: RJ45 Gigabit LAN • IP protocol: IPv4 • Transmit Protocol: UDP •... -
Page 45: Payload Type
PAYLOAD TYPE 3.4.2 Name Value Value Value (Byte 0) (Byte1) VISCA command 0x01 0x00 Stores the VISCA command VISCA inquiry 0x01 0x10 Stores the VISCA inquiry VISCA reply Stores the reply for the VISCA command and VISCA 0x01 0x11 inquiry, or VISCA device setting command VISCA device Stores the VISCA device setting command 0x01... -
Page 46: Delivery Confirmation
• VISCA device setting command Save VISCA equipment setting command packet. • Control command The following data is saved in control command payload Name Value Description RESET 0x01 Resets the sequence number to 0. The value that was set as the sequence number is ignored ERROR 0x0Fyy yy=01:Abnormality in the sequence number... - Page 47 Lost message Received message Status after Correspondence after for retransmission retransmission retransmission Command ACK message Command is Continue processing performed by retransmission Completion ERROR Command has been If the result by the completion message for the (Abnormality in the performed message is needed, retransmit by command sequence number)
-
Page 48: Sequence Chart
SEQUENCE CHART 3.4.4 Sequence chart when command lost Sequence chart when returned message lost Note: Do not set IP address, sub net mask, gateway paramter in VISCA over IP command, otherwise it will cause network to break off. Due to change in these parameters, network will be in off status. Page | 48... -
Page 49: Pelco
PELCO PELCO-D PROTOCOL COMMAND LIST 3.5.1 Function Byte1 Byte2 Byte3 Byte4 Byte5 Byte6 Byte7 0xFF Address 0x00 0x08 Pan Speed Tilt Speed Down 0xFF Address 0x00 0x10 Pan Speed Tilt Speed Left 0xFF Address 0x00 0x04 Pan Speed Tilt Speed Right 0xFF Address... - Page 50 Zoom In 0Xa0 Address 0x00 0x20 0x00 0x00 0Xaf Zoom Out 0Xa0 Address 0x00 0x40 0x00 0x00 0Xaf Focus Far 0Xa0 Address 0x00 0x80 0x00 0x00 0Xaf Focus Near 0Xa0 Address 0x01 0x00 0x00 0x00 0Xaf Stop 0Xa0 Address 0x00 0x00 Pan Speed Tilt Speed...
-
Page 51: Section 4 About Ndi
It is no surprise, then, that efficient, economical, non-linear video transfer in IP space is augmenting and even superseding traditional linear connection methods (SDI, HDMI, etc.) and systems. NewTek NDI ® (Network Device Interface) makes it easy to share high-quality video over a local Ethernet network. -
Page 52: Ndi Benefits
NDI BENEFITS The NDI concept is simple: You supply a video source – in this case, an NDI stream from your NewTek NDI|HX-PTZ3. At that point, anyone else on that network can see it and work with it just as if it was locally connected to their system (unless you deliberately limit access). - Page 53 FIGURE 22 FIGURE 23 • Afterward, you will see an entry named NewTek NDI Video (or Audio) listed along with any other qualified sources available to applications like Skype™, etc. Page | 53...
-
Page 55: Section 5 End User License Agreement
The computer program(s) (the "Software") installed and/or enclosed with the Product is licensed, not sold, to you by NewTek, Inc. (NEWTEK) for use only under the terms of this License, and NEWTEK reserves any rights not expressly granted to you. You own the any disk(s) and/or tangible media that might be enclosed... - Page 56 Educational license. Any non-educational use will be considered, as with other uses in contravention of this license, copyright infringement. You may determine whether it is a Limited Educational License by referring to the serial number and letter code. **Call NewTek to determine the nature of the license for this Product.
- Page 57 This License is effective until terminated. This License will terminate immediately without notice from NEWTEK, or by judicial resolution, if you fail to comply with any provision of this License. Upon such termination you must destroy the Software, all accompanying written materials and all copies thereof. You may also terminate this License at any time by destroying the Software, all accompanying written materials and all copies thereof.
- Page 58 LightWave, LightWave 3D® and LightWave CORE. The list is not intended to be exhaustive, and others are or may be claimed by NewTek related to these or other NewTek products, some of which may be found at www.newtek.com. All other brand names, product names, or trademarks belong to their respective holders.
- Page 59 PORTFOLIO, WHICH LICENSE IS AVAILABLE FROM MPEG LA, L.L.C., 250 STEELE STREET, SUITE 300, DENVER, COLORADO 80206. MPEG-4; THIS PRODUCT IS LICENSED UNDER THE MPEG-4 VISUAL PATENT PORTFOLIO LICENSE FOR THE PERSONAL AND NON-COMMERCIAL USE OF A CONSUMER FOR (i) ENCODING VIDEO IN COMPLIANCE WITH THE MPEG-4 VISUAL STANDARD (“MPEG-4 VIDEO”) AND/OR (ii) DECODING MPEG-4 VIDEO THAT WAS ENCODED BY A CONSUMER ENGAGED IN A PERSONAL AND NON-COMMERCIAL ACTIVITY AND/OR WAS OBTAINED FROM A VIDEO PROVIDER LICENSED BY MPEG LA TO PROVIDE MPEG-4 VIDEO.
- Page 60 (i) If use of the Software is discontinued to the installation specified in the purchase/delivery order and the US Government desires to use it at another location, it may do so by giving prior written notice to NEWTEK, specifying the type of computer and new location site. US Governmental personnel using this Software, other than under a DoD contract or GSA Schedule, are hereby on notice that use of this Software is subject to restrictions which are the same as or similar to those specified.
- Page 61 Skype client software thereunder will be governed by the standard Skype™ Terms of Use. NewTek is not responsible for that license nor a party to it and you agree to be bound by it and comply with the Skype™ Broadcast Terms of Use as found at:...
- Page 62 (or operation) of any of the Product. NewTek’s liability is limited solely to the repair or replacement of the defective Product. NewTek is under no obligation or responsibility to enhance or update the product.
- Page 63 Blvd., San Antonio, TX, USA, 78249 to receive a Returned Materials Authorization (RMA), and deliver the product along with proof of ownership (such as the original invoice, or a photocopy) to NewTek. You will be responsible for any costs associated with the delivery to and from our service center.
-
Page 64: Credits
Trademarks: NDI, TriCaster, 3Play, TalkShow, Video Toaster, LightWave 3D, and Broadcast Minds are registered trademarks of NewTek, Inc. MediaDS, Connect Spark, LightWave, and ProTek are trademarks and/or service marks of NewTek, Inc. All other products or brand names mentioned are trademarks or registered trademarks of their respective holders. - Page 66 Copyright © 1990-2022 NewTek Inc. San Antonio TX USA...
Need help?
Do you have a question about the NDI HX PTZ3 and is the answer not in the manual?
Questions and answers