Table of Contents
Advertisement
Quick Links
Advertisement
Table of Contents

Subscribe to Our Youtube Channel
Summary of Contents for rollibot M6
- Page 1 User Manual In order to continue serving our customers and providing the best products, our product information including our user manuals may receive updates from time to time. Please check our website for the latest user manuals and product materials. Ver 1.0 8/12/19...
-
Page 2: Table Of Contents
7.2 – Changing the rear mop ..............14 7.3 – Cleaning the mop ................14 Section 8 : Specification ........... 15 Section 9 : Troubleshooting ..........15 Section 10 : Warranty ............16 10.1 – Violation ..................16 10.2 – Information ..................16 RolliBot 2-in-1 Electric Mop... - Page 3 Dear Rollibot Owner, Welcome to the new age of cleaning! The M6 is the modular powerhouse mop that leaves your home sparkling clean.. Whether you need to tidy up your once, home, use the M6 to take your cleaning to new heights.
-
Page 4: Section 1 : Safety Warnings & Guidelines
Section 1 : Safety Warnings & Guidelines 1.1 – Introduction This user manual will guide you through the functions and usage of your RolliBot electric mop. It is important that you follow all instructions and take extra caution on all notes that appear throughout this manual. -
Page 5: Battery & Charging
Please ensure the adapter is fully inserted and/or connected to the wall outlet • before charging. Improper insertion may result in electric shock, short circuiting, smoke, or fire. • M6 mop may not be used with any type of power converter or extension cord. • • Store the M6 mop indoors at a dry location with stable temperature. RolliBot 2-in-1 Electric Mop... -
Page 6: Disposal At End-Of-Life
The substances contained inside the battery present chemical risks to the environment. The recommended disposal for any RolliBot mop at its end-of-life is to dispose of the entire unit at or through an e-waste recycling center, program, or facility. -
Page 7: Section 2 : Box Content
Section 2 : Box Content Handle Stem Tube Adapter Battery Section Main Body Rear Mops x 2 Rotation Mops x 4 User Manual x 1 RolliBot 2-in-1 Electric Mop... -
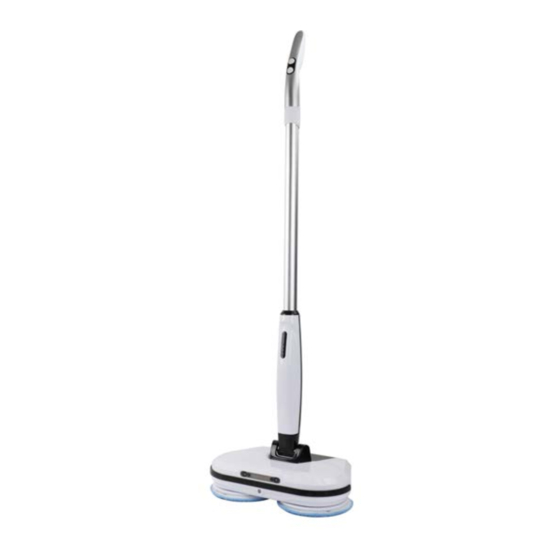
Page 8: Section 3 : Product Overview
Section 3 : Product Overview Spray Button Power/Speed Button Handle Stem Tube Battery Compartment Discharge LED Charging Port Battery LED Indicator Battery Section Rotation Mop Headlight Water Tank Water Sprayer Main Body Rear Mop RolliBot 2-in-1 Electric Mop... -
Page 9: Section 4 : Installation
Lock Hole Battery Section With the handled and stem assembled, insert the battery section into the main body. The peg on Lock Hole the main body should pop in place with a "click" sound once affixed. Main Body RolliBot 2-in-1 Electric Mop... -
Page 10: Section 5 : Using The Battery
• The charging time is approximately 2.5 hours. Charging longer than that may affect battery life and/or performance. • Use only the adapter provided with your Rollibot mop. If you have lost or misplaced your charger, contact customer support to obtain a replacement. -
Page 11: Changing The Battery
5.2 – Changing the battery The Rollibot electric mop's battery can be removed and changed as needed. Step 1. Use a screwdriver (not included) to loosen the screw on battery compartment, then remove the cover. Step 2. Disconnect the battery from the connector and remove the battery pack. -
Page 12: Section 6 : Using The Electric Mop
2. Press the power button once to turn on the mop. It will start in low-speed mode. Press the power button again to cycle to a faster speed mode. To stop, press the power button a third time. Power Button/ Speed Switch 12 RolliBot 2-in-1 Electric Mop... -
Page 13: Wet Mop
2. Press the power button once to turn on the mop. It will start in low-speed mode. Press the power button again to cycle to a faster speed mode. 3. Press the spray button to spray water. 4. To stop, press the power button a third time. Spray Water Power/Speed Button Water Outlet RolliBot 2-in-1 Electric Mop... -
Page 14: Section 7 : Maintain
Button 7.3 – Cleaning the mop Clean the dirty mops with the water below 40 C. The mops are dishwasher safe. (Do not use high temperature settings.) For avoid damaging floor, remove any hard objects picked up by the mops before working. 14 RolliBot 2-in-1 Electric Mop... -
Page 15: Section 8 : Specification
Restart after 30 normal operation minutes. If the information in this section did not resolve your issue, please visit our website at www. rollibot.com or contact customer support at 1-844-585-6295. RolliBot 2-in-1 Electric Mop... -
Page 16: Section 10 : Warranty
This Warranty is for one (1) replacement only of like-items and does not cover items out of production if the product is no longer made or stocked. This Warranty is not assignable or transferable. The original purchaser may call RolliBot’s toll-free number at 1-844-585-6295 for service request. - Page 17 SOME STATES DO NOT ALLOW THE EXCLUSION OR LIMITATION OF INCIDENTAL OR CONSEQUENTIAL DAMAGES, SO THE ABOVE LIMITATION OR EXCLUSION MAY NOT APPLY TO YOU. THE DURATION AND REMEDIES OF ALL IMPLIED WARRANTIES, INCLUDING WITHOUT LIMITATION THE WARRANTIES OF MERCHANTABILITY. RolliBot 2-in-1 Electric Mop...
- Page 18 Copyright © 2019. Rollibot, LLC. All Rights Reserved...
Need help?
Do you have a question about the M6 and is the answer not in the manual?
Questions and answers