
Related Manuals for Nippon Genetics FastGene

Summary of Contents for Nippon Genetics FastGene
- Page 1 GP-04LED Manual FAS-BG LED BOX NIPPON Genetics EUROPE GmbH Mariaweilerstraße 28-30, 52349 Düren, Germany, www.nippongenetics.eu Tel: +49 2421 5549 60, Fax: +49 2421 55496 11, E-Mail: info@nippongenetics.de,...
- Page 2 NIPPON Genetics EUROPE FastGene FAS-BG LED BOX ®...
-
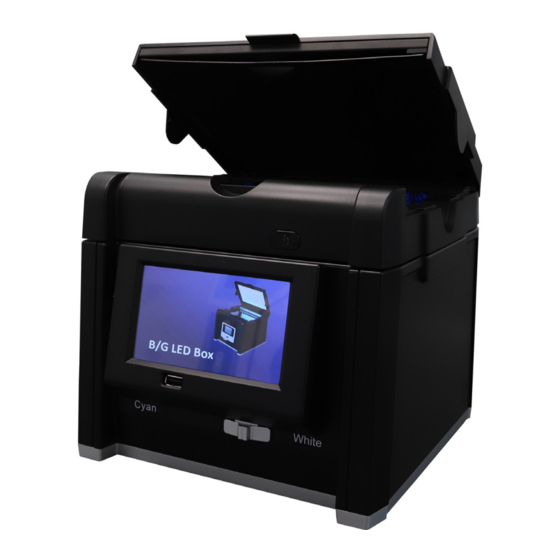
Page 3: Table Of Contents
P. 9 3.3 Agarose gel scanning (Blue/Green LED light)..........P. 9 3.3.1 Gel positioning....................P. 9 3.3.2 Exposure time correction................. P. 10 3.3.3 Image viewer menu and external storage transfer........P. 11 3.4 DNA extraction from agarose gels..............P. 13 3.5 Membrane/Petri dish scanning (White epi light)........... P. 14 3.6 Colorimetric gel scanning (White LED light transilluminator)....P. 15 3.7. General settings....................P. 16 3.8. Connecting an external printer................. P. 17 3.9. Connecting an external (touch) monitor............P. 18 NIPPON Genetics EUROPE FastGene FAS-BG LED BOX ®... - Page 4 NIPPON Genetics EUROPE FastGene FAS-BG LED BOX ®...
-
Page 5: General Information
EUROPE will repair or replace the defective parts at its discretion without charge. The following defects, however, are specifically excluded: - Defects caused by improper operation. - Repair or modification done by anyone other than NIPPON Genetics EUROPE or an authorized agent. - Damage caused by substituting alternative parts. - Use of fittings or spare parts supplied by anyone other than NIPPON Genetics EUROPE. - Damage caused by accident or misuse. - Damage caused by disaster. - Corrosion caused by improper solvent or sample. For any inquiry or request for repair service, contact NIPPON Genetics EUROPE or your local distributor. Please send a message containing information about the model and serial number of your instrument. 1.2 Regulatory notice IMPORTANT: This NIPPON Genetics EUROPE instrument is designed and certified to meet safety standards and EMC regulations. Certified products are safe to use when operated in accordance with the instruction manual. This instrument must not be modified or altered in any way. Alteration of this instrument will: Void the manufacturer’s warranty Void the safety and EMC certification Create a potential safety hazard NIPPON Genetics EUROPE is not responsible for any injury or damage caused by the use of this instrument for purposes other than those for which it is intended, or by modifications of the instrument not performed by NIPPON Genetics EUROPE or an authorized agent. NIPPON Genetics EUROPE FastGene FAS-BG LED BOX ®... -
Page 6: Safety Information
® illuminators will normally not damage samples or eyes and skin of the user. However, prolonged exposure of human naked eyes with light irradiation in the blue spectrum may increase the probability of suffering from retina diseases. Therefore, we recommend using the amber filter shield included in the package, when handling the Blue/Green LED transilluminator while the FastGene FAS-BG LED BOX is open and the Blue/ ® Green LED light is turned on. Operate the FAS-BG LED BOX only if it is connected to a safety socket. Place the unit on a level surface with minimal chance of dropping. 1.4 Contact information NIPPON Genetics EUROPE GmbH Mariaweilerstraße 28-30 52349 Düren, Germany Tel: +49 2421 554960 Fax: +49 2421 55496 11 E-Mail: info@nippongenetics.de For more detailed product information, contact details, questions, or trouble shooting please visit our website www.nippongenetics.eu or contact us via info@nippongenetics.de. FastGene is a registered trademark of NIPPON Genetics EUROPE GmbH. ® NIPPON Genetics EUROPE FastGene FAS-BG LED BOX ®... -
Page 7: Technical Specifications
Image format TIFF, JPEG and PNG Exposure time 0.2 - 2 sec, 21 exposure steps Light sources Light sources Blue/Green LED transilluminator White epi light White LED light transilluminator Transilluminated area 16 x 11,5 cm Display/Software/Connections Display 5" Color LCD Touch Panel Software Inbuilt control software Connections 2x USB Port (1x front, 1x back) 1x HDMI Port Thermal printer support General Info Power 12V, 4.16A Dimensions (H x D x W) 23 x 25.4 x 20.7 cm Gel Tools Amber filter shield Weight 3.2 kg NIPPON Genetics EUROPE FastGene FAS-BG LED BOX ®... -
Page 8: System Operation
Black velvet sheet Amber filter shield Black velvet sheet Upper lid Power button 5" LCD Touch Screen and control menu USB 2.0 port Light source switch USB 2.0 port DC power jack HDMI port NIPPON Genetics EUROPE FastGene FAS-BG LED BOX ®... -
Page 9: Initial Setup
Connect the included DC adapter to the back of the unit then plug into power outlet. Push the power button. Initiate the desired application Agarose gel scanning (Blue/Green LED light) (section 3.3) DNA extraction from gel (section 3.4) Membrane/Petri dish scanning (White epi light) (section 3.5) Colorimetric gel scanning (White LED light) (section 3.6) 3.3 Agarose gel scanning (Blue/Green LED light) 3.3.1 Gel positioning Open the lid of the FastGene FAS-BG LED BOX. Slide the black velvet sheet into the groove of the lid to ® cover the white light area of the lid (see figure below). The black velvet sheet reduces the background. Upper lid Insert black velvet sheet Place the gel tray with the agarose gel on the view area and close the lid. Note: the view area is water- proof. Hence, the usage of the gel tray is not obligatory. NIPPON Genetics EUROPE FastGene FAS-BG LED BOX ®... -
Page 10: Exposure Time Correction
Slide the light source switch on the front side of the instrument to the cyan light source (see figure below). Press „B/G“ (Blue/Green LED light) on the control menu, displayed on the right side of the screen. This will turn on the Blue/Green LED light. A live image of the gel will be displayed on the screen. Capture Exposure back Continuous Capture Image Setting Viewer 3.3.2 Exposure time correction Use the up and down buttons on the control menu to change and correct the exposure time until the appro- priate exposure of the gel is reached. The exposure time can be adjusted from -10 (short exposure time) to +10 (long exposure time). The middle button displays the current exposure level (e.g. -2) NIPPON Genetics EUROPE FastGene FAS-BG LED BOX ®... -
Page 11: Image Viewer Menu And External Storage Transfer
3.3.3 Image viewer menu and external storage transfer Image Press the "Image Viewer" button to enter the image viewer menu for viewing, Viewer printing and transferring recorded images. The top of the image viewer menu displays the name, exposure level, date and time of each currently displayed image. Scroll through the recorded images by pressing the left and right buttons. 20220202001 Image name, exposure level, EV: -2 date and time 2022/02/02 10:23:43 < > Scroll through recorded images Save Save all Rename Negative Print Delete Delete All Zoom In Zoom Out Return NIPPON Genetics EUROPE FastGene FAS-BG LED BOX ®... - Page 12 Insert an external storage device in one of the two USB-ports (front or back) of the FAS-BG LED BOX. Press "Save" to transfer the currently displayed image Save Save all to the external storage device. Press "Save all" to transfer all images currently stored in the internal storage. To change the name of the image press "Rename". The image name can contain Rename a maximum of 15 characters. Press "Negative" to display the current image in negative colours. Press "Save" Negative Save to transfer the negative image version to the external storage device. If an external printer is connected to the FAS-BG LED BOX via USB (see section Print 3.8), the currently displayed image can be directly printed by pressing "Print". Press "Delete" to delete the currently displayed image. Press "Delete All" Delete Delete All to delete all images currently stored in the internal storage. Use the „Zoom in“ and „Zoom out“ buttons to enlarge a specific area of the gel. Please note that the zoom function can only be used for viewing purposes and Zoom In Zoom Out an enlarged image view cannot be saved or transferred. Press "Return" to return to the previous display menu. Return NIPPON Genetics EUROPE FastGene FAS-BG LED BOX ®...
-
Page 13: Dna Extraction From Agarose Gels
3.4 DNA extraction from agarose gels The FastGene FAS-BG LED BOX is equipped with an amber filter shield to filter out the Blue/Green LED ® excitation light. The filter enables visualization of DNA bands for the extraction of DNA from the agarose gel. Slide the light source switch on the front side of the instrument to the cyan light source. Open the upper lid of the FAS-BG LED BOX. The Blue/Green LED light will automatically switch off. Position the central opening of the amber filter shield in the hanging tab. Make sure the two bent areas are placed against the lid. Amber filter shield Upper lid Turn the Blue/Green LED light back on by pressing the "B/G" button. back Excise visible DNA fragments from the gel by looking through the amber filter shield. NIPPON Genetics EUROPE FastGene FAS-BG LED BOX ®... -
Page 14: Membrane/Petri Dish Scanning (White Epi Light)
3.5 Membrane/Petri dish scanning (White epi light) Open the lid of the FastGene FAS-BG LED BOX. Slide the black velvet sheet into the groove of the lid to ® cover the white light area of the lid (see figure below). The black velvet sheet reduces the background. Upper lid Insert black velvet sheet Place the membrane/Petri dish on the view area and close the lid. Slide the light source switch on the front side of the instrument to the white light source. Press "WL epi" on the control menu, displayed on the right side of the screen. back This will turn on the white epi light. A live image of the membrane/Petri dish will be displayed on the screen. Refer to section 3.3.2 for expo- sure time correction and to section 3.3.3 for image viewing and external storage transfer. NIPPON Genetics EUROPE FastGene FAS-BG LED BOX ®... -
Page 15: Colorimetric Gel Scanning (White Led Light Transilluminator)
3.6 Colorimetric gel scanning (White LED light) Open the lid of the FastGene FAS-BG LED BOX. Remove the black velvet sheet from the inside of the lid. ® Upper lid Remove black velvet sheet Place the transparent colorimetric (protein) gel on the view area and close the lid. Note: the view area is water-proof. Slide the light lource switch on the front back side of the instrument to the white light source (see section 3.5). Press "WL back" on the control menu, displayed on the right side of the screen. This will turn on the white LED light transilluminator. A live image of the colorimetric gel will be displayed on the screen. Refer to section 3.3.2 for exposure time correction and to section 3.3.3 for image viewing and external storage transfer. NIPPON Genetics EUROPE FastGene FAS-BG LED BOX ®... -
Page 16: General Settings
3.7 General settings Setting Press "Setting" to get to the general settings menu. The general settings menu Date Update S/W Sleep Mouse Time displays the following screen: Save Format: JPEG Color Type: Color The device software can be updated by pressing "Update S/W". Press "Sleep" to adjust the time after which the FAS-BG LED BOX goes into sleeping mode. You can adjust the time between 1 min, 5 min, 10 min, 30 min or never. Press "Date Time" to set the date and time on the device. It is possible to connect an external mouse to the FAS-BG LED BOX via one of the two USB-ports. Activate the "Mouse" button to use the external mouse and deactivate the "Mouse" button to use the device via touch screen. Mouse inactive Mouse active Mouse Mouse Press the button next to "Save Format" to set the image file type. The currently used file type is displayed on the button. Image files can be saved as TIF, JPEG or PNG. JPEG Press the button next to "Color Type" to set the image color. The currently used image color type is display- ed on the button. The image color can be set to Color or Gray. NIPPON Genetics EUROPE FastGene FAS-BG LED BOX ®... -
Page 17: Connecting An External Printer
3.8 Connecting an external printer Image Connect the external printer to the FAS-BG LED BOX via the USB-port. Viewer Press the Image viewer button. Press "Print" in the image viewer control menu to directly print the displayed image on the external printer. 20220202001 EV: -2 2022/02/02 10:23:43 < > Save Save all Rename Negative Print Delete All Delete Zoom In Zoom Out Return NIPPON Genetics EUROPE FastGene FAS-BG LED BOX ®... -
Page 18: Connecting An External (Touch) Monitor
3.9 Connecting an external (touch) monitor Connect the external monitor to the HDMI-port of the FAS-BG LED BOX. Note that the monitor should be connected before switching on the device. The active display automatically switches to the external monitor. For using an external touch display connect it via the HDMI-port and USB-port to the FAS-BG LED BOX. NIPPON Genetics EUROPE FastGene FAS-BG LED BOX ®... - Page 19 NIPPON Genetics EUROPE FastGene FAS-BG LED BOX ®...
- Page 20 NIPPON Genetics EUROPE GmbH +49 2421 55496 0 info@nippongenetics.de +49 2421 55496 11 www.nippongenetics.eu...
Need help?
Do you have a question about the FastGene and is the answer not in the manual?
Questions and answers