Table of Contents
Advertisement
Quick Links
Advertisement
Table of Contents

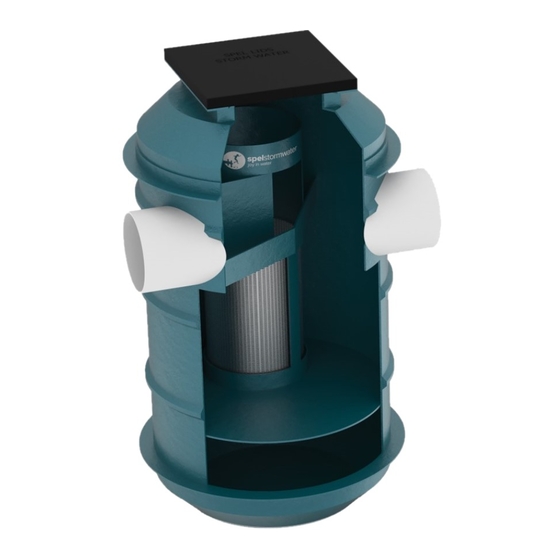
Summary of Contents for SPEL Vortceptor
- Page 1 Installation Manual SPEL Vortceptor ® spel.com.au...
-
Page 2: Table Of Contents
GA to validate any future warranty claim. The warranty in effect at the time of delivery will apply and is available from SPEL Environmental. Installation Manual Vortceptor... -
Page 3: Installation Checklist
Level and adjust the Vortceptor to suit the main drain pipework and the Diversion Chamber inlet void. The invert levels of the inlet and outlet pipework is to match the invert of the inlet and outlet chute of the Vortceptor. YES / NO... - Page 4 Use a Sikaflex bead around the rebate on the top of the Diversion Chamber YES / NO to ensure a satisfactory seal between cover slab (Lid) and chamber. Lift and install cover slab, ensure manhole void / cover is on Vortceptor side of YES / NO the chamber.
-
Page 5: Handling And Preparation
(table 1). and environmental contamination. Anti floatation ring and ballast designs in (Table 1) meet Australian Standard Code S3600A. (Dead load resisting floatation have a factor of safety of 0.9 applied.) spel.com.au... -
Page 6: Bed And Backfill
High - Considerable compactive effort. In-place density >/= 95% standard compaction, or >/= 70% modified compaction • The difference in the “dumped” and “slight” degree of compaction values are significant and are based on the method of construction, not the measured densities. Installation Manual Vortceptor... -
Page 7: Wetwell Installation With A
All piping must have a flexible connector installed directly on the fitting or accessory to allow for a minimum 15mm differential settlement between the wetwell and the pipe. If more than 15mm differential settlement is expected, choose a flexible connector designed for the expected settlement. spel.com.au... -
Page 8: Top Pad
/ or traffic loads must be supported by the soil around the wetwell and not by the wetwell itself. TRAFFICABLE MANHOLE Ensure cover is installed to manufacturers instructions. SPEL drawing is a guide (page 9). Installation Manual Vortceptor... - Page 9 spel.com.au...
- Page 10 Installation Manual Vortceptor...
-
Page 11: Wet Hole Installation
Use only enough ballast to sink the tank. One tank is level and ballasted, carefully place concrete ballast as per section C then processed to sections D, E (if applicable), F, G and H. spel.com.au... -
Page 12: Table 1
1 @ 3400mm Dia. N16 & 1000 1 @ 3800mm Dia. N16 3500 1 @ 3900mm Dia. N20 & 1000 1200 1 @ 4800mm Dia. N20 4000 1 @ 4400mm Dia. N20 & 1100 1400 1 @ 4900mm Dia. N20 FIGURE 1 Installation Manual Vortceptor... - Page 13 spel.com.au...
- Page 14 Email: sales@spel.com.au spel.com.au SPEL Stormwater accepts no responsibility for any loss or damage resulting from any person acting on this information. The details and dimensions contained in this document may change, please check with SPEL Stormwater for confirmation of current specifications.
Need help?
Do you have a question about the Vortceptor and is the answer not in the manual?
Questions and answers