Table of Contents
Advertisement
Quick Links
1
Start up
art up
st
1. Insert the Nano-SIMcard and wait for about 10 seconds for the device to bootup
h
d
d
2. Call the unit, and the unit will pick up the call
3. Wait for unit to send replies, sometimes it can take a short amount of time.
4. Close the unit with screwdriver, gently tighten
Commands: - variable
Voice during phone
call (Gain)
Activation of VOX
SNDSENS
detection
Factory settings
RESET
Status of device
STATUS
Password settings
PASSWORD
Turn off LED diodes
LEDMSK
www.stealthtronic.com | sales@stealthtronic.com
f
b
d f
h d
0 -OFF
1-100 – The lowest sensitivity
000 – Turn off
001 - 999 – set number
possibility
0 – OFF
15- ON
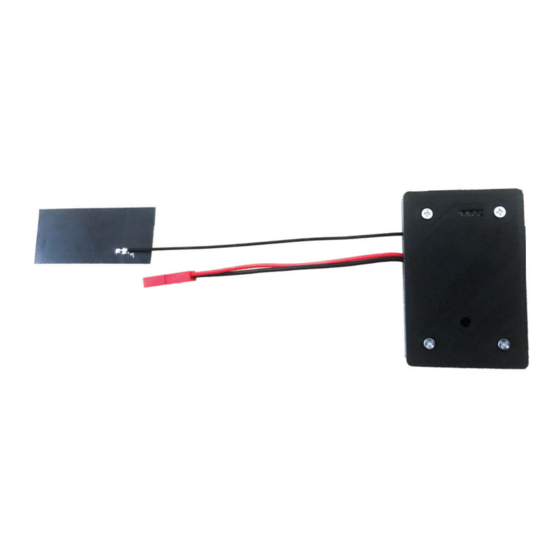
ANTENA
Charging cable
GLITE PRO 2.0
b
Simply, for increasing the signal from the micro-
phone, you use following commands, pressing on
the keypad: #01, #02, to #09 ... wait in between the
pressing of DTMF tone.
The number refl ects the "dB" in the surrounding,
so if you will set it to 30 you will need noise of 30
dB to activate it. Recommend it for activation by
voice is 30-50db
Factory settings = SLP0, SLPINT15, PWRINT2,
LEDMSK15, MOVESENS0, SNDSENS0
If you decide to activate password you will have to
use it for further communication with the device.
For example, if you set PASSWOD777 and you will
want to change the sensitivity you will need to
do so like this 777SNDSENS50
You will turn off the led diodes by sending to the
device LEDMSK0
LED diodes can be turned off
4 screws had to be removed
for placing simcard
user manual
Advertisement
Table of Contents

Summary of Contents for StealthTronic GLITE PRO 2.0
- Page 1 GLITE PRO 2.0 Start up art up 1. Insert the Nano-SIMcard and wait for about 10 seconds for the device to bootup 2. Call the unit, and the unit will pick up the call 3. Wait for unit to send replies, sometimes it can take a short amount of time.
- Page 2 GLITE PRO 2.0 Top cover, carefully remove. It is attached to the wires. ANTENA SIM card slod Charging cable Screws have to be unscrewed before placing SIMcard Charging micro USB Status example for FW1.3 Diodes explanation: STATUS: = indication of communication with another device, when blinking red it FW:1.3,BAT:60%,SLP0,SLPINT15,PWRINT2,SNDSENS0,MOVESENS30...
Need help?
Do you have a question about the GLITE PRO 2.0 and is the answer not in the manual?
Questions and answers