
Related Manuals for Fri-Jado TG 4M

Summary of Contents for Fri-Jado TG 4M
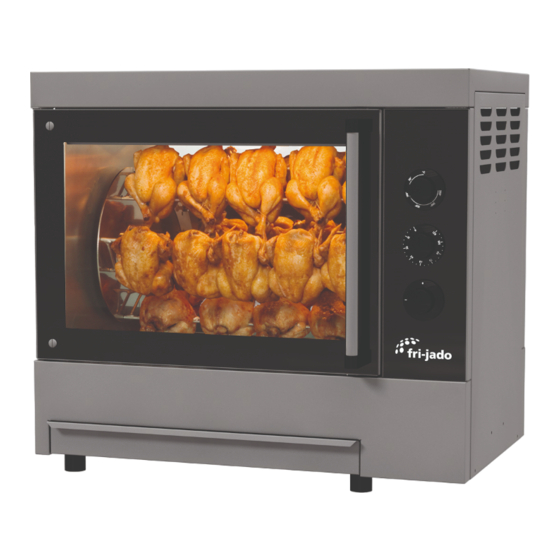
- Page 1 USER MANUAL TG 4M WARNING Read the instructions before using the machine. EN (Original Instruction) 9124177 / 2106...
- Page 2 KEEP THIS USER MANUAL FOR FUTURE USE © 2021 Fri-Jado B.V., Oud Gastel, The Netherlands. We advise you to contact your supplier for the guarantee period and conditions. Further we refer to our General Terms and Conditions for Sales and Delivery that are available upon request.
-
Page 3: Table Of Contents
CONTENTS INTRODUCTION ......................5 General ..........................5 Identification of the unit ..................... 5 Pictograms and symbols ....................5 Safety instructions ......................6 1.4.1 General ........................6 1.4.2 Moving ......................... 6 Hygiene ..........................7 Service and technical support ................... 7 Storage ..........................7 Disposal .......................... - Page 4 Monthly Cleaning ......................19 Cleaning guidelines for non-stick coated surfaces ............20 MALFUNCTIONS AND SERVICE .................. 21 Replace the mains cord ....................21 Adjust the door........................ 21 Replace a lamp ....................... 22 TECHNICAL SPECIFICATIONS ..................23 4 / 24...
-
Page 5: Introduction
INTRODUCTION General This manual is intended for the user of the TG (Turbo Grill). The features and controls are being described, along with directions for the safest and most efficient use, in order to guarantee a long life of the unit. All pictograms, symbols and drawings in this manual apply to all TG models. -
Page 6: Safety Instructions
Safety instructions WARNING The outside of the unit can be very hot. In particular the windows, top and fat tray. WARNING The maximum load on top of the unit may never exceed 50 kg (110 lbs). WARNING Risk of slippery floor: Spills may cause slippery surfaces, clean-up promptly. WARNING See installation instructions for grounding requirements. -
Page 7: Hygiene
Hygiene The quality of a fresh product always depends on hygiene. Especially grilling products. With the risk of salmonella contamination – especially for chicken products – you must make sure that grilled products can never be mixed with uncooked products. Also contact between grilled products and hands or tools that have been in contact with raw chicken meat, must be avoided at all times. -
Page 8: Description Of The Unit
DESCRIPTION OF THE UNIT Technical description The TG uses a combination of direct infra-red radiation and convection heat. The rotor is being wheeled by a maintenance-free motor with a gear box. The fan provides an equally divided heat. The glass panes are equipped with a heat reflecting layer to keep the heat inside the grill. -
Page 9: Installation And First Use
INSTALLATION AND FIRST USE All packing materials used for this unit are suited for recycling. After unpacking, check the state of the unit. In case of damage, store the packing material, and contact the transporter within fifteen working days after receiving the goods. Unpacking the unit Your unit is packed in a plastic container, protective corners and a carton box around it. -
Page 10: First Use
• Place the bottom plates in the grilling compartment. First use When using the unit for the first time, to remove the metal odour that will appear at first use, the unit must be heated at the maximum temperature (250°C/482°F) for at least half an hour. Clean the interior thoroughly with soap suds. -
Page 11: Operation And Use
OPERATION AND USE WARNING The outside of the unit can be very hot. In particular the windows, top and fat tray. Control Panel The dial on the thermostat is graduated from 65 to 250ºC (149 to Thermostat 482°F), and the temperature can be set by turning the thermostat dial a clockwise direction Oven time can be set between 1 and 120 minutes by turning the timer Timer... -
Page 12: Loading The Unit
Whole uncut chickens should always be grilled using the meat forks. This way their natural fat will baste each other, giving a perfectly slender cooking result. Refer to the You-Tube movie: “Fri-Jado instruction for binding and loading chicken”. 12 / 24... -
Page 13: Loading The Rotisserie Using V-Shape Spits (Accessory)
For preparing chicken or any other poultry, you can work as follows: Insert one point of the meat fork through the chest at the position of the wings. Insert the other point through the drum sticks. Don’t forget to include the wings. Leave some space between the products, for an even exposure and browning. -
Page 14: Grilling Time
Grilling time Grilling time depends on a number of factors: • The ambient temperature and draft in the direct vicinity of the unit. • Grilling temperature. • The initial product temperature. • The sort of meat (fat or lean) and with or without additives. •... -
Page 15: Taking Out The Meat Forks
This releases the meat fork. Take the meat fork at its other end and take it out of the unit. Remove the products from the meat fork. Refer to the You-Tube movie: “Fri-Jado instruction for unloading chicken from a rotisserie”. 4.5.2 Taking out the V-shape spit (accessory) For taking out the V-shape spit you can use the same principle as described in section 4.5.1. -
Page 16: Emptying Grease Drawer
Emptying grease drawer WARNING Check the grease drawer after each cooking process and empty already when about half full to avoid overflowing WARNING Grease will be hot immediately after cooking. Allow grease to cool or use extreme caution and wear insulated gloves or safety mitts. Open the door and slide the grease drawer out about 130 mm (5 inch). -
Page 17: Cleaning And Maintenance
CLEANING AND MAINTENANCE WARNING Appliance must be disconnected from the power supply during cleaning or maintenance and when replacing parts. Do not use aggressive or abrasive materials. These will damage the surface which will make it more difficult to remove dirt. Clean the inside, the removable parts and the accessories thoroughly with cleanser and water before putting the unit into use. -
Page 18: Weekly Cleaning
Fat collecting drawer • Empty the drawer first, refer to section 4.6 • Clean with ‘Fri-Jado Clean’ or hot water with an appropriate cleaning agent. The interior • Clean the interior with cleaning agent or hot water combined with an appropriate cleaning agent. -
Page 19: Monthly Cleaning
Monthly Cleaning WARNING Remove the power plug from the wall socket. Clean the ventilation grille, fan plate and fan blades thoroughly as described below. Grille • The fan grille can be removed by loosening two cap nuts . Behind the grille is the fan blade. •... -
Page 20: Cleaning Guidelines For Non-Stick Coated Surfaces
Cleaning guidelines for non-stick coated surfaces Several parts of your rotisserie may have a non-stick coating surface. Abrasion and caustic chemicals reduce the life of the coating. With proper care, the non-stick coating surface should provide a long life of easy-to-clean service. DO NOT do the following: Do not use scouring pads, steel wool, Scotch-Brite pads, plastic wash pads, or other abrasive cleaning aids (abrasive pads remove the coating over time significantly reducing the life of the... -
Page 21: Malfunctions And Service
MALFUNCTIONS AND SERVICE Before you contact your supplier/dealer in case of a malfunction, there are some items you can check yourself: • Is the power supply working properly? Check fuses and differential switch. • Has the timer clock been properly set? Item Malfunction Possible action... -
Page 22: Replace A Lamp
Replace a lamp WARNING Remove the power plug from the wall socket. WARNING Do not touch the lamps with bare hands. Use a clean cloth or paper tissues when replacing the lamp. Remove any moisture with alcohol or methyl spirits after the lamp has cooled down. Switch off the unit. -
Page 23: Technical Specifications
TECHNICAL SPECIFICATIONS WARNING Consult the identification plate to get the proper specifications of the unit. The electrical data may vary from country to country. European Models TG 4M SB Model TG 4M (solid back) Dimensions Width 825 mm 825 mm... - Page 24 Fri-Jado B.V. Fri-Jado Inc. Blauwhekken 2 1401 Davey Road, Suite 100 4751 XD Oud Gastel Woodridge IL 60517 The Netherlands Tel: +31 (0) 76 50 85 400 Tel: +1-630-633-7950 www.frijado.com 24 / 24...
Need help?
Do you have a question about the TG 4M and is the answer not in the manual?
Questions and answers