NETGEAR FSM726 Installation Manual
10/100/1000 mbps managed switch
Hide thumbs
Also See for FSM726:
- Datasheet (2 pages) ,
- Setup manual (156 pages) ,
- Software user's manual (152 pages)
Table of Contents
Advertisement
Quick Links
Advertisement
Table of Contents

Related Manuals for NETGEAR FSM726


Summary of Contents for NETGEAR FSM726
- Page 2 In the interest of improving internal design, operational function, and/or reliability, NETGEAR reserves the right to make changes to the products described in this document without notice. NETGEAR does not assume any liability that may occur due to the use or application of the product(s) or circuit layout(s) described herein.
- Page 3 Check the NETGEAR Web page at http://www.NETGEAR.com. • Call Technical Support in North America at 1-888-NETGEAR. If you are outside North America, please refer to the phone numbers listed on the Support Information Card that shipped with your switch. •...
-
Page 4: Table Of Contents
Step 4: Applying AC Power ...14 Step 5: Connecting Devices to the Switch ...15 Step 6: Installing a GBIC Module ...15 Step 7: Connecting to the Console Port to Manage the Switch (initial configuration) ...16 APPENDIX A: TECHNICAL SPECIFICATIONS ...19 APPENDIX B: TROUBLESHOOTING ...21 Troubleshooting Chart...21... - Page 5 Figures FIGURE 1-1. PACKAGE CONTENTS ... 8 FIGURE 2-1. FRONT PANEL OF THE FSM726 MANAGED SWITCH ... 9 FIGURE 2-2. BACK PANEL OF THE FSM726 MANAGED SWITCH... 9 FIGURE 2-3. WARNING! CREATING REDUNDANT PATHS BETWEEN NETWORK DEVICES... 10 FIGURE 3-1. ATTACHING MOUNTING BRACKETS ... 14 FIGURE 3-2.
-
Page 6: Chapter 1: Introduction
• Connect fiber and copper Gigabit Ethernet networks Your NETGEAR Model FSM726 Managed Switch can be free-standing, or rack mounted in a wiring closet or equipment room. It is IEEE-compliant and offers low latency for high-speed networking. It includes 24 auto-sensing 10/100 Ethernet/Fast Ethernet ports. -
Page 7: Features
Features • The following list identifies the key features of the NETGEAR Model FSM726 Managed Switch. • Twenty-four 10/100 Mbps auto sensing Fast Ethernet switching ports • Two Gigabit Ethernet ports that can be used either through the built-in RJ-45 ports for 10/100/1000 Mbps connectivity or through the GBIC modules for a variety of fiber connections •... - Page 8 • Automatic address learning function to build the packet-forwarding information table. The table contains up to 8,000 media access control (MAC) addresses (that is, the switch can support networks with as many as 8,000 devices). • Store-and-Forward transmission to remove bad packets from the network •...
-
Page 9: Package Contents
Managed Switches Resource CD • Warranty/Support information card If you ordered additional GBIC modules with your switch, they are provided in a separate package. If any item is missing or damaged, contact your place of purchase immediately. Figure 1-1. Package Contents... -
Page 10: Chapter 2: Physical Description
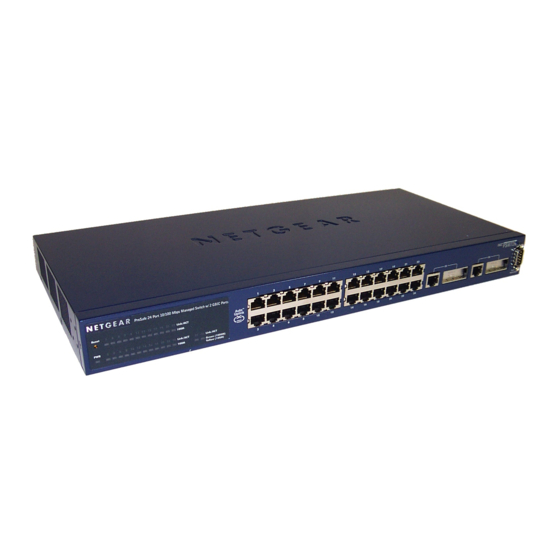
Reset Button Front and Back Panels Figures 2-1 and 2-2 show the key components on the front and back panels of the NETGEAR Model FSM726 Managed Switch The front panel contains LEDs, RJ-45 jacks, GBIC module bays, and a console port. The back panel has a standard AC power receptacle for accommodating the supplied power cord. -
Page 11: Gigabit Ethernet Ports (Rj-45 And Gbic Module Bay)
In Figure 2-3, for example, connecting two RJ-45 ports on a NETGEAR Model FSM726 Managed Switch to a router containing a 4-port switch creates a loop. The Spanning Tree protocol will prevent loops, if that advanced feature is enabled. -
Page 12: Led Descriptions
Two LED / Port Console Port Your NETGEAR Model FSM726 Managed Switch has a console port on the front panel. This port is labeled Console and is required for initial management configuration of the switch. It also lets you manage the switch using a directly connected VT-100 terminal, personal computer (PC), Apple Macintosh, or UNIX workstation. -
Page 13: Reset Button
In addition to using the console port, you can manage the switch using a Web browser or a Simple Network Management Protocol (SNMP) management program. Note: You must use the console port for the initial management configuration. For more information about console-port connections, see “Connecting to the Console Port” in Chapter 3 Installation. -
Page 14: Chapter 3: Installation
CHAPTER 3: INSTALLATION This chapter describes the installation procedures for your NETGEAR Model FSM726 Managed Switch. Switch installation involves the following steps: Step 1: Preparing the site Step 2: Installing the switch Step 3: Checking the installation Step 4: Applying AC power... -
Page 15: Step 2: Installing The Switch
Step 2: Installing the Switch You can install your NETGEAR Model FSM726 Managed Switch on a flat surface or in a standard 19-inch rack. Installing the Switch on a Flat Surface The switch ships with four self-adhesive rubber footpads. Stick one rubber footpad on each of the four concave spaces on the bottom of the switch. -
Page 16: Step 5: Connecting Devices To The Switch
2. Connect the 3-pronged end of the AC power adapter cable to a grounded 3-pronged AC outlet. When you apply power, the Power LED on the switch’s front panel will be Yellow, as it conducts a Power On Self Test (POST). -
Page 17: Step 7: Connecting To The Console Port To Manage The Switch (Initial Configuration)
To learn the IP address, you must first access the management via the console interface. After you power-up the switch for the first time, you can connect to it using a VT100/ANSI terminal or a PC, Apple Macintosh, or UNIX workstation that is directly connected to the switch’s console port. -
Page 18: Figure 3-4. System Information
GUI. Note: You need to know the IP address of the switch in order to use your browser or SNMP application to manage the switch. If you leave the switch IP mode in the default DHCP mode, the IP address of your switch could change, and you would have to reconnect to the switch via the console port to discover the new IP address. - Page 19 8. Select ‘C’ for Reset Switch, and confirm with a ‘Y’ To continue using the console interface to manage your switch, e.g. set GBIC ports, hit ‘ESC’ to go to the main menu. To set the GBIC ports, go to Set-up, then Port Configuration. Use your arrow keys to move the curser down to port 25 or 26, and hit the space bar to toggle between the RJ-45 port and the GBIC port.
-
Page 20: Appendix A: Technical Specifications
APPENDIX A: TECHNICAL SPECIFICATIONS This appendix provides technical specifications for the NETGEAR Model FSM726 Managed Switch. Network Protocol and Standards Compatibility IEEE 802.3i 10BASE-T IEEE 802.3u 100BASE-TX IEEE 802.3z 1000BASE-SX IEEE 802.3ab 1000BASE-T IEEE 802.3x flow control Management IEEE 802.1Q Static VLAN (Up to 64) IEEE 802.1p Class of Service (CoS) - Page 21 Power Supply DC power consumption: 15 W maximum 100-240VAC/50-60 Hz universal input Physical Dimensions 440 x 205 x 43 mm (W x D x H) 17.3 x 8.1 x 1.7 inch Environmental Specifications Operating temperature: 0 to 40°C (32 to104°F) Storage temperature: -20 to 70°C (-4 to 158°F) Operating humidity: 90% maximum relative humidity, non-condensing Storage humidity: 95% maximum relative humidity, non-condensing...
-
Page 22: Appendix B: Troubleshooting
APPENDIX B: TROUBLESHOOTING This chapter provides information about troubleshooting the NETGEAR Model FSM726 Managed Switch. Topics include: o Troubleshooting chart o Additional troubleshooting suggestions Troubleshooting Chart Table B-1 lists symptoms, causes, and solutions of possible problems. Table B-1. Troubleshooting Chart Symptom Power LED is off. - Page 23 Reset command or remove AC power from the switch and then reapply AC power. If the problem continues, contact NETGEAR technical support. In North America, call 1-888-NETGEAR. If you are outside of North America, please refer to the support information card included with your product.
-
Page 24: Appendix C: Default Settings
APPENDIX C: Default Settings This appendix provides the default settings for the NETGEAR Model FSM726 Managed Switch. Feature Port Speed Port Duplex Flow Control (half duplex) Flow Control (full duplex) Broadcast Storm Control Gigabit ports IP Configuration Password protection User Name...
Need help?
Do you have a question about the FSM726 and is the answer not in the manual?
Questions and answers