Table of Contents
Advertisement
Advertisement
Table of Contents

Summary of Contents for Quilt EZ Professional Butler
- Page 2 About Butler Butler is an easy-to-use robotic system that turns your quilting machine into a Quilting Machine! The servo-controlled system gives you power and function with- out needing awkward, space-eating computers. For Quilters looking to quilt simple or complex patterns with perfection. Quilt smoothly, quickly, and effortlessly. About QuiltEZ Located in Northern Utah, QuiltEZ was founded with a single goal: to simplify your life.
-
Page 3: Table Of Contents
Table of Contents Tag/Remove Patterns Ext Butler Overview Layout Butler Overview Ext Add Pattern/Remove Pattern 12" Android Tablet Ajust Pattern box/ Set Quilt Area Free motion Settings Manual Operation Parmerters Parmerters Ext Machine Settings Butler PerfectStich Machine Settings Ext Butler Home Test Set Start Test/Advanced... - Page 4 Getting to Know Butler The Black Motor Box Y-motor pulley This is used to control the front to back move- ment of the machine. X-belt engaging lever This is used to engage or disengage the white Power Switch x-belt. Set the lever to the right when using The power switch is used to power the motor robotics, or set it to the left when doing free box on or off.
- Page 5 A. X-belt bearing A D. Locking arm Helps keep the x-belt secure. The locking arm keeps the x-belt secure when the locking lever is engaged or releases tension B. X-belt pulley on the belt when the locking lever is This is used to control the left and right disengaged for free motion.
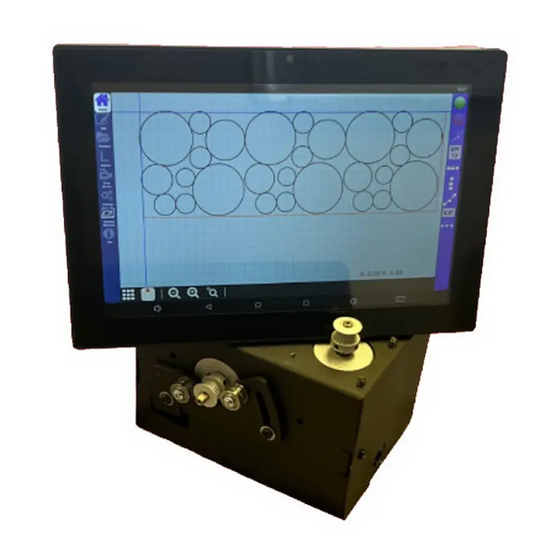
- Page 6 The 12” Android Tablet 12” A. Touch screen display F. USB port This area of the tablet is where you touch A micro-USB port. Not used with the to interact with objects on the display. Butler system. Can be used as an alternative B.
-
Page 7: Free Motion
Disengage for Free Motion locked position In order to start free motion quilting, the belts will need to be disengaged, or there will be too much resistance, and free motion quilting will be more difficult. In order to disengage the x-belt, move the locking lever away from the edge of the motor-box. -
Page 8: Manual Operation
Manual Operation The machine will move to the start point after you hit the green checkmark. You will then cycle the needle on the machine using the handlebar controls. Once you are ready tap the green checkmark to proceed. You will then pull up the bobbin thread then tap the green checkmark to proceed. - Page 9 Navigating the Android Tablet By default the system will open the PerfectStitch program automatically. The escape button and the back arrow are also locked, so that you do not accidentally exit your work in progress. Note: Users with PerfectStitch regulation will see the PerfectStitch screen upon startup, while users with robotics only will see the robot screen (displayed to...
- Page 10 The Overview icon allows you to see and manage the open applications. Open applications appear as minimized square tiles. If you want to open an application in the list simply tap on its tile. Holding your finger over one of these tiles will allow you to close the application by selecting “Remove from list”...
- Page 11 The Hide icon will hide the Android buttons for a full-screen view. Hiding the Android buttons is not recommended. If you ever find that the Android buttons are missing, simply slide up from the bottom center of the screen with your finger to bring them back into view.
- Page 12 Adding a shortcut to the desktop You may want to add shortcuts of the applications to the desktop to make them quicker to access. 1. From desktop Application icon to view all of the applications on the tablet (located at the top right corner for 7” models).
- Page 13 Connect the Android tablet to Wi-Fi Connecting the tablet to Wi-Fi carries with it many benefits such as being able to connect to the Internet and download patterns, (Note: only pattern that are not zipped or compressed can be downloaded via the tablet) or to be able to connect directly to support technicians.
- Page 14 Getting to know the Butler PerfectStitch Program Overview of the Screen Layout Right Left Icons Icons Bottom Icons The left icons are used for main navigation. The right icons correspond with the currently selected tool on the left. The bottom icons are always available from any pattern view screen and allow you to customize how you view what is on the screen.
-
Page 15: Butler Home
Butler Home Start and Stop Butler, Set Stitch Regulation, Belt Locks, Nest Go/Stop Stop The green Go button will engage the Butler robot and start following the pattern. Select this to trace or stitch the pattern after edits have been made. The red Stop button will immediately stop the pattern and return you to the pattern display screen. - Page 16 Cancel will return you the previous pattern view screen. Pattern order will let you set the order each pattern will be stitched. (By default, the patterns are stitched order they added.) This feature can be used when there is more than one patten on the quilt area.
- Page 17 Set Start allows you to set the start position on the pattern. This is useful if you need to resume a pattern that has only been partially stitched, such as a pattern that had a thread break. When you select the Set Start button the screen will display a prompt to “Move to the desired start point.
- Page 18 The green check mark will always begin the pattern from the start point. To save time you may want to move your machine close to the start point so it does not have to move as far. After you press OK, your machine will reposition the needle to be over the start position of the first pattern on the pattern box and perform a needle up.
- Page 19 Stitch Controller Stitch Controller Highlight the stitch controller icon before selecting the green Go button to have the machine stitch the patterns loaded on the display Selecting the green Go button without highlighting this icon will have machine trace the patterns loaded on the display The SPI icon will only display on machines with QuiltEZ electronics or PerfectStitch regulation.
-
Page 20: Nest
Angle Lock Angle Lock Angle lock allows you to set any angle, out of 360 degrees, that you would like to lock the machine. Nest Touch the 0.0° icon to set the angle at which you desire to lock the movement of the machine. - Page 21 3. Once the quilt is rolled, follow the on-screen instructions to realign your machine with point marked in step 1, and press the green check mark. 4. You should now see two patterns on the screen. The light gray patterns represents the pattern you have already quilted on your quilt top.
-
Page 22: Edit
Edit Add, remove, and edit patterns for a layout. Repeat Repeat allows you to repeat the currently selected pattern vertically Repeat and horizontally. Repeated patterns are automatically merged into a single pattern. Use the plus and minus icons to increase and decrease the number of vertical or horizontal repeats. -
Page 23: Move Pattern
Move Pattern Move Pattern Move will allow you to position the currently selected pattern anywhere you want it on the quilt area. arrows will move the currently selected pattern incrementally left or right. arrows will move the currently selected pattern incrementally up or down. - Page 24 Rotate Rotate Rotate allows you to rotate the currently selected pattern. Press the 45° icons to rotate left or right, press the plus and minus to rotate by single degrees, or press the numbers in the center to input a specific degree of rotation. Alternatively, you can touch and drag the red circle at the lower right of the selected pattern.
- Page 25 Crop Crop allows you to remove sections of a pattern, the crop feature offers three different ways to crop: Traditional Crop, Appliqué Inside, and Appliqué Outside. Traditional Crop Traditional Crop will remove any excess portions of the pattern that are outside of the pattern box.
- Page 26 Appliqué Inside Appliqué Inside requires least or a free motion two pattern boxes appliqu é and will crop everything inside the set pattern box. You can use this feature with an appliqué using the free motion on the left tool bar or with.
- Page 27 Pattern Layout Helper Note: This will not This feature will help you prepare your replace nesting, and it quilt. It will allow you to set how large cannot be used to stitch of a quilt and how many rows you would out an entire quilt.
- Page 28 Binding Binding lets you account for the space at the top and bottom of the quilt. If you are setting a half inch binding at the top and bottom set this value to 0.5” for each. Quilt Shrinkage Quilt Shrinkage is a value that accounts for how much the quilt is going to shrink when stitched.
- Page 29 Point to Point Point to Point gives you the option to customize the pattern placement by selecting key points on your quilt. In order to use Point to Point a single pattern must be loaded onto the quilt area. Point to Point can be used to create interesting borders or diagonal designs.
- Page 30 Reset Pattern Chain This feature breaks the link with the previously set pattern so you can set a new control point. Setting a new control point will allow you to start a new string of patterns. Text Generator This feature lets you create a pattern based on customized text.
- Page 31 Next Pattern Next Pattern Next will select the next available pattern. The patterns are selected in the order in which they are added to the pattern box. You can also have multiple patterns within the same pattern box. Alternatively you can tap the different patterns on the screen to switch between them.
-
Page 32: Save Pattern/Mirror
Save Pattern Save allows you to save the currently selected pattern, and any changes you may have made, under a new name. Saving a pattern with its original name overwrites the old pattern. The pattern is saved under the “Saved” Save Pattern tag on the patterns list. -
Page 33: Reverse Start/Undo Redo
Reverse Start/ Stop Points Reverse Start/Stop Points allows you to swap the start and end points of the currently selected pattern. This will reverse the direction in which the pattern is stitched. Reverse Start/Stop Points This feature can be used to switch the start and stop points of the second row so that when the first row finishes stitching on the right it can drop straight down... -
Page 34: Patterns
Patterns Load patterns, import, export, or add a tag to patterns. Patterns From this screen you can select the patterns that you want to quilt. Patterns Edit... - Page 35 These tabs allow you to navigate the This is the Tag section. Tags will allow patterns section. Select a tab to go to that you to search for patterns by narrowing feature. the search by categories. When a tag is selected only patterns attributed with that tag will be shown.
-
Page 36: Import/Export
Import/Export The Import section is used to bring external pattern files onto the tablet. Begin by selecting a source to import from, either USB or Internal. After selecting a source you have the option to specify a tag for the pattern. The default tag is Imported. - Page 37 The Export section is used to take patterns off of the tablet and put them onto a USB. This is useful if you want to take the pattern and edit it in a digitizing software like Quilt Manager. Select the Internal option to get started.
- Page 38 The Backup and Restore section is used to save a database of your patterns or to restore lost patterns. Backup Patterns Backup Patterns gives you the option to backup the current patterns loaded on your display. This will create a database of all the patterns that are on your tablet.
-
Page 39: Tag/Remove Patterns
Tag /Remove Patterns This screen will allow you to attribute tags to patterns or delete tags or patterns. Tags are similar to an index for your patterns. Adding tags to patterns can make them easier to find. Patterns... - Page 40 Filter Items allows you to narrow down When checked, Multi-Select will allow your search by selecting tags. Press the you to choose multiple tags at once to Select Tag button and select the tag from either add a tag, or to delete permanently. the list.
-
Page 41: Layout
Layout Create, save, and open layouts. Adjust quilt area and pattern boxes. New Layout Open Layout New Layout New Layout creates a new, clear layout to which you can add patterns and pattern boxes. A layout is usually used to save all the work on your current quilt project. -
Page 42: Add Pattern/Remove Pattern
Add Pattern Add Pattern Box Add pattern box will add a new pattern box to the layout. When you press add pattern box, you will see three buttons: a red “X” to cancel, a green plus to add a point to define the pattern box, and a green check mark to place the last pattern box point, finishing the pattern box. -
Page 43: Ajust Pattern Box/ Set Quilt Area
Adjust Pattern Adjust Pattern Box allows you to redefine the borders of the currently selected pattern box. Press the Adjust Pattern Box icon, then follow the same procedure of adding a new pattern box to redefine the pattern box. Adjust Pattern Box Patterns are not affected when adjusting a pattern box. - Page 44 Free Motion Record and Save Free Motion Quilting Record on/off Record on/off Record on/off toggles the record feature of Butler. Press once to activate free motion record. Move the machine head to draw your recorded free motion design, then press it again to stop recording.
- Page 45 Save Pattern Save pattern will save your recorded pattern to be used as a pattern in quilting. Select the Save Pattern icon to and enter an name in the on screen keyboard to save it as a pattern. Saved patterns will be given the tag ‘Saved’...
- Page 46 Appliqué This feature lets you make a pattern box of any given shape. You will simply press the record button , you will draw the shape of the pattern box you want. Once you are done, select the power button again to stop recording and then select the appliqué...
-
Page 47: Settings
Settings Manage updates, constants, and machine specific settings Updates System Info System Info shows you your current display, robot, and machine versions, as well as other licensing information. Update Robot Update robot allows you to run the update that is currently saved on the system. - Page 48 Parameters Min Speed Min Speed sets the minimum speed at which Butler will run. We recommend that this setting only be changed under the direction of an authorized QuiltEZ dealer. Margin Margin behaves just like margins on a page. When a margin is set patterns will provide that amount of spacing from the edge of the pattern box.
- Page 49 E. Stop Determines how quickly the machine will disengage and throw a motor error when its path becomes obstructed. This value may vary from quilt to quilt. If you receive too many motor errors, raise this value; If your needle is tearing the quilt lower this value.
- Page 50 Machine Machine Type Machine Type ensures that Butler can properly communicate with your specific quilting machine. See Appendix C for help selecting the proper machine type. Needle Up Flag Needle Up Flag value is set automatically, if required, when selecting Machine Type.
- Page 51 SReg Wait SReg Wait sets the amount of time that Butler waits after sending the signal to your quilting machine to begin stitching. This should not need to be changed. Needle Up Needle Up tests your needle up by performing a full cycle of needle up and needle down.
-
Page 52: Test
Test Test is used to test if the Butler motor box is communicating properly with the quilting machine and if the motors are running to factory specifications. These tests are mostly for use in factory and troubleshooting. TEST ALL Test All will test the communication of Butler to your stitch regulator, as well as the encoder counts for both the X and Y motors. - Page 53 Advanced Advanced allows you to adjust settings for your machine. These settings are vital for proper machine performance. Do not change these values unless told by a support representative. Setup...
- Page 54 Stitch Regulator Access the stitch regulator user interface. Stitcher User Interface Pressing the sewing machine icon will show the PerfectStitch user interface on Butler’s display. This icon will only display on systems that have QuiltEZ electronics or the PerfectStitch upgrade installed. This will give you allow you to switch over to the stitch regulator for free motion quilting.
-
Page 55: Information
Information Help with icons Information Information Information Mode is used to explain the interface of Butler on the spot. Press the Information icon, then press any icon you would like to learn more about. (An example of pressing the Nesting button on the right.) A window will appear with a brief description of the feature and the option to view a video explanation of the icon. -
Page 56: Bottom Icons
Bottom Icons Pattern View, Zoom, Pan and Zoom to Cross Hair Pattern Box View The Pattern Box View lets you choose to see one pattern box at a time or all current pattern boxes if you have loaded more than one. Select Single Pattern Box icon, the icon with only one box highlighted to see... -
Page 57: Zoom In / Out
Zoom Out/In Zoom Out/In lets you control the zoom level of the pattern view screen. Tap the magnifying glass with the minus button You can use android pinch gestures to zoom in and out. Use this feature to get a closer look at patterns. -
Page 58: Zoom To Crosshair
Zoom to Crosshair Zoom to Cross Hair lets you zoom where ever the cross hair is located, where the two blue lines intersect. To use this feature simply highlight the magnifying glass and press the zoom in or zoom out button on the display. The screen will zoom in or out with the crosshair in the middle of the screen. - Page 59 Pan lets you pan the pattern view screen. To Pan, touch the pan icon to highlight it, and then press and drag your finger across the screen. Swipe from the direction that you want to move the screen. If you swipe from the left, the screen will move left.
- Page 60 Appendix A: How To Get started quilting quilt blocks and pantograph-style patterns Getting Started: Set a quilt area and load a pattern 1. Before you can access any other feature you must set a quilt area. The screen will prompt you to move your machine to the back left corner of the quilting area.
-
Page 61: Appendix A How To
11. Optional: Select the green Go button without the Needle icon highlighted and run the machine without stitching to verify that it will run properly. 12. Select the Needle icon. 13. Optional: PerfectStitch users may change their SPI before stitching to control the Stitches Per Inch. -
Page 62: Quilt A Quad Pattern Quilt Block
Quilt a quad pattern quilt block 1. Go to layout on left navigation. 2. Press new layout 3. Press green check on notification screen. 4. Move machine to top-left corner of quilt area and press green plus 5. Move machine to bottom-right corner of the quilt area and press green plus 6. - Page 63 11. Go to Patterns on left navigation. 12. Open the blocks Tag. 13. Select the budding blocksjs061 pattern. 14. Press the green check mark . (You should see large circles around the edges.) 15. You should large circles around the edges.(If not, touch the pattern.) Touch the center circle of the pattern and drag it to the top left corner of the pattern box.
- Page 64 26. Select Corners > JSM6 and press green check mark. 27. Resize and rotate the corner pattern to fit into a corner of the pattern box. 28. Repeat steps 25-27 until all corners are filled. 29. Go to home on the left navigation.
- Page 65 Quilt a pantograph style clam pattern 1. Go to layout on left navigation. 2. Press new layout 3. Press OK at notification screen. 4. Move machine to top-left corner of quilt area and press green plus 5. Move machine to bottom-right corner of the quilt area and press green plus 6.
- Page 66 12. Notice all of the even rows are hanging outside of the quilt area select the crop icon. 13. Select the Traditional Crop Icon to cut out everything that is outside of the quilt area. 14. Go to home on the left navigation.
-
Page 67: Nest The Daisies Pantograph Pattern
Nest the daisies pantograph pattern 1. Go to layout on left navigation. 2. Press new layout 3. Press OK at notification screen. 4. Move machine to top-left corner of quilt area and press green plus 5. Move machine to bottom-right corner of the quilt area and press green plus 6. - Page 68 1. Go to home on the left navigation. 2. Turn off the needle with thread if it was previously selected. Press the green go button , check that your needle is in the up position, then press the green check mark .
- Page 69 11. Select either the Move icon or Spacing icon to adjust the nest space, then press the green check mark . (The bottom pattern represents where the new pattern will be stitched and the gray pattern represents where the pattern has already been stitched.) 12.
- Page 70 Perform an appliqué crop for a block 1. Go to the layout screen and select add pattern box. 2. Select Show all to see the pattern as a reference on the screen. 3. Move the machine to the top left corner of the block and select the green plus sign to set the first...
-
Page 71: Appendix B Definitions
Appendix B: Definitions Home Location The top left corner of the Quilt Area or Pattern Box. This is also known as zero/zero or point of origin. Layout A Layout consists of the quilt area, Pattern Boxes, and all the patterns seen in the pattern view. - Page 72 Appendix C: Machine Type Use this chart to help select the proper machine type. The cable configuration refers to where the cables are plugged into on the black motor box. Cable Configuration Machine Type Setting Stitcher Box port only Default Remote and Stitcher Box ports SC 3.0 or Default Remote and Handlebar ports...
- Page 75 For answers to questions and video tutorials check out our support page at support.quiltez.com www.quilt-ez.com © 2013 Quilt-EZ. All rights reserved.
Need help?
Do you have a question about the Professional Butler and is the answer not in the manual?
Questions and answers
error code 1023?
what size usb stick can i use for my butler robotics