Advertisement
N56
Series
Quick
Installation
Guide
www.etrovision.com
+886-2-2655-1518
Technical Support: etrotech@etrovision.com
Sales Contact: etrosales@etrovision.com
Install EtroScan on a Windows PC
- EtroScan™ is a utility is used to configure network
settings for cameras & video servers. EtroScan™ is
available on the CD-ROM or can be downloaded at
http://www.etrovision.com/Support/.
- Run Setup.exe to install EtroScan.
Basic Installation
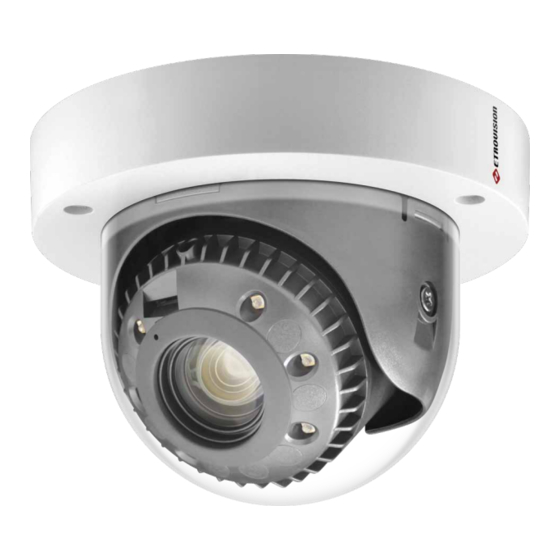
1. Unscrew and remove the cover from the camera base
2. The N56 features triple axis design which allows easy,
flexible adjustment of the lens tilt and direction.
The 3 highlighted screws can be loosened to allow
adjustment of the camera/lens.
A. Lens rotation
B. Lens tilt
C. Base rotation
3. A micro SD card can be inserted if recording to SD card.
The N56Q-10 SD card can be inserted in the slot next to
the lens.
The N56A-BL and N56Q-C require removing the lens
from the camera. Unscrew the 2 screws that secure the
camera, and pull the camera part out to access the
PCB.
The micro SD card is highlighted below.
4. The lens for N56Q-C and N56A-BL can be manually
adjusted. The N56A-BL lens focus can be adjusted,
while the N56Q-C has both focus and zoom control.
Configure the Network Settings
The factory default IP address settings:
IP Address:
192.168.1.2
Subnet Mask: 255.255.255.0
Gateway:
192.168.1.1
Run EtroScan™ (program available via Start All
Programs Etrovision Technology menu).
Scan displays all devices on the network. Use 192.168.1.2 IP,
Model, and MAC Address to identify a specific
camera/video server.
Advertisement
Table of Contents

Subscribe to Our Youtube Channel
Related Manuals for EtroVISION N56 Series

Summary of Contents for EtroVISION N56 Series
- Page 1 Gateway: 192.168.1.1 Run EtroScan™ (program available via Start All Programs Etrovision Technology menu). Scan displays all devices on the network. Use 192.168.1.2 IP, Model, and MAC Address to identify a specific camera/video server. 4. The lens for N56Q-C and N56A-BL can be manually adjusted.
- Page 2 displayed. Use Change Setting to change network settings. After Restoring Factory Default Settings clicking Apply, enter “pass” for the root password when prompted. To restore the factory default settings, remove the outer plastic cover. Insert a thin object into the hole next to the camera lens and press &...
Need help?
Do you have a question about the N56 Series and is the answer not in the manual?
Questions and answers