
Related Manuals for Dover OPW 8800E


Summary of Contents for Dover OPW 8800E
-
Page 1: Installation Manual
Installation Manual OPW Fluid Transfer Group Europe B.V. Rack Monitor 8800E / 8801E Version Date 24 August 2016... -
Page 2: Disclaimer
Rack Monitor 8800E/8801E Document: Installation Manual 24 August 2016 Date: Version: B.1 Disclaimer In this document an installation manual is presented of the OPW Rack Monitor 8800E/8801E. It is important that the end user (in many cases the operator) of the OPW Rack Monitor 8800E/8801E has an adult age, is skilled, reads and understands this manual (and therefore has knowledge of the English language), otherwise it is not recommended to use the OPW Rack Monitor 8800E/8801E. -
Page 3: Warranty
Rack Monitor 8800E/8801E Document: Installation Manual 24 August 2016 Date: Version: B.1 Warranty All parts and products are thoroughly inspected and tested from the time raw material is received at our plant, until the product is completed. We guarantee that all products are free from defects in materials and workmanship for a period of one year from the date of shipment. -
Page 4: Table Of Contents
Rack Monitor 8800E/8801E Document: Installation Manual 24 August 2016 Date: Version: B.1 Important. Entity parameters for pin 11 on all rack 8800E rack monitors with a serial number starting with a “1” has been changed. Terminals Entity 2 Wire 5 Wire Grounding Data Emergency Sw... - Page 5 Rack Monitor 8800E/8801E Document: Installation Manual 24 August 2016 Date: Version: B.1 Mounting Points ............................. 12 Electrical wiring / installation ......................14 Sensor ................................14 2.4.1 Mains wiring ..........................17 2.4.2 Relay outputs ..........................18 2.4.3 Data communication ........................20 System configuration ..........................
-
Page 6: Specifications
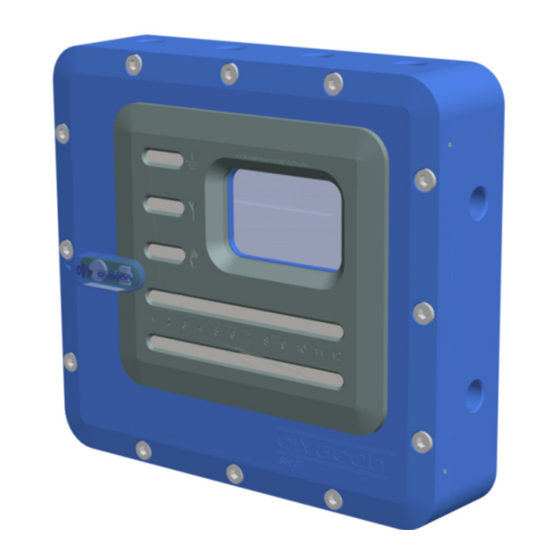
Rack Monitor 8800E/8801E Document: Installation Manual 24 August 2016 Date: Version: B.1 1 Specifications The Rack Monitor 8800E/8801E is a loading rack monitoring system detects and communicates an overfill condition to the loading rack control automation equipment by means of a normally open relay contact. In addition this non-permissive condition as well as diagnostic information is displayed. -
Page 7: Specifications External Environment
Rack Monitor 8800E/8801E Document: Installation Manual 24 August 2016 Date: Version: B.1 Specifications external environment Temperature Range (T : -45°C (-42.8°F) to +70°C Max. surface temperature (T4) : ≤135°C (21.1°F) Relative humidity : 50 ± 5% IP Class closed : IP65 acc. to IEC 60529 Resistant to : UV Light (within Sun light) : Corrosion... -
Page 8: Bolts
Rack Monitor 8800E/8801E Document: Installation Manual 24 August 2016 Date: Version: B.1 1.3.1 Bolts Yield Stress Limit : 450 N/mm Tensile Stress Limit : 700 N/mm Thread engagement (h) : > D bolt 1.3.2 Package Dimensions Package outside dimensions 8800E/8801E (HxWxD) :45x40x50 Package weight 8800E/8801E 12 Kg... -
Page 9: Compliance
Rack Monitor 8800E/8801E Document: Installation Manual 24 August 2016 Date: Version: B.1 Compliance See inserted Declaration of conformity H71794 for the latest standards and directives. Please contact OPW when this document is missing To get the Rack Monitor enclosure with a CE marking, the following directives are applicable with IS Outputs The Rack Monitor 8800E/8801E is designed with the use of the following standards. -
Page 10: Initial Installation
Rack Monitor 8800E/8801E Document: Installation Manual 24 August 2016 Date: Version: B.1 Initial installation Attention Installation must be performed by authorized and trained personnel only. Safety precautions Warning Read & Understand this instruction before starting installation. Equipment to be used for its designated purpose only. •... -
Page 11: Version
Rack Monitor 8800E/8801E Document: Installation Manual 24 August 2016 Date: Version: B.1 Figure 2 Remove the 12 bolts mounted into the door, • Open the door as far as 180°, • Warning : Make sure always to open the door by 180°, because there is a risk that the hinges could be damaged when not opened completely (see Figure 3 Figure 3... -
Page 12: Mounting Points
Rack Monitor 8800E/8801E Document: Installation Manual 24 August 2016 Date: Version: B.1 Prepare the designated position for installation, • Make sure that the drilled holes are at least 8,4 mm or M8 threaded (when you don’t want to use the •... - Page 13 Rack Monitor 8800E/8801E Document: Installation Manual 24 August 2016 Date: Version: B.1 Determine the conductor length required to connect to the designated terminal block and prepare the • cable accordingly, removing part of the outer sheath where required to reveal the insulated conductors.
-
Page 14: Electrical Wiring / Installation
Rack Monitor 8800E/8801E Document: Installation Manual 24 August 2016 Date: Version: B.1 Note : Do not drill any additional (conduit) hole in the rack monitor enclosure. This will violate the enclosure’s approvals and voids the warranty. Electrical wiring / installation Sensor For connecting the monitor to the sensors mounted on a tank-truck a plug and cable set is being used. - Page 15 Rack Monitor 8800E/8801E Document: Installation Manual 24 August 2016 Date: Version: B.1 Five-wire pin usage EN13922 Colour Current Colour US Colour US Colour 7400E 7110 7300 7100 Black Blue Green Blue 4J Plug 3J Plug 4J Plug 3J Plug Plug & terminal 10 Pins 6 Pins 10 Pins...
- Page 16 Rack Monitor 8800E/8801E Document: Installation Manual 24 August 2016 Date: Version: B.1 Emergency-switch An emergency switch or dead man switch can be connected at the terminal shown in Figure 8. On the right side of the 10+1 tank truck sensors terminal strip a 2 pin terminal strip is placed.
-
Page 17: Mains Wiring
Rack Monitor 8800E/8801E Document: Installation Manual 24 August 2016 Date: Version: B.1 To bypass the emergency switch connect pin 1 to pin 2 by means of a short peace of wire. The color is not important and can be chosen randomly. -
Page 18: Relay Outputs
Rack Monitor 8800E/8801E Document: Installation Manual 24 August 2016 Date: Version: B.1 The mains terminal block is situated at the upper left corner of the metallic enclosure. Since the 8800E/8801E rack monitor is equipped with a high efficient switching regulator with a wide operating range no settings has to made and all voltages between 110 and 230 Vac are accepted. - Page 19 Rack Monitor 8800E/8801E Document: Installation Manual 24 August 2016 Date: Version: B.1 The second relay is closed when proper grounding of the truck is verified. The permissive and ground verified relay are Form A normally open relays. See Figure 13 and Figure 14 for details. All relay contacts are rated at 250 Vac, 5Amp resistive Figure 14 The two remaining Form C Auxiliary relays can be dedicated...
-
Page 20: Data Communication
Rack Monitor 8800E/8801E Document: Installation Manual 24 August 2016 Date: Version: B.1 Data communication This Rack Monitor 8800E/8801E can be connected to the rest of the world by means of RS 485 half duplex or RS485 full duplex multi drop (See inside enclosure for detailed switch setting). - Page 21 Rack Monitor 8800E/8801E Document: Installation Manual 24 August 2016 Date: Version: B.1 Overall wiring top side Figure 19 Finishing installation Remove the corrosion protector from the seal and attach it to the door, • Caution : - Make sure, before closing the enclosure, that the cables do not get stuck between the door and the bottom side of the enclosure.
-
Page 22: System Configuration
Rack Monitor 8800E/8801E Document: Installation Manual 24 August 2016 Date: Version: B.1 2 System configuration A typical system consist of two parts. The Loading Rack Side The Tank Truck Side The 8800E/8801E Rack monitor is mounted as a stationary system on a loading rack. Although the 8800E/8801E rack monitor is equipped with all basic functionality some extra parts can be added. - Page 23 Rack Monitor 8800E/8801E Document: Installation Manual 24 August 2016 Date: Version: B.1 Another typical configuration is shown below. Instead of flameproof cable glands Explosion proof seals are used. Figure 21 Read the installation manual of the explosion proof seals carefully to avoid dangerous situations. Notes: –Control Equipment and Electrical Apparatus connected to the 8800E / 8801E Rack monitor should NOT use or generate more than 250 Volts AC.
-
Page 24: Maintenance
Rack Monitor 8800E/8801E Document: Installation Manual 24 August 2016 Date: Version: B.1 3 Maintenance Think of the following when servicing the Rack Monitor 8800E/8801E: Before maintenance the full installation must be shut down/off before proceeding, • Maintenance must be performed by authorized personnel only, •... -
Page 25: Dismantling Rack Monitor
Rack Monitor 8800E/8801E Document: Installation Manual 24 August 2016 Date: Version: B.1 5 Dismantling Rack Monitor Attention Dismantling must be performed by authorized and trained personnel only. At a certain moment (at the end of its lifetime) one could decide to stop using the Rack Monitor 8800E/8801E for monitoring the transfer of mediums. -
Page 26: Trouble Shooting
Rack Monitor 8800E/8801E Document: Installation Manual 24 August 2016 Date: Version: B.1 6 Trouble shooting Although Many events are displayed on the screen a there are always problems that cannot be measured automatically. Read operation manual for operational related problems. On all relay contacts and at the power inlet voltage terminal suppressors are placed to limit the surge voltage and current as well as for absorbing energy. -
Page 27: Sensor Cable Specifications
Rack Monitor 8800E/8801E Document: Installation Manual 24 August 2016 Date: Version: B.1 Figure 22 Parameters Terminal CN8 230Vac 200mA Negligibly small Negligibly small Table 2 Terminals Entity 2 Wire 5 Wire Grounding Data Emergency Sw Internal Parameters CN2 / pin1~8 CN2 / pin 4,5,6,8 CN2 / pin9 CN2 /pin11 12,6 V 12,6 V 12,6 V... -
Page 28: Annex A - Available Detail Wiring Drawings Of The Rack Monitor 8800E/8801E And Associated Parts
Rack Monitor 8800E/8801E Document: Installation Manual 24 August 2016 Date: Version: B.1 Annex A - Available detail wiring drawings of the Rack Monitor 8800E/8801E and associated parts Drawing(s) DS00257 RS-485 WIRING DIAGRAM DS00258 BLACK PLUG WIRING DS00259 7511E DUAL BREAK AWAY Annex B - Modification Mounting Holes The Rack Monitor 8800E/8801E is equipped with 4 mounting holes. -
Page 29: Annex C - Recommended Spare Parts
Rack Monitor 8800E/8801E Document: Installation Manual 24 August 2016 Date: Version: B.1 Annex C - Recommended Spare Parts With the purchase of the Rack Monitor the OPW Fluid Transfer Group Europe BV recommends some spare parts to be purchased. Although this Rack Monitor 8800E/8801E is designed with solid state lamps and minimum maintenance components, spare parts are available.
Need help?
Do you have a question about the OPW 8800E and is the answer not in the manual?
Questions and answers