
Subscribe to Our Youtube Channel
Summary of Contents for Trader Meerkat Bluetooth MESPBT
- Page 1 Meerkat Bluetooth ‰ ® ® Speaker System MESPBT Speaker Set, Bluetooth, 2 Speakers (1 x Active / 1 x Passive) 6.5 inch, 8 Ohm, 30 Watts each MESPP Speaker (1 Speaker, Passive only) 6.5 inch 8 Ohm 30 Watts...
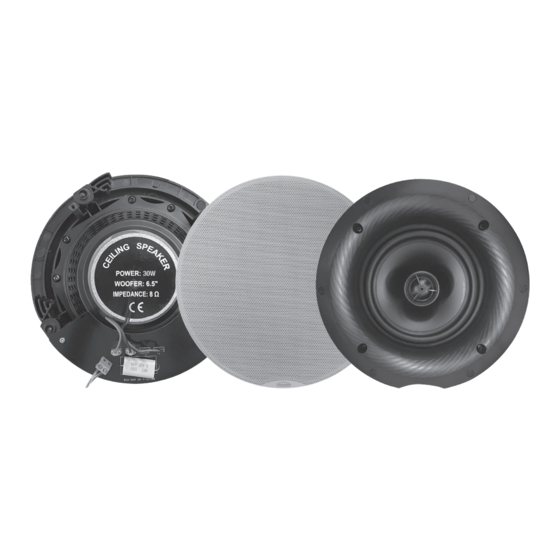
- Page 2 MESPBT - Speaker Set, Bluetooth, 2 Speakers, 1 x Active / 1 x Passive, 6.5 inch 8 Ohm 30 Watts each MESPP - Speaker, 1 Speaker, Passive only, 6.5 inch 8 Ohm 30 Watts Active speaker: • Power RMS: 30 Watts per speaker • Power Max approx.: Max peak power 50W • Impedance: 8 Ohm • Frequency response: 100Hz-20kHz • SPL@1W/1m:86dB (Sensitivity: 86dB 1W/1m)
- Page 3 INSTRUCTION MANUAL Thank you for choosing the TRADER MESPBT Speaker Bluetooth 6.5” 30 Watts, 2 Speaker pack. This innovative design and advanced engineered product, provides easy installation and setup and is designed for high quality sound and ease of use. This manual describes the installation of MESPBT series speakers within conventional stud and joist and plasterboard ceiling applications. IMPORTANT SAFETY WARNING BEFORE USE PLEASE READ COMPLETELY AND USE THE PRODUCT IN ACCORDANCE WITH THESE SAFETY INSTRUCTIONS. This product is supplied with a 15V dc power pack that runs from a 220-240V ac supply, and if there are additional electrical works required to provide a power source, these must be carried out by a licensed electrician in accordance with AS/NZS3000 wiring rules. If the unit is to be used as a replacement for an existing product, remove the existing unit from its location and disconnect the plug from the socket. Ensure cables are not trapped and the powerpack is clear and away from insulation. READ THE INSTRUCTIONS CAREFULLY BEFORE STARTING THE INSTALLATION PROCESS AND KEEP THEM SAFE FOR FUTURE REFERENCE.
- Page 4 BOX CONTENTS Please ensure you read the entire instruction manual carefully before you commence any work. Carefully unpack the speakers from the packaging. Please check to ensure all the parts shown below are included. If any parts of the speaker appear damaged, please contact your dealer/reseller immediately or contact www.gsme.com.au for direction. 1 Master active speaker with amplifier 1 15V dc 220-240V ac power supply 1 Passive speaker 10 metre speaker cable 2 speaker grilles A cardboard cutting template is included in the box. INSTALLATION IMPORTANT: ANY ELECTRICAL WORK MUST BE CARRIED OUT BY A LICENSED ELECTRICIAN AND BEFORE COMMENCING WORK ENSURE THE SUPPLY IS SWITCHED OFF AT THE MAINS.
- Page 5 8. O nce master speaker is installed, turn power on and confirm the Bluetooth connection is functioning. CONNECTING WITH BT Connecting your BT device to the speaker, following the below steps: 1. Turn on BT on your device 2. Search for “BT Ceiling Speaker” 3. Connect with “BT Ceiling Speaker” Your device is now connected. DISCONNECTING OR RECONNECTING If you want to change from BT-device, follow below steps: 1. Disconnect the current BT-device (“OFF”) 2. Connect new BT-device by following above steps If you move out of range or turn off the BT function on your BT-device, the BT of the speaker will disconnect. To reconnect turn on the BT on the desired device, it will reconnect. PAINTING THE SPEAKER GRILLE: If speaker grilles are required to be another colour such as black, do not paint the speaker grilles whilst attached to the speaker. It is recommended to remove them for spray painting using 5 parts thinning agent to 1 part paint. Spray thinly to ensure speaker cover grille holes are not blocked, as this will affect the sound quality of the speakers. INSTALLATION IN FIRE-RATED CEILINGS If you plan to mount your speakers in a fire-rated ceiling, you should purchase a fire hood for the speaker. Visit www.gsme.com.au for more information and recommended hoods available in the market.
- Page 6 HARD WIRED INPUT To connect other devices such as CD player, Blu-Ray player etc. to play through the speakers please follow the steps below: To play music via the speaker hard wired facility, connect RCA cable to L-R and Ground wire to the terminal marked AUX on the amplifier shown in “Image 1”, these cables can then be connected to remote inputs such as RCA or Banana jacks in a wall plate located down a wall lower to the floor or elsewhere from the ceiling. Note: To ensure the best possible sound without humming or noise or poor grounding, it is recommended to use quality shielded RCA cable. Image 1. Image below shows example of a fixed wall connection link to the AUX terminals: CREATE STEREO PAIR WITH PASSIVE SPEAKER The active speaker containing the amplifier and power supply is designed to connect to the additional passive (slave) speaker in the MESPBT pack via the speaker output (+/-) Use wire cutters to strip the ends of the speaker cable (if required) and connect to the terminals of the passive speaker and corresponding terminal at position (1) on the amplifier PCBA in “Image 2”.
- Page 7 Please note there are three additional terminals on the amplifier to allow expansion to a 4-speaker system from the one powered active unit. To set up the first stereo pair ensure the first additional speaker is connected to the terminal marked (1). After this has been completed additional speakers can be connected to the other terminals at position (2) in “Image 2”, if required. These are available as individual expansion packs and purchased as MESPP. (One passive (slave) speaker and 10 metres of cable) per pack. Image 2. TROUBLESHOOTING If a problem arises, please try the troubleshooting guide below. If the problem is not listed please contact www.gsme.com.au Customer Service: 1300 301808 Customer Service Email: service@gsme.com.au Q: Speaker has not been found during Bluetooth setup A: P lease check power cord is correctly connected into speaker and transformer. *Before commencing any electrical work ensure the supply is switched OFF at the mains. Q: Speaker connected but not playing from device A: P lease ensure device has good Bluetooth connection and battery power and that volume is turned up. Failing this, turn the speaker power off then on. Q: Can the speaker be installed into the bathroom ceiling? A: This is not recommended, and other IP rated speakers should be used for this application 1 Year Warranty...
- Page 8 One (1) Year Warranty This product has been manufactured to the highest quality standards. This product is warranted to the original purchaser and is not transferable. The product is guaranteed to be free from defects in workmanship and parts for a period of 5 Years from the date of purchase. Defects that occur within this warranty period, under normal use and care will be repaired, replaced or refunded. The benefits conferred by this warranty are in addition to all other rights and remedies of the consumer under Commonwealth, State and Territory laws in relation to the goods or services to which this warranty relates and Australian Consumer Law. Risk in regard to the product to be repaired shall at all times remain with the Purchaser. The warranty is given on the condition that the product to which it applies is used for the purpose and in the manner intended by its construction and for no other purposes whatsoever. GSM Electrical (Australia) Pty Ltd shall not be responsible for damage of any kind, caused by accidents, power surges, electrical storm damage, incorrect power current, infestation (vermin or insect), incorrect installation, incorrect electricity or plumbing installation, improper use of controls or failure to use the product in accordance with the operating instructions, general misuse or abuse or from normal wear and tear. Any attempt by an unauthorised person to repair or tamper with the equipment shall render the warranty null and void. GSM Electrical (Australia) Pty Ltd’s liability under this warranty is limited to the replacement and/or repair of the defective parts within the warranty period and does not extend to installation or removal of the product. Acceptance of liability by GSM Electrical (Australia) Pty Ltd contained herein is to the exclusion of any other remedy whatsoever and howsoever arising in respect of any equipment to which it applies. The Bluetooth® word mark and logos are registered trademarks owned by Bluetooth SIG, Inc. and any use of such marks by GSM Electrical is under license. Other trademarks and trade names are those of their respective owners. GSM Electrical (Australia) Pty Ltd, Level 2 142-144 Fullarton Road, Rose Park SA 5067 www.gsme.com.au // Phone: 1300 301 838 // Fax: 1300 301 778 January 2022 / 220110...
Need help?
Do you have a question about the Meerkat Bluetooth MESPBT and is the answer not in the manual?
Questions and answers