Advertisement
Quick Links
GB
Using Instructions "Trendy"
These instructions relate ONLY to this product and contain
important information for using the product for the first time.
Please keep these instructions for later reference and should
always accompany the product in the event of transference
to a new user.
These instructions relate ONLY to this product and contain
important information for using the product for the first time.
Please keep these instructions for later reference and should
always accompany the product in the event of transference
to a new user.
1. Introduction
Dear Costumer,
Thank you for purchasing the solar light. With this solar light you
purchased a product manufactured according to the current state
of technology.
This product fulfils all requirements of the valid European
and national regulations. The conformity was proved. The
relevant declarations and documentation are deposited with
the manufacturer.
To maintain this state and guarantee a safe operation, you as the
user will have to follow this operating manual!
2. Safety Instructions
- In case of damages caused by not
!
following this operating manual, the
warranty rights will expire! We exclude
liability for any consequential damages!
- We exclude liability for property or perso-
nal damages caused by inappropriate handling or not follo-
wing the safety instructions.
- In these cases any guarantee rights will expire.
Due to safety and admission reasons (CE) it is not allowed to arbi-
trarily reconstruct and/or change the solar light.
Therefore, please keep to the operating manual.
The accident prevention rules of the association of the industrial
trade cooperative association for electric plants and working
material are to be considered in industrial environments.
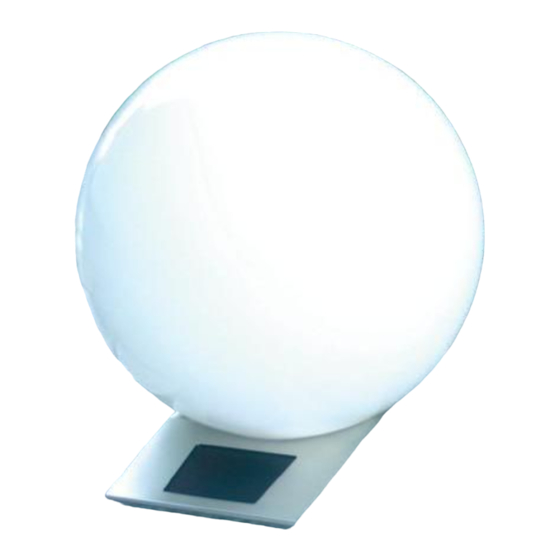
3. Intended use
The solar light is designed for interior and exterior use. Its light
changes between 7 colors; however, also a fixed color can be
set it required.
The integrated battery is charged via the solar cell integrated
into the stainless steel base or the included plug-in power supply
(only for interior use).
During solar operation, the light automatically switches on at
dawn and off at daybreak. The light sensor is the solar cell.
The light is produced by 4 highly efficient LEDs. Their power
consumption is low, and their luminosity is high; their average
lifetime exceeds 100,000 hours.
Note: After prolonged period of insufficient sunshine, radiation-
induced battery recharge may be low.
However, the solar light is not defective. After a couple of
sunny days, it will work again as before or charge the bat-
tery with the power supply.
It is recommended to replace the battery every 2 years.
4. Installation
1. Remove the parts cautiously from the packaging.
2. Carefully screw the ball from the base part in a
counterclockwise direction (Figure 1) and carefully remove
the ball.
3. To prevent its theft, you can screw the ball on the floor; refer
to item 5. "Installation of the housing" in this instructions for
use.
4. Insert the plug of the battery unit into the socket on the board
(Figure 2).
Caution: After the plug was inserted, the LEDs will illuminate.
Do not directly look into the light to prevent ocular injuries.
Note: The plug can be inserted only in one orientation to prevent
wrong polarity. Never use excessive force when plugging in.
5. Now put the ball carefully on the base and fix it again by tur-
ning it clockwise. For this purpose, place the base on a table
with the solar battery directing to the front (Figure 3) and put
the ball on the stainless steel base while the notch in the
bayonet lock directs to the rear (Figure 4), then screw the
ball tightly to the base.
6. The solar light is now ready for operation and is charged by
the integrated solar module. Place the ball on a sunny place
with the solar module directing to the front.
Note: The duration of the illumination period strongly depends
on intensity and duration of the duration of sunshine during the
day. Therefore, it is normally shorter in wintertime. If the lamp
does not shine on the first evening, you should wait for another
sunny day.
1.
3.
- Optional operation with the integrated power supply.
1. Insert the plug of the mains power supply into the socket at
the bottom of the circuit board (Figure 5) and plug the power
supply into the mains. The battery is now charged via the
power supply.
2. Now put the ball carefully on the base and fix it again by tur-
ning it clockwise. The solar light is now ready for operation.
Caution: The power supply is
only suitable for interior operation!
2.
Ball
Notch in the
bayonet lock
4.
5.
Advertisement

Subscribe to Our Youtube Channel
Related Manuals for esotec Trendy


Summary of Contents for esotec Trendy
- Page 1 4. Installation Using Instructions “Trendy” 1. Remove the parts cautiously from the packaging. 2. Carefully screw the ball from the base part in a These instructions relate ONLY to this product and contain counterclockwise direction (Figure 1) and carefully remove important information for using the product for the first time.
- Page 2 Color Color is fixed now. You can return to change Manufacturer/ Importer: the color change mode by sim- esotec GmbH, Etzenrichterstr. 14, D-92729 Weiherhammer ply switching the switch back. Tel.-Nr: 0049 (0)9605-92206-28 Fax.-Nr: 0049 (0)9605-92206-10 e-mail:info@esotec.de 7. Setting color duration www.esotec.de...
Need help?
Do you have a question about the Trendy and is the answer not in the manual?
Questions and answers