Table of Contents
Advertisement
Quick Links
Advertisement
Table of Contents

Summary of Contents for MULTILIFT Hooklift XR S Series
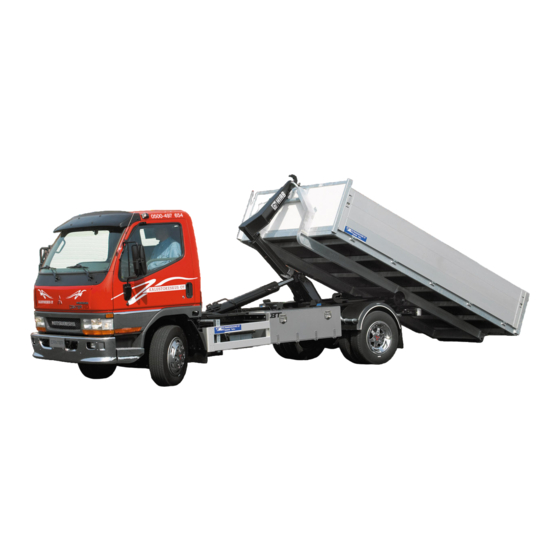
- Page 1 MULTILIFT XR S Hooklift XR3S / XR5S INSTALLATION INSTRUCTIONS January 2019...
- Page 3 - ! ! " # $ % & ' # % ( # ) $ * + #...
-
Page 4: Table Of Contents
Before mounting the subframe Shortening of subframe Shortening the chassis frame Mounting fitting plates Mounting instructions when using Multilift –fitting plates Multilift –fitting plate series Mounting instructions when using other plates 3.10 Installing of toolbox, spare wheel, sheet rack etc. -
Page 5: Preparing For Installation
Check the availability of the correct tools and lifting gear during the installation. General safety precautions during installation Multilift XR demountable body lifting equipment may only be installed by qualified personnel. XR-unit can only be installed on suitable truck chassis. Normally chassis have to be meant for tip- ping use. -
Page 6: General
GENERAL Main components of XR-unit Steel contructions: Sliding arm Middle frame Hydraulic body locking (additional) Rear roller Rear frame Tipping lock Sub frame... -
Page 7: Main Hydraulic Components Of Xr-Unit
GENERAL Main components of XR-unit Hydraulic components: Main cylinder Hookarm cylinder Hydraulic body locking cylinder (additional) Control valve Oil tank... -
Page 8: Bodybuilding
BODYBUILDING Safety precautions when mounting the hooklift unit Before any welding work is done, make sure the battery cables of the vehicle’s electrical system are detached. Check always instruc- tions of chassis manufacturer, how the de- tach of battery can be done and what else should be noticed. -
Page 9: Before Mounting The Subframe
Before mounting the subframe • Check that vehicle chassis is horizontal across its width -Use a level • Set all wheels to straight forward • Make sure the tyre pressure is correct • If the vehicle is equipped with one or various facilities for prolonged reduction in load on a shaft or wheel, such as a lifting axle or trailing axle, all wheel... - Page 10 The general principle is that the rear over- hang should be kept to the minimum. The aim is to position the unit longitudinally so that the center of gravity of the fully loaded body coincides with the center of gravity of the load on the vehicle loaded to full GVW.
-
Page 11: Mounting Fitting Plates
Please observe any instructions given by the vehicle manufacturer, which will affect the follow- ing Multilift installation instructions. Multilift has available a variety of installation kits to suit a range of popular trucks (or vans). These kits include the necessary brackets, nuts and bolts to complete installation. The quality of bolts is 8.8 or 10.9 depending on vehicle manufacturers instructions. -
Page 12: Mounting Instructions When Using Multilift -Fitting Plates
Mounting instructions when using other plates Use the existing holes in the chassis frame wherever possible. Choose the dimensions of the large rear retainer plate and shape the plate so that the plate can hold the minimum number of screws with required distances despite the bracket of rear spring or other such parts. (Drawing) Drill holes of fitting bolts to fitting plates and to the chassis frame if necessary. -
Page 13: Multilift -Fitting Plate Series
Multilift-kiinnityslevy sarjat, XR-5 Iveco Daily No. 110983801... - Page 14 Mitsubishi Canter No. 110770501...
- Page 15 MB Ateco 818 / 823 No. 110838801...
- Page 16 MB Ateco 1223 No. 110840401...
- Page 17 Volvo FL612 No. 110996501...
- Page 18 MAN L2000 No. 110842301...
- Page 19 Renault Mascott No. 110838001...
- Page 20 Renault Midlum No. 110732401...
-
Page 21: Mounting Instructions When Using Other Plates
Mounting instructions when using other plates Fix XR-unit to the vehicle chassis using clamps. Locate the upper edge of brackets horizontal above the holes of the subframe that drilling of holes is possible. Use the ex- isting holes in the chassis frame wherever possible. -
Page 22: Installing Of Toolbox, Spare Wheel, Sheet Rack Etc
Fix the rear end retainer plate to the subframe by three bolts an SL-nuts. Lower the XR-unit subframe onto the chassis (or the additional subframe) and check it’s exact longitudinal location and center it in relation to the chassis. Once the hooklift system is accurately positioned, fix it to the vehicle chassis using clamps. -
Page 23: Hydraulic System
Observe the utmost cleanliness while installing the hydraulic system! The Multilift unit has been tested at the factory under maximum permitted operating pressure. The pressure limiting cartridges of the control valves are not to be changed or adjusted to give higher capacity. -
Page 24: Hydraulic Diagram
Hydraulic layout Hydraulic line Return line to the oil reservoir 5/8” hose mounting MU110063410 Pressure line from pump 0.63" pressure pipe and ½” hose mounting as the vibration dumper 1½” suction hose... -
Page 25: Oil Tank Installation
Oil tank installation The XR-unit is generally provided with a oil tank to be mounted on the front of the unit, either on the top of the sub frame or on its side. A tank mounted on the top of the sub- frame is normally installed at the factory. -
Page 26: Hydraulic Oil
If unit has to work at very high or low tem- Under specific circumstances the pump peratures, special attention must be paid to may be applied with an adapter between the oil grade used. Check the grade require- pump and PTO. A constraint, however, is ments with the oil supplier. -
Page 27: Control System
CONTROL SYSTEM Installation of control unit Choose a suitable location for the control unit in the vehicle’s cabin. A suitable place is one where the operator can reach the con- trols and see the signal lights easily from driver’s seat without straining and at the same time check the unit’s movements through rear windows or mirrors. - Page 28 Do not remove the connector from the Connect the power supply according to cable or shorten the cable. the vehicle manufacturer’s instructions. Drill a hole 1.38" (35 mm) in the cab floor, Install the wiring in such a way that it is impossible for them to be jammed or bend.
-
Page 29: Electric System (Basic)
Electric system (Basic) -
Page 30: Electric System (Basic Plus)
Electric system (Basic Plus) -
Page 31: Testing The Unit
TESTING THE UNIT All operations should be tested several times Safety precautions when testing the without load. Most of the air can be vented hooklift system from the system by driving the rams fully in and out 4 or 5 times, for about 5 seconds. High pressure oil leaks can be life threatening, particularly direct sprays of oil. -
Page 32: Finishing
Take the following safety precautions before FINISHING operating with a test load: 1. Ensure that tip and body locks cannot be Cleaning vehicle combination opened during tipping (front of unit raised about 1.5 ft) • Protect electrical– and moving parts 2. -
Page 33: Training
DO NOT FORGET TO TRAIN THE OPERATOR! Stress the need to observe safety rules during operation. Make sure, that the operator receives a Multilift instruction manual when unit handed over, encourage him to study its contents before using the unit.
Need help?
Do you have a question about the Hooklift XR S Series and is the answer not in the manual?
Questions and answers