Advertisement
(A)
LEFT SIDE PANEL
(B)
RIGHT SIDE PANEL
(C)
CROSS BRACE
(D)
DOWELS (8)
(E)
DOOR
(F)
BASE
(G)
BACK
(H)
CAM-BOLTS (8)
(I)
CAM-LOCKS (8)
(J)
COVERS (8)
Q
R
ATTENTION: SOME NUMBERED PARTS LISTED ON THE INSTRUCTION SHEET MAY NOT BE IN PARTS BAG AS THEY MAY ALREADY BE ASSEMBLED. CAREFULLY CHECK PARTS
AND PACKING MATERIALS PRIOR TO ORDERING REPLACEMENTS.
IMPORTANT NOTE: Follow instructions listed below in the proper sequence as numbered to assure fast, easy and correct
assembly.
1.
Note: Upon opening, thoroughly clean all wood surfaces with furniture polish to remove dust and dirt that may have
settled onto finish during shipment.
2.
Insert Dowels (D) into ends of Cross Brace (C). Tighten Small Wood Screws (R) through Magnetic Latch (S) into Cross
Brace (C). Insert Dowels (D) extending from Cross Brace (C) into corresponding holes near top edge of Left and Right
Side Panels (A,B). Groove on Side Panels (A,B) should face inward. Door stop on Cross Brace (C) should face
downward. (See ill. #1)
3.
Insert Large Wood Screws (Q) through loops in Basket (N) and tighten into corresponding holes on inside of Door (E).
(See ill. #2)
4.
Tighten Cam-bolts (H) into threaded holes in Base (F). Insert Dowels (D) into remaining holes in Base (F). Insert Cam-
locks (I) into large holes near bottom edge of Side Panels (A,B). Rotate Cam-locks (I) with a screwdriver so arrow
points toward Cam-bolts (H). Note: Be sure that slot for screwdriver faces outward. (See ill. #3 & #4)
5.
Insert long end of Hinge Pins (M) into top and bottom corners of Door (E). Align holes on bottom edge of Side Panels
(A,B) with Cam-bolts (H) extending from Base (F) and insert Cam-bolts (H) into holes in bottom edge of Side Panels
(A,B). Lift Right Side Panel (B) slightly to allow insertion of Hinge Pin (M)
extending from bottom corner of Door (E) into hole in Base (F). Align hole
in Cross Brace (C) with Hinge pin (M) extending from top corner of Door
(E) and push Right Side Panel (B) and Cross Brace (C) downward until
Right Side Panel (B) rests on Base (F). Rotate Cam-locks (I) clockwise to
secure Side Panels (A,B) to Base (F). Push Covers (J) into Cam-locks (I).
(See ill. #3)
#1
PARTS
(K)
KNOBS (2)
(L)
MACHINE SCREW
(M) HINGE PINS (2)
(N)
BASKET
(O)
TRAY
(P)
TOP
(Q)
LARGE WOOD SCREWS (4)
(R)
SMALL WOOD SCREWS (2)
(S)
MAGNETIC LATCH
HARDWARE ILLUSTRATION
L
M
D
Tools required: Screwdriver (not included)
ASSEMBLY INSTRUCTIONS (ZH)
MODEL NO. 843
Made in China
Thank you for purchasing this quality product. Be sure to check all
packing material carefully for small parts which may have come
loose inside the carton during shipment. Separate, identify, and
count all parts and metal hardware. Compare with parts list to be
sure all parts are present. If any part(s) are missing or damaged,
phone, fax, or mail to our Customer Service Department. For
efficient and speedy service, please indicate the model number and
code letter of part(s) needed.
H
I
#2
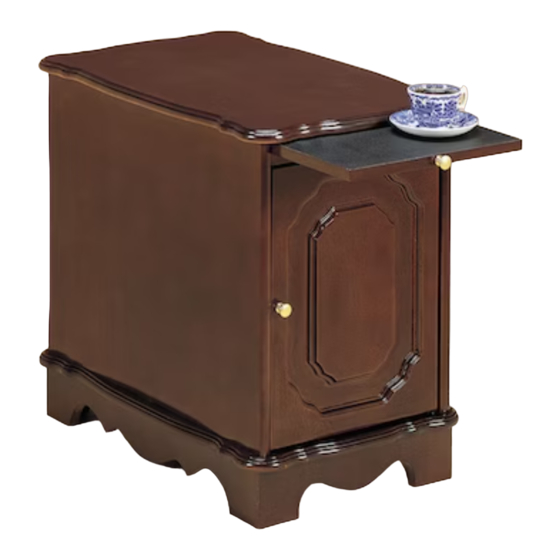
"NOSTALGIC OAK"
844
"HEIRLOOM CHERRY"
J
S
Advertisement
Table of Contents

Related Manuals for Powell 843


Summary of Contents for Powell 843
- Page 1 ASSEMBLY INSTRUCTIONS (ZH) MODEL NO. 843 "NOSTALGIC OAK" Made in China "HEIRLOOM CHERRY" PARTS Thank you for purchasing this quality product. Be sure to check all LEFT SIDE PANEL KNOBS (2) packing material carefully for small parts which may have come...
- Page 2 Have your model number and part code letter handy. Name Address Part Letter Description Quantity Daytime Phone ( Reason for Replacement Place of Purchase Powell Service Department • P.O. Box 1408, Culver City, CA 90232-1408 Made in China Rev. 06/02/03...
Need help?
Do you have a question about the 843 and is the answer not in the manual?
Questions and answers