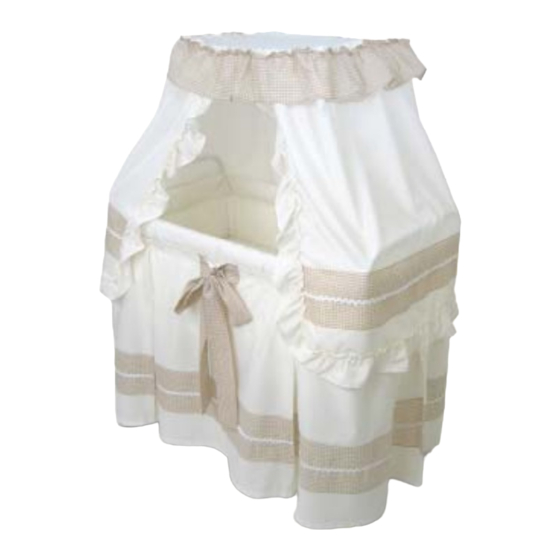
Advertisement
Quick Links
MODEL #'s:
NAME:
TOOLS NEEDED: Phillips Screwdriver, Hammer
* Power screwdriver is helpful but keep the torque setting low so you don't strip the screws or damage the bassinet
PARTS INCLUDED:
(B) 2 - Metal Side Frames/Legs
(C) 1 - Bottom Back Rail (5 holes)
(D) 1 - Bottom Front Rail (4 holes)
(F) 1 - Top Back Rail (3 holes)*
(G) 1 - Top Front Rail (2 holes)*
(H) 1 - Bottom Platform Board
(J) 1 - Canopy Pole
(K) 1- Canopy Frame
(L) 4 - Wheels
(M) 1 - Mattress Pad (not shown)
* The top rails are already inserted into
the pockets on the Bumper/Liner (E)
I
A
Diagrams not to scale.
ASSEMBLY:
Ensure that all the parts and
hardware listed above are
included. If anything is
missing, please do not return
the product to the store. Call
or e-mail us for assistance.
Page 1 of 4
763 Ecru/Beige Gingham & 764 White/Sage Gingham
Keep Your Baby Close Bassinet
B
Q
R
BEFORE
YOU
BEGIN
(Monday through Thursday 7:30 AM to 4:30 PM CST), cs@badgerbasket.com
PLANT AND GENERAL OFFICE: PO Box 227, Edgar, WI 54426-0227
CORPORATE OFFICE: 111 Lions Dr., Suite 220, Barrington, IL 60010
Save these instructions for future use
HARDWARE INCLUDED:
(A) 8 - 2" Wood Screws
(I) 4 - 1¾" Bolts
(Q) 2 - 1¼" Bolts
(R) 6 - T-Nuts
(S) 6 - Washers (not shown)
BEDDING INCLUDED:
(E) 1 - Bumper/Liner
(N) 1 - Skirt
(O) 1 - Sheet
(P) 1 - Canopy
Bedding can be machine washed & ironed before assembly if desired.
N
L
O
K
Visit us online at www.badgerbasket.com
Toll-Free Customer Service: 1-800-236-1310
Phone: 715-352-2311 Fax: 715-352-3163
ASSEMBLY
INSTRUCTIONS
Adult Assembly Required
C,D,F,G
J
E
H
P
1.0/0205
Advertisement

Summary of Contents for Badger Basket 763
- Page 1 INSTRUCTIONS Adult Assembly Required Save these instructions for future use MODEL #’s: 763 Ecru/Beige Gingham & 764 White/Sage Gingham NAME: Keep Your Baby Close Bassinet TOOLS NEEDED: Phillips Screwdriver, Hammer * Power screwdriver is helpful but keep the torque setting low so you don’t strip the screws or damage the bassinet...
- Page 2 PICTURE 1A: STEP 1: See PICTURES 1A and 1B. Side view close-up Using FOUR 2” SCREWS (A), attach the BOT- of the dimple on TOM BACK RAIL (C) and BOTTOM FRONT RAIL the metal tube for (D) to the TWO SIDE FRAMES (B). screw head.
- Page 3 STEP 4: See PICTURE 4. PICTURE 3B - Attach the CANOPY POLE (J) to the TOP and Outside View BOTTOM BACK RAILS (C, F) using TWO 1¼” BOLTS (Q), TWO WASHERS (S) and TWO T-NUTS (R). The canopy pole has dimples for the bolt heads. Push the bolts through the pre-drilled holes on the metal pole and screw into T-NUTS (R) inserted into the holes on the inside faces of the rails.
- Page 4 PICTURE 7 PICTURE 6 PICTURE 7 M, O FOR YOUR CHILD’S SAFETY TO PREVENT SERIOUS INJURY OR DEATH: Do not use the bassinet if Baby is older than 3-4 months of age, weighs more than 20 lbs. (9.09 kg), PICTURE 8 or if Baby can push up, roll over, or crawl.
